Table of Contents
Ready to elevate your nail game with a touch of warmth and sparkle? Look no further than brown glitter nail designs. This trend is taking over, offering a sophisticated yet playful twist on classic manicures. Whether you're drawn to the cozy vibes of autumn or simply love a unique, eye-catching look, brown glitter nails are incredibly versatile. In this guide, we'll dive deep into the world of brown glitter nails, exploring why they're so popular and showcasing a range of stunning design ideas you can recreate yourself. We'll cover everything from selecting the perfect shades of brown and glitter to mastering application techniques for a flawless finish. Get ready to discover how to achieve salon-worthy results from the comfort of your own home. Plus, we'll share essential tips on maintaining your dazzling manicure, ensuring your brown glitter nails stay gorgeous for longer. So, grab your favorite polishes and let's get started on this sparkly adventure!
Why Brown Glitter Nails Are the Perfect Choice
Why Brown Glitter Nails Are the Perfect Choice
A Touch of Sophistication
Let's be real, finding nail designs that are both elegant and a little bit edgy can be a challenge. That’s where brown glitter nails come in. Brown, in its many shades, offers a grounded, sophisticated base. Then, you add glitter? Boom! Instant glam. It's a combo that works for everything from a casual coffee date to a fancy evening out. Think of it as the "little black dress" of nail designs – always appropriate, always stylish.
Brown glitter nails also sidestep the often-overdone reds and pinks, giving you a unique look that still feels classic. It's a subtle rebellion against the norm, a way to express your individuality without screaming for attention. Plus, the warmth of brown tones complements a wide range of skin tones, making it a universally flattering choice.
Versatility for Every Season
One of the best things about brown glitter nails is their year-round appeal. While they're especially perfect for autumn and winter with their cozy, earthy vibes, they can absolutely rock in spring and summer too. A light, shimmery bronze glitter on a nude-brown base screams sunshine and warmth, while a deep chocolate brown with holographic glitter is perfect for those colder months.
Consider the versatility of brown itself. From light beige-browns to dark, almost-black browns, the spectrum is huge. This means you can tailor your brown glitter nail design to perfectly match the season, your outfit, or just your mood. Feeling bold? Go for a rich, dark espresso with chunky gold glitter. Want something more subtle? A sheer tan-brown with fine silver glitter is your go-to.
Endless Design Possibilities
Seriously, the possibilities are endless. Solid brown with a glitter topcoat is a classic, but that's just the beginning. You can experiment with ombre effects, glitter gradients, geometric patterns, or even incorporate other colors like gold, bronze, or even a pop of teal for a surprising twist. The glitter itself comes in a variety of forms – chunky, fine, holographic, iridescent – each offering a unique texture and shine.
Moreover, brown glitter nails are a fantastic canvas for nail art. Add delicate floral designs, subtle accents with rhinestones, or even try your hand at creating a tortoiseshell effect with brown and gold glitter. Don't be afraid to get creative and personalize your manicure to reflect your individual style. After all, your nails are a mini work of art, so have fun with it!
Design Element | Possible Variations |
|---|---|
Base Color | Light tan-brown, Rich chocolate, Nude-brown, Espresso brown |
Glitter Type | Fine glitter, Chunky glitter, Holographic glitter, Iridescent glitter |
Design Style | Ombre, Gradient, Geometric, Accents |
Trendy Brown Glitter Nail Design Ideas to Copy Now
Trendy Brown Glitter Nail Design Ideas to Copy Now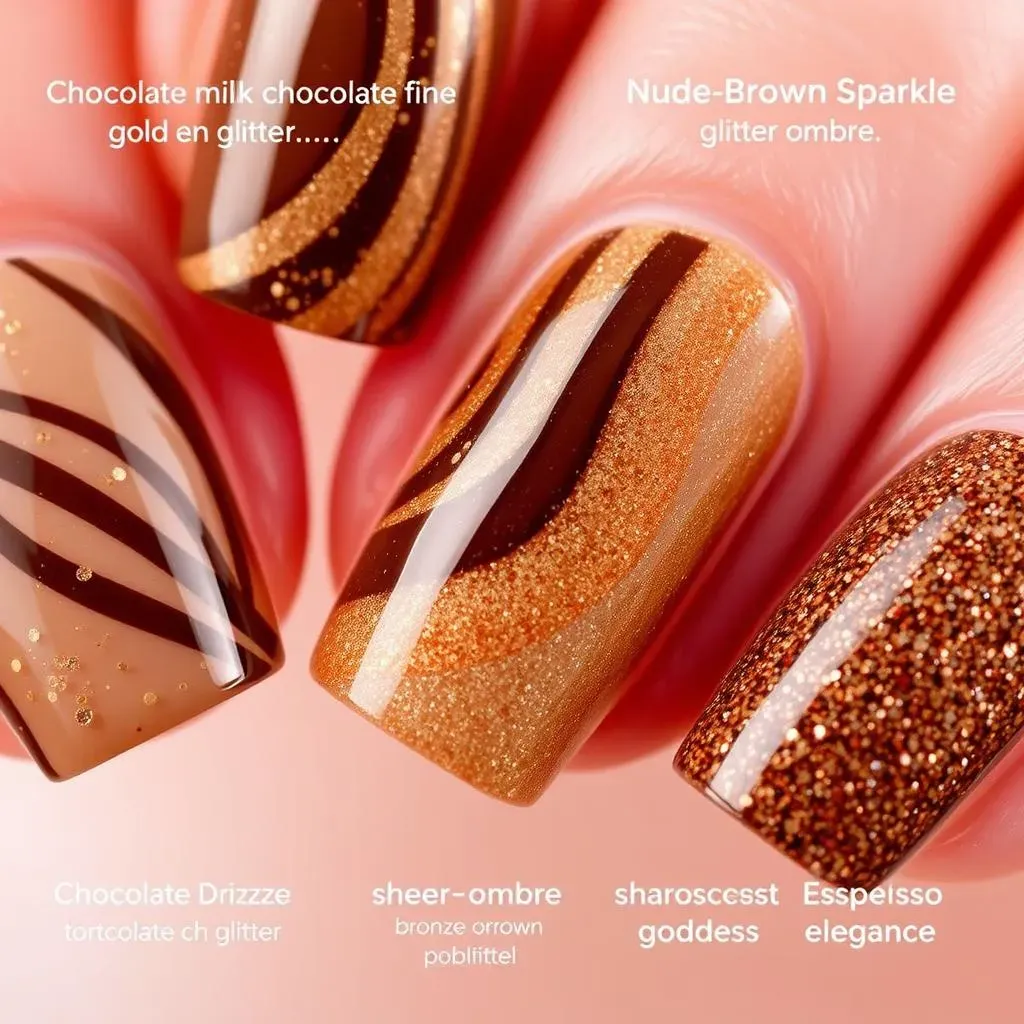
Alright, let's dive into the fun part: actual design ideas! If you're itching to try brown glitter nail designs, you've come to the right place. First up, we have the "Chocolate Drizzle." Picture this: a creamy, milk chocolate base with a cascade of fine gold glitter drizzled diagonally across each nail. It’s decadent, it’s delicious, and it's surprisingly easy to achieve. Then there's the "Tortoiseshell Twist," which blends various shades of brown, amber, and gold glitter to mimic the classic tortoiseshell pattern. It’s a bit more advanced but totally worth the effort for that high-end look. And for those who love a minimalist vibe, the "Nude-Brown Sparkle" is your go-to. A sheer, nude-brown base with a subtle dusting of iridescent glitter creates an understated yet captivating effect.
Don't forget the power of accents! A single nail with a full glitter application, while the rest sport a solid brown, can make a statement. Or, try geometric designs using striping tape and different shades of brown and glitter polishes. The key is to experiment and find what resonates with your personal style. Whether you're aiming for subtle sophistication or bold glamour, there's a brown glitter nail design out there for you.
Some ideas to inspire you:
- Chocolate Ombre: Dark chocolate at the base, fading into a lighter brown with gold glitter at the tips.
- Bronze Goddess: A shimmery bronze-brown base with chunky gold glitter accents.
- Espresso Elegance: Deep espresso brown with holographic silver glitter for a touch of mystery.
- Caramel Swirl: A creamy caramel brown base with swirling patterns of gold glitter.
- Woodland Wonder: Matte brown base with leaf-shaped gold glitter accents for an earthy vibe.
How to Achieve the Perfect Brown Glitter Nail Look at Home
How to Achieve the Perfect Brown Glitter Nail Look at Home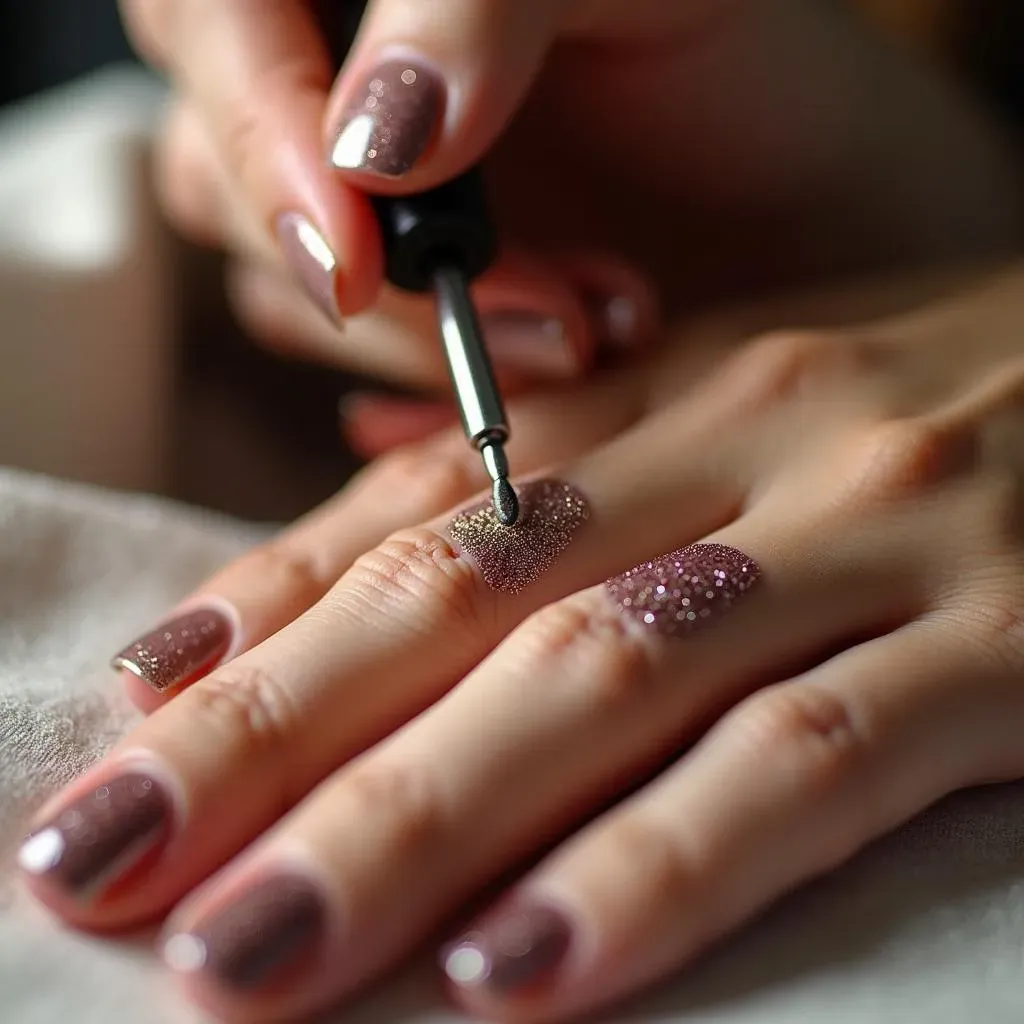
Prep Like a Pro
Before you even think about polish, nail prep is key. I cannot stress this enough! Start by removing any old polish and shaping your nails to your desired form. Whether you're into square, oval, or almond shapes, make sure they're all uniform. Then, gently push back your cuticles using a cuticle pusher. Don't cut them unless you really know what you're doing – you risk infection. Next, lightly buff the surface of your nails to create a smooth canvas for the polish to adhere to. Finally, cleanse your nails with rubbing alcohol to remove any oils or residue. Trust me, this step makes a world of difference in how long your manicure lasts.
Think of it like prepping a wall before painting. You wouldn't just slap paint on a dirty, uneven surface, would you? The same principle applies to your nails. A well-prepped nail bed ensures that your polish goes on smoothly, adheres properly, and lasts longer without chipping or peeling. Plus, it gives your nails a healthier, more polished look overall.
Mastering the Application
now for the fun part: applying the polish! Start with a thin base coat – this protects your nails and helps the color adhere better. Let it dry completely before moving on to your brown polish. Apply two thin, even coats, allowing each coat to dry before applying the next. Patience is crucial here! Thick coats are more likely to bubble and take forever to dry. Once your brown polish is completely dry, it's time for the glitter. If you're using a glitter topcoat, apply one or two thin layers, depending on the desired level of sparkle. For loose glitter, apply a thin layer of clear polish and then gently sprinkle the glitter onto your nail. Use a small brush to pat it down and remove any excess. Seal everything with a topcoat for a smooth, glossy finish.
Want to avoid those annoying air bubbles? Roll the polish bottle between your palms instead of shaking it. Shaking creates air bubbles that can transfer to your nails during application. Also, make sure to clean the neck of the polish bottle regularly to prevent it from getting gloopy and making it difficult to apply the polish smoothly.
Clean Up and Care
Even the steadiest hands can make mistakes, so don't worry if you get polish on your skin. Dip a small brush or cotton swab in nail polish remover and carefully clean up any smudges or spills. Once your manicure is complete, apply cuticle oil to keep your nails and cuticles hydrated. This helps prevent them from drying out and cracking. Reapply cuticle oil daily to maintain healthy, happy nails. And of course, avoid using your nails as tools! Opening packages or scraping things can damage your manicure and cause it to chip or break.
To extend the life of your brown glitter nail designs, reapply topcoat every other day. This helps protect the polish from chipping and keeps the glitter sparkling. Also, consider wearing gloves when doing household chores like washing dishes or gardening. Harsh chemicals and prolonged exposure to water can weaken your nails and damage your manicure.
Step | Description | Why It Matters |
|---|---|---|
Clean Up | Remove smudges with a brush and remover. | Ensures a professional, polished look. |
Cuticle Oil | Apply daily to hydrate nails and cuticles. | Prevents dryness and cracking, promoting healthy nails. |
Reapply Topcoat | Every other day to protect the manicure. | Extends the life of the design and keeps glitter sparkling. |
Wear Gloves | Protect nails during chores. | Shields nails from harsh chemicals and water damage. |
Choosing the Right Brown and Glitter for Your Nail Design
Choosing the Right Brown and Glitter for Your Nail Design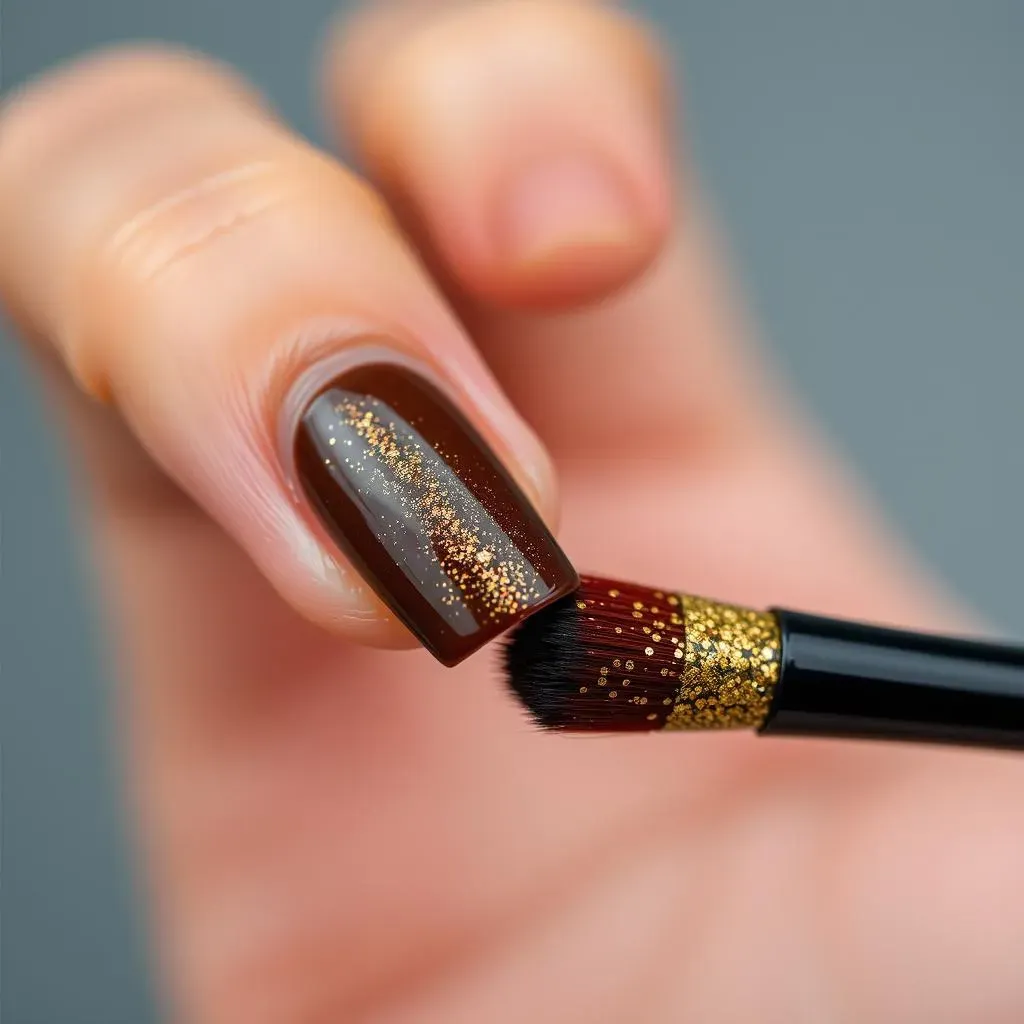
Understanding Brown Undertones
Brown might seem like a simple color, but it's surprisingly complex. It comes in a wide range of undertones, from warm and reddish to cool and ashy. Understanding these undertones is crucial for selecting a brown that complements your skin tone. Warm browns tend to look best on those with warm undertones in their skin, while cool browns flatter those with cooler undertones. Not sure what your undertone is? A simple trick is to look at the veins on your wrist. If they appear green, you likely have warm undertones. If they appear blue, you probably have cool undertones. If you can't tell, you might have neutral undertones, which means you can rock pretty much any shade of brown!
Once you've determined your undertone, you can start experimenting with different shades of brown. For warm undertones, think caramel, chocolate, and reddish-browns. For cool undertones, consider taupe, mushroom, and ashy browns. And for neutral undertones, the world is your oyster! You can play around with any shade of brown you like. Don't be afraid to swatch different colors on your skin to see how they look before committing to a full manicure.
Selecting the Perfect Glitter
Glitter isn't just glitter, trust me! It comes in a dazzling array of sizes, shapes, colors, and finishes. Fine glitter creates a subtle, shimmery effect, while chunky glitter makes a bold, statement. Holographic glitter reflects light in a rainbow of colors, while iridescent glitter shifts colors depending on the angle. The key is to choose a glitter that complements the brown base color and matches the overall vibe you're going for. For a sophisticated look, opt for fine gold or silver glitter on a classic brown base. For something more playful, try chunky holographic glitter on a dark chocolate brown. And for a truly unique look, experiment with mixing different types of glitter together.
Think about the occasion, too. A subtle shimmer might be perfect for work, while a bold glitter explosion is ideal for a night out. Also, consider the application method. Loose glitter can be a bit messy, so it's best suited for those with some nail art experience. Glitter topcoats are much easier to use and are a great option for beginners. No matter what type of glitter you choose, make sure it's specifically designed for use on nails to avoid any potential irritation or damage.
- Fine Glitter: Subtle shimmer, great for everyday wear.
- Chunky Glitter: Bold statement, perfect for parties.
- Holographic Glitter: Reflects rainbow colors, adds a fun twist.
- Iridescent Glitter: Shifts colors, creates a unique effect.
Complementary Color Combinations
While brown and glitter are a match made in heaven, don't be afraid to incorporate other colors into your nail design. Gold and bronze are natural choices that enhance the warmth of brown, while silver and champagne add a touch of cool elegance. For a more unexpected twist, try pairing brown with jewel tones like emerald green, sapphire blue, or amethyst purple. These colors create a striking contrast that's sure to turn heads. You can also experiment with negative space designs, using brown and glitter to create geometric patterns or abstract art on a bare nail base.
When choosing complementary colors, consider the overall aesthetic you're trying to achieve. Warm colors create a cozy, inviting vibe, while cool colors evoke a sense of sophistication and mystery. Neutral colors like beige, cream, and gray can be used to balance out bolder shades and create a harmonious look. Ultimately, the best color combinations are the ones that make you feel confident and beautiful. So, don't be afraid to break the rules and experiment until you find what works for you!
Color Combination | Vibe | Best Occasion |
|---|---|---|
Brown & Gold | Warm & Luxurious | Evening Events |
Brown & Silver | Cool & Elegant | Work or Formal Occasions |
Brown & Emerald Green | Striking & Unique | Parties or Special Events |
Maintaining and Caring for Your Brown Glitter Nail Designs
Maintaining and Caring for Your Brown Glitter Nail Designs
Protect Your Polish
Alright, you've got your killer brown glitter nail designs, now how do you keep them looking fresh? Think of your manicure like a delicate piece of art – it needs protection! First, gloves are your best friend. Seriously, whether you're washing dishes, gardening, or tackling any kind of housework, those chemicals and constant water exposure are brutal on your nails. Invest in a good pair of gloves and make it a habit to wear them. Also, avoid using your nails as tools. I know it's tempting to scrape off that sticker with your nail, but resist! You'll thank yourself later.
Another key tip: reapply topcoat every other day. This seals in the glitter and prevents chipping. It's like giving your nails a little shield to protect them from the elements. Plus, a fresh coat of topcoat adds extra shine, making your manicure look even more dazzling. And if you notice any small chips, address them immediately. A tiny chip can quickly turn into a major crack, so dab on a bit of polish and topcoat to prevent further damage.
Hydration is Key
Dry, brittle nails are no match for a gorgeous manicure. Keep your nails and cuticles hydrated by applying cuticle oil daily. This nourishes the nail bed and promotes healthy growth. You can find cuticle oil at most drugstores or beauty supply stores, or you can even make your own by mixing a few drops of jojoba oil, almond oil, and vitamin E oil. Massage the oil into your cuticles and nails before bed to allow it to soak in overnight. And don't forget to drink plenty of water! Hydration starts from within, so make sure you're getting enough fluids to keep your nails strong and healthy.
Also, avoid using harsh nail polish removers that contain acetone. Acetone can dry out your nails and make them more prone to breakage. Opt for an acetone-free remover instead, and always follow up with cuticle oil to replenish any lost moisture. Remember, healthy nails are the foundation for a beautiful manicure, so take care of them!
Gentle Removal
When it's time to say goodbye to your brown glitter nail designs, resist the urge to peel them off! Peeling off polish can damage your nails and weaken them over time. Instead, use a gentle nail polish remover and soak a cotton ball in the remover. Place the cotton ball on your nail and hold it there for a few seconds to allow the remover to penetrate the polish. Then, gently wipe the polish away. For stubborn glitter, you can try the foil method. Soak a cotton ball in remover, place it on your nail, and wrap it in foil. Let it sit for a few minutes, then remove the foil and wipe away the polish. This helps loosen the glitter and makes it easier to remove.
After removing your polish, give your nails a break before applying a new manicure. This allows them to recover and rehydrate. You can apply a nail strengthener or a clear coat of polish to protect them during this time. And remember, consistency is key! By following these simple tips, you can keep your brown glitter nail designs looking fabulous and your nails healthy and strong.
Care Tip | Description | Why It's Important |
|---|---|---|
Wear Gloves | Protect nails during household chores. | Prevents damage from chemicals and water. |
Reapply Topcoat | Every other day to seal and protect. | Extends manicure life and adds shine. |
Apply Cuticle Oil | Daily to hydrate nails and cuticles. | Promotes healthy nail growth and prevents dryness. |
Gentle Removal | Avoid peeling; use acetone-free remover. | Prevents nail damage and breakage. |
Conclusion: Embrace the Sparkle with Brown Glitter Nail Designs
From subtle shimmer to bold, dazzling statements, brown glitter nail designs offer endless possibilities for expressing your personal style. We've explored various techniques, color combinations, and maintenance tips to help you achieve the perfect manicure. Whether you're a DIY enthusiast or prefer visiting a salon, the key is to experiment and find what works best for you. So go ahead, embrace the warmth and sparkle of brown glitter nails, and let your fingertips shine!