Table of Contents
Ever looked at those amazing nail art designs and thought, "I wish I could do that"? Well, guess what? You totally can! We're diving into the super fun world of cute simple flower nail designs, and trust me, it's way easier than it looks. Forget complicated tools and hours of frustration; we're all about keeping it simple, sweet, and totally doable, even if you're a complete beginner. This isn't about becoming a pro overnight, but about having some fun and adding a little floral flair to your fingertips. In this article, we'll start with the basics, showing you some super easy designs that anyone can pull off. We'll move on to step-by-step tutorials to guide you through the process of creating your own cute floral masterpieces. Finally, we'll share some essential tips to make your designs last longer. So, grab your favorite nail polish colors, and let's get blooming!
Easy Peasy Flower Power: Simple Designs for Beginners
Easy Peasy Flower Power: Simple Designs for Beginners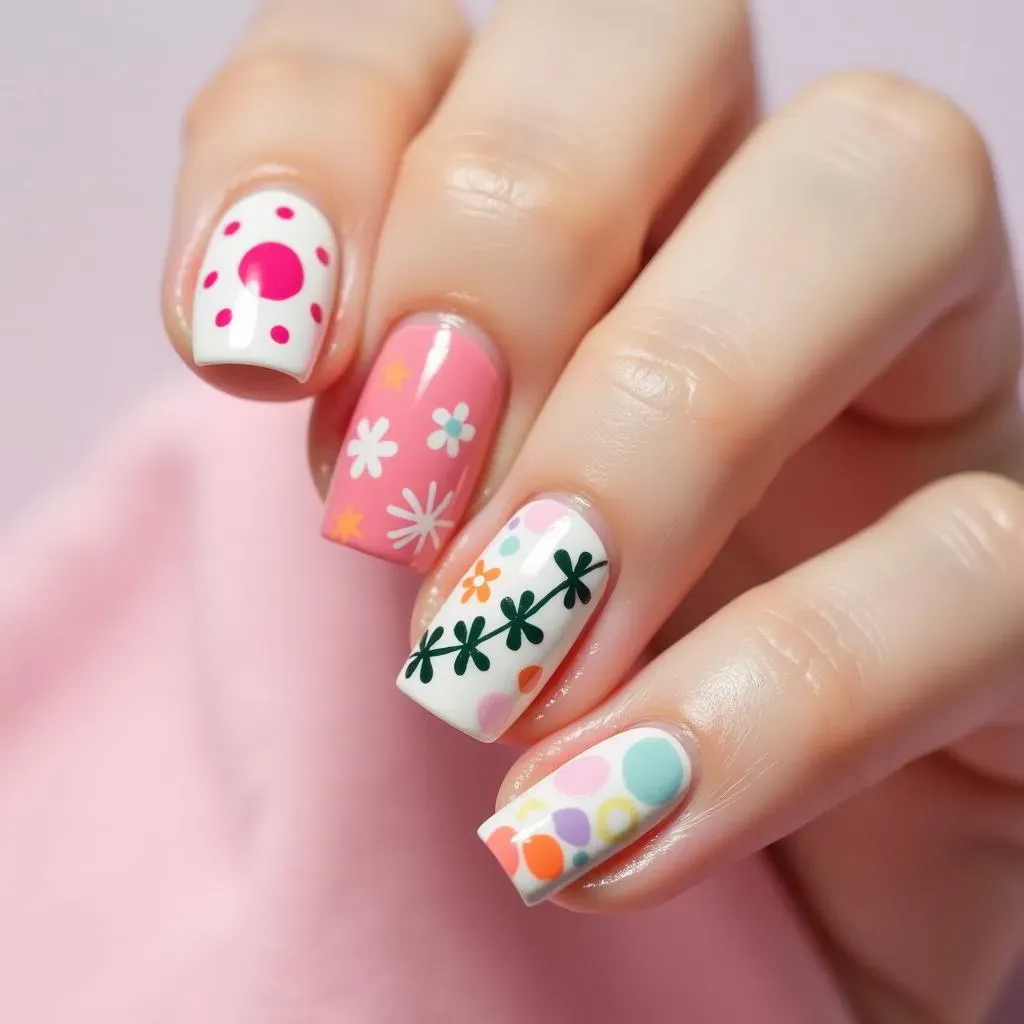
Dot Flowers: The Easiest Start
so you're thinking about flower nails, right? But maybe you're picturing some super complicated art that you're just not ready for. Forget that! We're starting with dots. Yes, dots! Grab a toothpick or a dotting tool (if you have one, no worries if not!), and your favorite nail polish colors. Just make a few dots in a circle, add a different color dot in the middle, and boom – you've got a flower. It's like magic, but way easier. Seriously, even if you’re all thumbs, you can do this. It's the perfect way to dip your toes into nail art without feeling overwhelmed.
I remember the first time I tried dot flowers, I was so surprised at how good they looked. I was expecting a total mess, but it was actually kind of cute. I used a bright pink base coat and then did white and yellow dots for the petals and center. It was so simple and yet so effective. That's the beauty of this method; it's foolproof!
Daisy Chains: Connecting the Dots
Now that you've mastered the dot flowers, let's connect them. Instead of just a single flower, imagine a cute little daisy chain across your nail. You can use the same dotting technique, but this time, make your flowers slightly smaller and place them in a line. It's like creating a tiny flower garden on each of your nails. You can even add a little green dot for a leaf here and there if you’re feeling fancy. It’s a simple step up from single dots, but it makes a big difference in how it looks.
Design | Difficulty | Tools |
|---|---|---|
Dot Flowers | Super Easy | Toothpick or dotting tool |
Daisy Chains | Easy | Toothpick or dotting tool |
Abstract Petals: Embrace the Imperfection
Alright, let's get a little more free-spirited. Forget the perfect circles and dots. Grab a thin nail art brush (or again, use your toothpick) and just make some short strokes outward from a central point. You're not trying to make perfect petals. Instead, you are going for a more abstract, artistic vibe. Think of it as painting a flower, not drawing one. It’s all about letting go of the need for perfection and having fun with the colors and shapes. The best part? No two flowers will ever look the same!
One time, I was in a hurry but I still wanted to put some flower on my nails, so I tried abstract petals, and they turned out pretty cool. It was a happy accident. It made me realize that sometimes the best designs are the ones you don't overthink. So, go for it, get a little messy, and see what you create!
Cute Flower Nail Designs: StepbyStep Tutorials
Cute Flower Nail Designs: StepbyStep Tutorials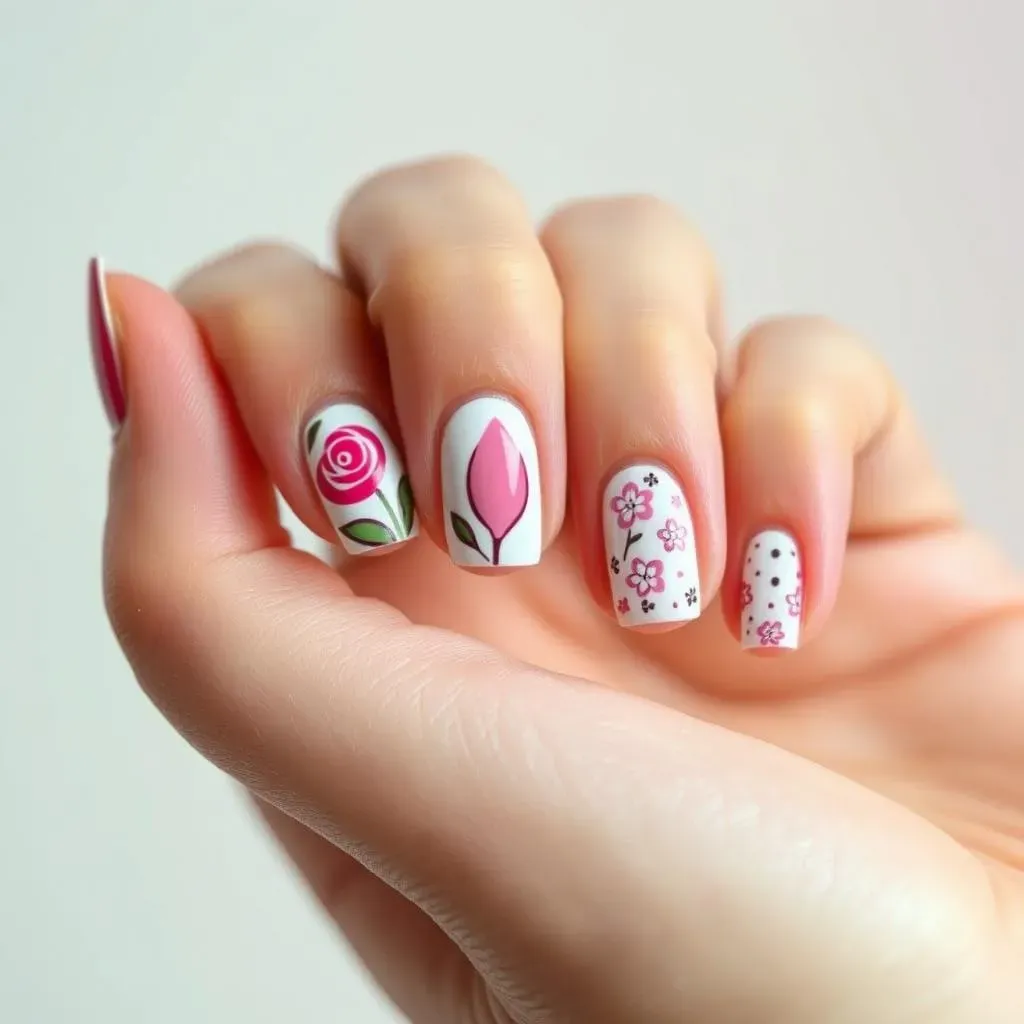
The Classic Rose: A Step-by-Step Guide
so you've got the basics down, now let's try something a bit more detailed. Don't worry, it's still totally doable! We're going to create a classic rose. Start with a base coat, and pick a color for your rose petals. Using a thin brush, make a small swirl in the center of your nail. Then, add curved strokes around the swirl, building up the petals one by one. It's like drawing a spiral and then adding little "C" shapes around it. Don't stress about making them perfect; roses aren't perfect in nature either. Add a green leaf or two for extra flair. It might take a few tries, but you'll get the hang of it.
I remember when I first tried the rose, it looked like a blob. But you know what? I kept practicing, and now I can whip out a pretty decent rose. The key is patience and not being afraid to experiment. You can also use different shades of the same color to give your rose some depth.
Tulip Time: Simple Lines and Shapes
Next up, let's try tulips! Tulips are all about simple lines and shapes, which makes them great for nail art. Start with a base coat, choose your tulip color, and with a thin brush, paint a "U" shape towards the top of your nail. Then, add a couple of curved lines to create the petals. Add a green line for the stem and a couple of leaves. That's it! It's way easier than it looks, and the result is super cute. Tulips are great because you can play with different colors and make a whole field of them on your nails.
Cherry Blossoms: Delicate and Dainty
Finally, let's add some delicate cherry blossoms. These are super cute and perfect for spring. Start with a light base coat, like a soft pink or white. Then, using a thin brush or a dotting tool, make tiny dots or short strokes in a branch-like pattern. Use a lighter pink for the petals, making them look like little clusters. You can add a brown line for the branch if you want. Cherry blossoms are all about being delicate and dainty, so don't overdo it.
I love cherry blossoms because they are so elegant, yet so simple to create. They always give me a feeling of spring, no matter the season. Plus, they look great on any nail length. You can also play around with different shades of pink and white to create a more textured look.
Design | Difficulty | Technique |
|---|---|---|
Classic Rose | Medium | Swirl and curved strokes |
Tulip | Easy | "U" shape and curved lines |
Cherry Blossoms | Easy | Dots and small strokes |
Keeping it Fresh: Tips for LongLasting Flower Nails
Keeping it Fresh: Tips for LongLasting Flower Nails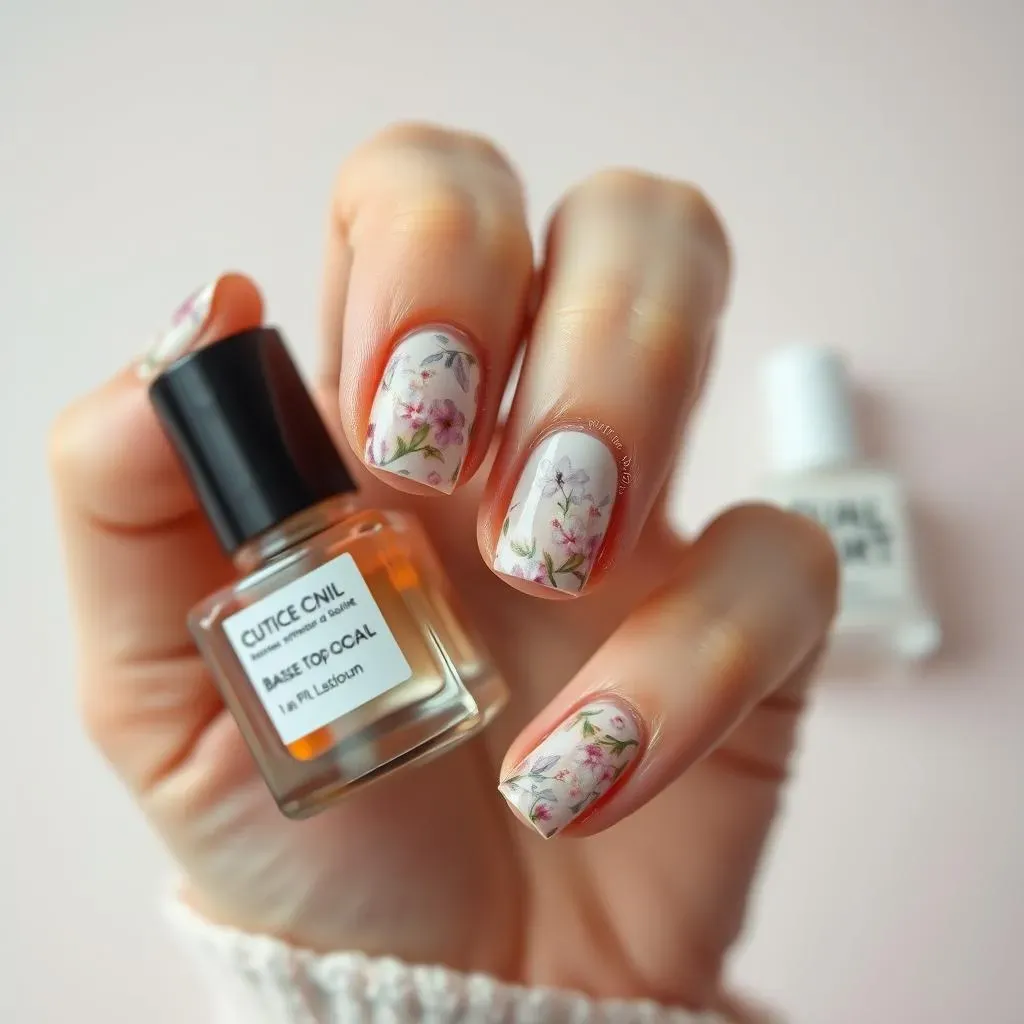
Base Coat is Your Best Friend
Alright, you've spent time creating your cute flower nail designs, and now you want them to last, right? The first secret weapon is a good base coat. Think of it as a primer for your nails. It creates a smooth surface for your polish to stick to, preventing chipping and peeling. It also protects your natural nails from staining, especially if you are using dark or highly pigmented polishes. It's like putting on sunscreen before going out in the sun; you wouldn't skip that step, would you?
I've learned this the hard way many times. I was so excited to try out a new color and didn't apply a base coat, and my nails chipped within a day. Now, I always make sure to start with a good quality base coat, and my manicures last so much longer. It might seem like an extra step, but trust me, it's worth it.
Top Coat Magic: Seal the Deal
Just as important as the base coat is the top coat. It's like the final layer of protection for your flower designs. A good top coat adds shine, prevents smudging, and seals in your nail art. Apply a generous coat over your entire design and let it dry completely. You can also reapply a top coat every couple of days to keep your manicure looking fresh and extend its lifespan. It's like putting a clear coat on a painting to protect it from the elements.
Handle with Care: Everyday Tips
Finally, let's talk about everyday care. Try to avoid using your nails as tools. I know it's tempting to use them to open packages or scrape things, but that's a surefire way to chip your polish. Wear gloves when doing dishes or cleaning. The chemicals in cleaning products can be harsh on your nails and your nail art. Also, keep your nails moisturized. Dry nails are more prone to breakage, so apply cuticle oil or hand cream regularly. These small changes can make a big difference in how long your cute flower nail designs last.
I always keep a small bottle of cuticle oil in my bag, and I use it whenever my hands feel dry. It might seem like a small thing, but it really helps keep my nails healthy and my manicures looking great for longer. It's all about being proactive and taking care of your nails.
Tip | Why It Works |
|---|---|
Base Coat | Creates a smooth surface and prevents staining |
Top Coat | Adds shine, prevents smudging, and seals in design |
Gentle Handling | Avoids chipping and breaking of the design |
Moisturize | Keeps nails healthy and less prone to breakage |
Wrap It Up: Your Blooming Nail Journey
So, there you have it! We've explored the wonderful world of cute simple flower nail designs, from the easiest of the easy to slightly more involved step-by-steps. Remember, the goal isn't perfection, it's about enjoying the process and adding a touch of your own personality to your nails. Whether you're rocking a single daisy or a whole garden on your fingertips, embrace the fun of it. With a little practice and a lot of creativity, you'll be amazed at what you can achieve. So, go ahead, grab those polishes, and let your nails blossom!