Table of Contents
Ever glanced at a field of wildflowers and wished you could capture that delicate beauty? Well, now you can, right on your fingertips! We're diving headfirst into the enchanting world of dry flower nail designs, where nature meets nail art. Forget the usual glitter and gems; we're talking real, pressed flowers transforming your nails into tiny, wearable gardens. This isn't just about slapping some petals on; it's about creating miniature masterpieces. This article will guide you through the process, from understanding why dried flowers are perfect for nail art to step-by-step instructions for making your own designs. We'll also explore a bunch of cool ideas to spark your creativity and make sure your floral nails stay looking fabulous. Get ready to unleash your inner artist and add a touch of botanical charm to your everyday style. Prepare to be inspired, get ready to learn, and let's make your nails bloom!
The Allure of Dried Flowers in Nail Art
The Allure of Dried Flowers in Nail Art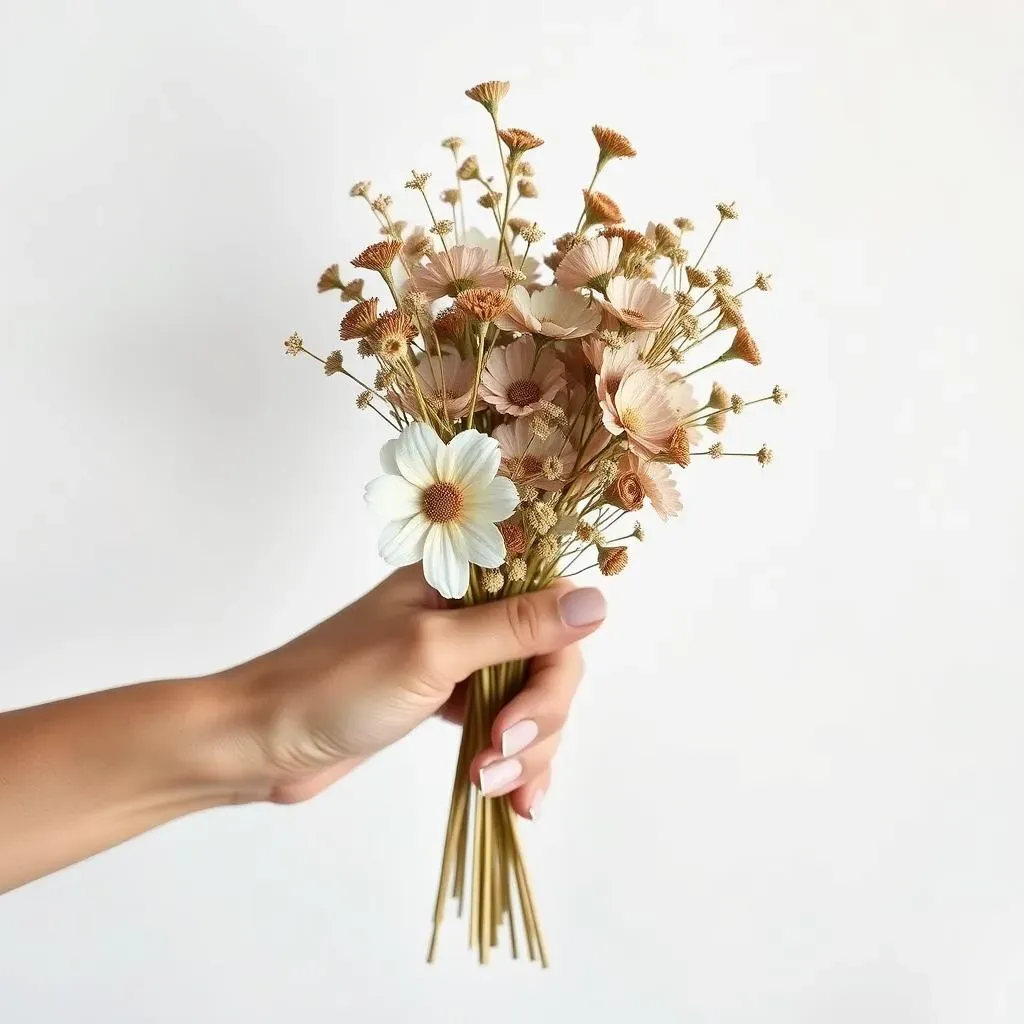
A Touch of Nature's Elegance
Let's be real, regular nail art can sometimes feel a bit...samey. You've seen the glitter, the geometric shapes, the endless swirls. But dried flowers? They bring a whole new level of sophistication and uniqueness. Each tiny petal, each delicate stem is a little piece of nature, perfectly preserved and ready to adorn your nails. It's like having a miniature, wearable bouquet at your fingertips. And the best part? No two flowers are ever exactly alike, meaning your nail art will be completely one-of-a-kind.
The texture they add is something else, too. It's not just a flat design; it's got depth and dimension. The slightly raised petals catch the light in a way that flat designs simply can't. It elevates your manicure from ordinary to extraordinary, making it a true conversation starter. People will be asking, "Where did you get that done?" and you can proudly say, "I created it myself!"
Why Dried Flowers Stand Out
What makes dried flowers so special in the nail art world? Well, for starters, they're incredibly versatile. You can use them whole for a bold, statement look, or break them down into tiny pieces for a more subtle, scattered effect. The color palette is amazing, from vibrant pinks and yellows to muted blues and purples. You're not limited to what you can find in a bottle of polish; you've got the whole spectrum of nature to play with.
Plus, dried flowers have a certain romantic charm. They evoke feelings of nostalgia and whimsy. It's like carrying a little bit of a fairy garden with you. They’re not just pretty; they tell a story. They whisper of sunny days, gentle breezes, and the quiet beauty of the natural world. It’s a far cry from the usual, harsh lines and artificial sparkle we often see, isn't it?
Here's a little something to ponder:
Feature | Dried Flowers | Typical Nail Art |
|---|---|---|
Uniqueness | Each piece is different | Often mass-produced designs |
Texture | Adds depth and dimension | Mostly flat |
Color | Wide range of natural hues | Limited by polish colors |
Charm | Romantic, whimsical, natural | Can be artificial, generic |
More Than Just Pretty Petals
Beyond the aesthetic appeal, using dried flowers in nail art is actually a pretty sustainable choice. Instead of synthetic materials, you're working with something that was once alive and beautiful. It's a way to bring a bit of nature's cycle into your beauty routine. Plus, it's a great way to use up those flowers from a special occasion or even the ones you've grown in your garden.
Also, let's be honest, it's just plain fun! There's a certain joy in arranging these tiny flowers on your nails, like you're creating a miniature landscape. It’s a relaxing and creative process that lets you express yourself in a unique way. It's a chance to slow down, get your hands dirty (well, maybe not too dirty), and make something beautiful and personal.
Creating Your Own Dry Flower Nail Designs
Creating Your Own Dry Flower Nail Designs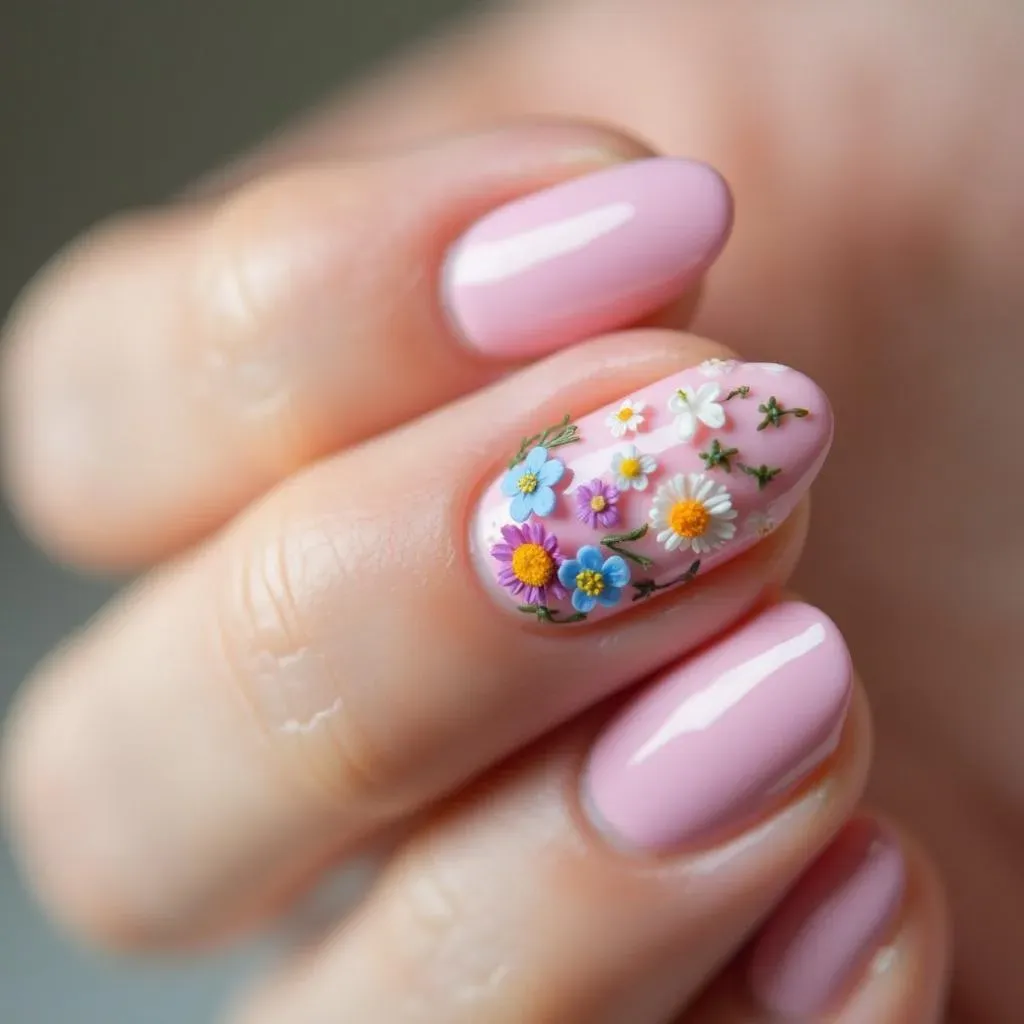
Gathering Your Supplies
Okay, so you're ready to dive into the world of DIY floral nails? Awesome! Before you get started, you'll need to gather a few essential supplies. First off, you'll need your dried flowers. You can buy these online or in craft stores, or even dry them yourself (more on that later!). It's best to choose flowers that are relatively flat and small, as they'll be easier to work with on your nails. Think tiny daisies, forget-me-nots, or even bits of fern. You'll also need a good base coat, your favorite nail polish colors, a clear top coat, and some tweezers or a dotting tool for precise placement. And don't forget a small dish to pour out any loose flowers!
Another thing you'll need is some patience. This isn't a process you can rush. It takes a bit of practice to get the hang of placing the flowers just right. But trust me, it's totally worth it. Think of it as a mini art project, where your nails are the canvas. And remember, there's no such thing as "perfect" when it comes to nature – embrace the slight variations and imperfections, that's part of the charm!
Step-by-Step Guide
Alright, let's get down to the nitty-gritty. First, start with a clean, prepped nail. Apply a thin layer of your base coat and let it dry completely. This helps protect your nails and gives the polish something to adhere to. Next, apply a coat of your chosen nail polish color. Now, while your polish is still slightly tacky, it’s time for the flowers! Using your tweezers or dotting tool, carefully pick up a dried flower or petal and gently place it on your nail. You can arrange them in any way you like – go for a single statement flower, a scattering of petals, or even a full floral design.
Once you are happy with the placement, let everything dry completely. Then, apply a generous layer of clear top coat. This seals in the flowers and gives your nails a smooth, glossy finish. You might need two coats of top coat to make sure the flowers are fully encapsulated. And there you have it – your very own, unique dry flower nail design! Don't be afraid to experiment with different flower types, colors, and arrangements. The possibilities are endless, and that's what makes it so fun!
Step | Action |
|---|---|
1 | Prep your nails with a base coat. |
2 | Apply your base color. |
3 | While tacky, place the dried flowers. |
4 | Let dry completely. |
5 | Apply 1-2 coats of clear top coat. |
Dry Flower Nail Design Ideas and Inspiration
Dry Flower Nail Design Ideas and Inspiration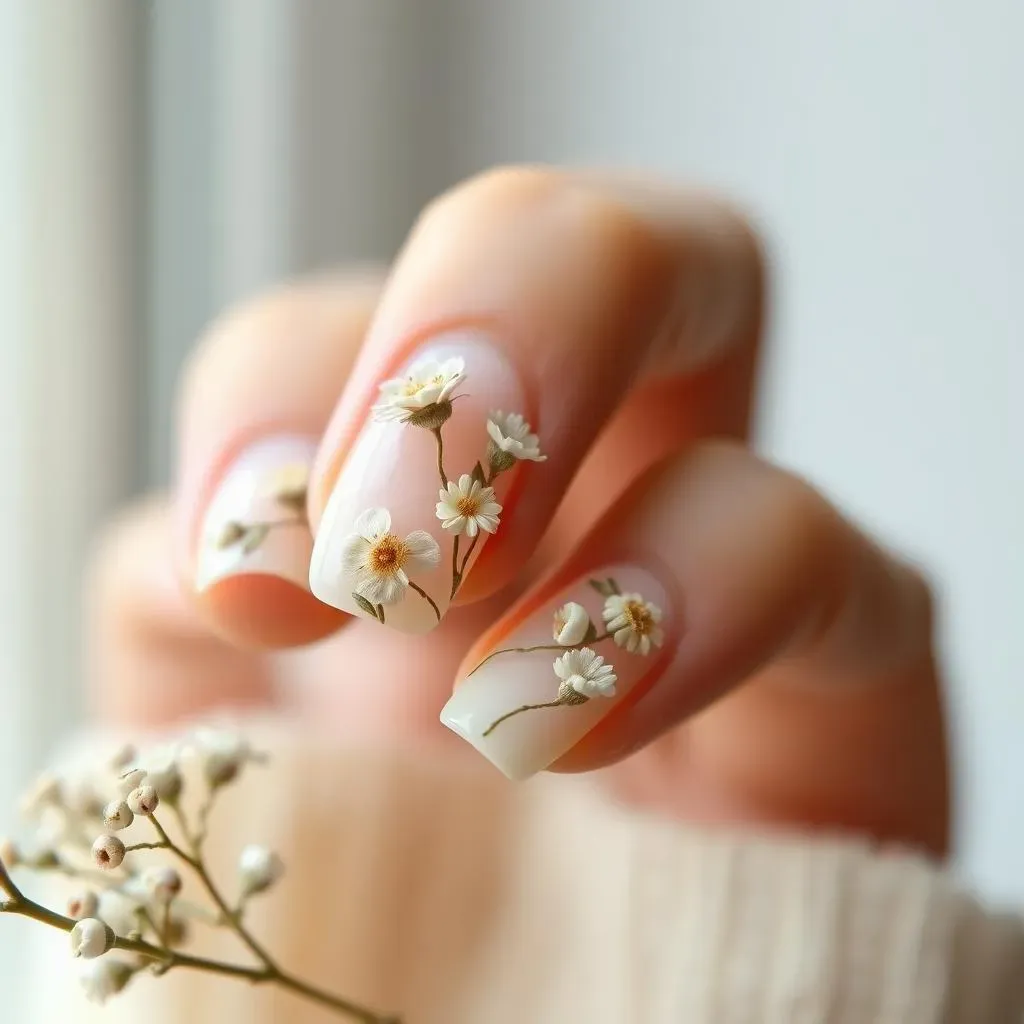
Embracing the Floral Spectrum
Alright, let's get into the fun part – the designs! When it comes to dry flower nail designs, the possibilities are as endless as a blooming garden. You can go for a minimalist look with a single delicate flower on each nail, or create a full-on floral explosion. Think about using different colors to match your mood or outfit. A soft pastel palette of pinks and blues can give you a romantic, ethereal vibe, while bolder combinations of reds and yellows scream summer fun. And don’t forget the contrast; placing a dark flower on a light background or vice versa can really make your design pop. It's all about playing around and finding what makes your nails sing.
Another cool idea is to think about themes. Maybe you’re feeling a bit bohemian, so you go for wildflowers and earthy tones. Or perhaps you are in the mood for something elegant, then use delicate white flowers on a nude base. You can even create seasonal designs, using sunflowers in the summer or deep reds and oranges in the fall. It’s like having a mini-art gallery right on your fingertips, and you are the curator. The best part is you can change it up as often as you like, keeping your nails fresh and exciting.
Design Style | Description | Best for |
|---|---|---|
Minimalist | Single flower or petal on each nail | Everyday wear, subtle elegance |
Floral Explosion | Multiple flowers, full coverage | Special occasions, bold statements |
Themed | Flowers and colors based on a theme | Expressing personality, seasonal looks |
Contrast | Dark flowers on light base, or vice versa | Making the design pop |
Mixing It Up
Don't feel like you have to stick to just flowers either. This is where you can really let your creativity shine! Try mixing in other elements like glitter, gold leaf, or even tiny rhinestones. A touch of sparkle can really elevate your design and make it feel extra special. You could also experiment with different nail polish finishes. A matte base can create a beautiful contrast with the glossy flowers, while a holographic polish can add a touch of magic. Think of your nails as a canvas and go wild with it, blending different textures and finishes to make your design truly unique.
And if you're feeling adventurous, try incorporating other natural elements. Tiny pieces of dried leaves or grasses can add a touch of earthiness to your design. You could also use small pieces of dried citrus peel for a pop of color and texture. It's all about thinking outside the box and finding what works for you. The more you experiment, the more you'll discover new and exciting ways to use dried flowers in your nail art. Who knows? You might just stumble upon the next big trend!
Maintaining and Showcasing Your Dry Flower Nail Designs
Maintaining and Showcasing Your Dry Flower Nail Designs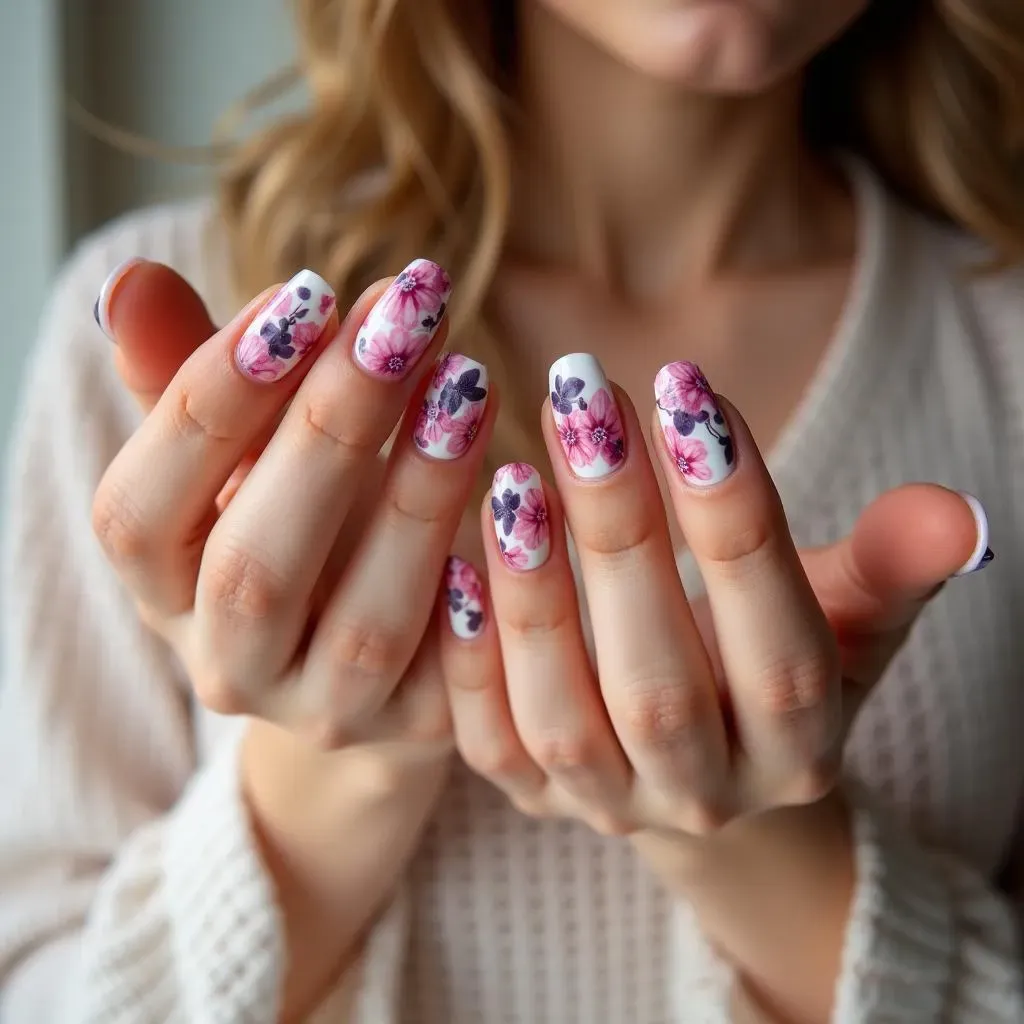
Keeping Your Blooms Looking Fresh
Okay, so you’ve poured your heart and soul into creating these gorgeous dry flower nail designs, now it’s time to make sure they last! The biggest enemy of your floral manicure is going to be moisture and friction. Think about it, you don’t want to be washing dishes with your precious petals unprotected! So, when you are doing anything that involves water or harsh chemicals, it’s a good idea to wear gloves. Also, be mindful of activities that could cause your nails to rub against things, like typing on a keyboard or digging in your bag. The more gentle you are with your nails, the longer your design will last.
Another key thing is to reapply your top coat every couple of days. This will help to keep the flowers sealed in and prevent them from lifting or chipping. It's like giving your manicure a little boost and keeping everything in place. Think of it as a maintenance check-up for your nails. It’s a small step that will make a big difference in the lifespan of your floral art.
Tip | Description |
|---|---|
Wear Gloves | Protect nails from water and chemicals. |
Be Gentle | Avoid activities that cause friction. |
Reapply Top Coat | Seal and protect flowers every few days. |
Showcasing Your Floral Masterpieces
Alright, you've got these stunning floral nails, and now you want to show them off, right? Of course! Your nails are a form of self-expression, so don't be shy about flaunting them. The most obvious way is to, well, just live your life and let people admire them. But if you want to take it a step further, think about posting some photos online. A good close-up shot of your nails can really showcase the detail and the beauty of your designs. Use good lighting and a nice background to make your photos pop. You can also try different angles and poses to really capture the essence of your manicure.
And don't forget to share your tips and tricks with others! If you’ve discovered a great technique or a unique way to use dried flowers, spread the word. Nail art is a community, and it’s always fun to share your creations and inspire others. You can even start your own nail art page on social media and become an influencer of sorts. Who knows, maybe your floral nail designs will be the next big trend!
"Flowers always make people better, happier, and more helpful; they are sunshine, food and medicine for the soul." - Luther Burbank