Table of Contents
Ready to ditch the boring and embrace the wild? You're in the right place! Forget complicated salon trips, because we're diving headfirst into the world of easy animal nail designs. This isn't about needing a steady hand of a surgeon or a degree in fine art. Nope, we’re talking about simple, fun, and totally achievable looks that'll have everyone asking, "Where did you get your nails done?" From cute paw prints to fierce zebra stripes, we'll show you how to create adorable animal-inspired manicures without breaking a sweat. We'll start with the basic animal print techniques, then move onto some cute animal face ideas, and finally, we’ll give you some tips to mix and match those designs for a truly unique look. By the end of this article, you'll be a master of easy animal nail designs, ready to express your wild side, one nail at a time. So, grab your polish and let's get started!
Simple Animal Print Nail Techniques for Beginners
Simple Animal Print Nail Techniques for Beginners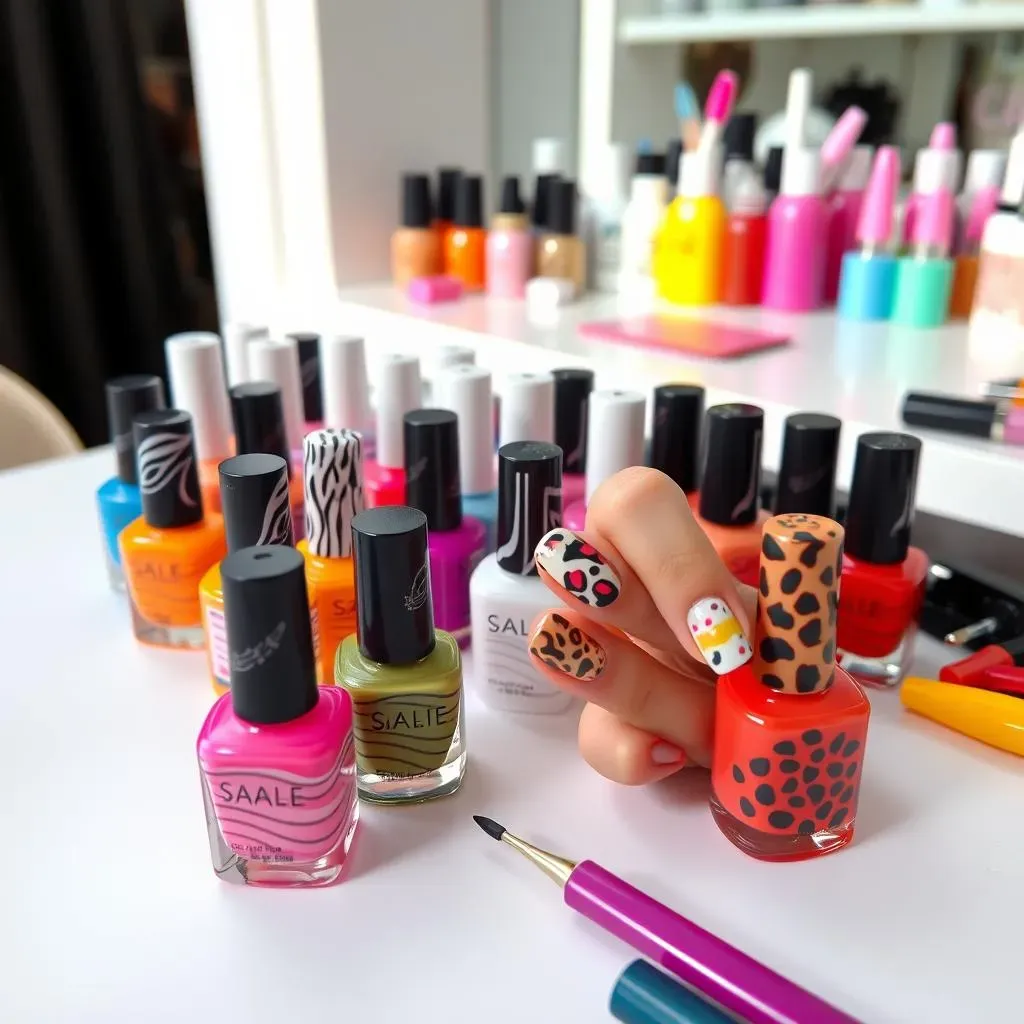
Okay, so you wanna try some animal prints, huh? I get it, they're super fun and way easier than they look. Forget those fancy salon tools for now. We're starting with the basics: dots, lines, and a little bit of patience. Think of it like drawing, but on a tiny canvas. Zebra stripes? Just some black lines on a white base. Leopard spots? Random dots. Seriously, that's all there is to it. The key is not to overthink it. Grab your favorite polishes, some dotting tools or even a toothpick, and let's get going. Don't worry about being perfect, the beauty of animal prints is that they're naturally a little messy and imperfect.
Animal Print | Technique | Tools Needed |
|---|---|---|
Zebra | Thin, uneven black lines | Thin brush or toothpick |
Leopard | Random black dots with a few brown spots | Dotting tool or toothpick |
Cow | Uneven black blobs | Dotting tool or small brush |
Cute and Easy Animal Face Nail Art Ideas
Cute and Easy Animal Face Nail Art Ideas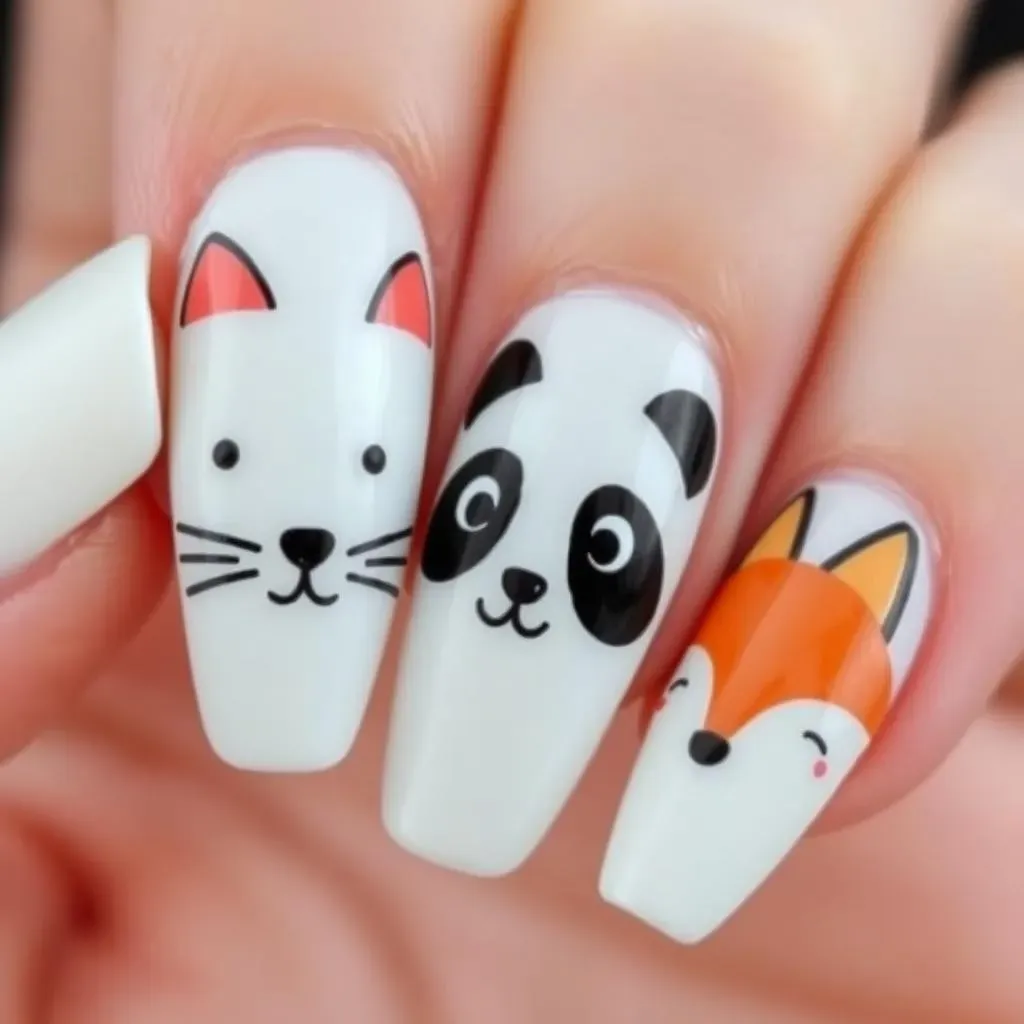
Alright, let's move on from the prints to something even more adorable: animal faces! Now, I know what you might be thinking, "Faces? That sounds hard!" But trust me, we're keeping it super simple. We're not aiming for a photorealistic portrait, more like a cute cartoon version. Think of it like this: a few strategic dots and lines can transform your nail into a sweet kitty, a playful panda, or even a sly fox. The secret? Start with a base color that matches your animal, then add the main features, like eyes, nose, and maybe some ears. Use a dotting tool for the eyes and nose, and a thin brush for any outlines. It's all about using basic shapes and letting your creativity shine. Don't stress about making it perfect, the charm is in the simplicity.
Animal Face | Key Features | Tips |
|---|---|---|
Cat | Two dots for eyes, triangle for nose, small curved lines for whiskers | Use a contrasting color for the nose and whiskers to make them pop. |
Panda | Black circles for eyes, black dot for nose, white base | Make the black circles slightly bigger for a more cartoonish look. |
Fox | Orange base, white triangle for snout, black dots for eyes, pointed ears | Use a toothpick to get the precise point on the ears. |
Mixing and Matching Easy Animal Nail Designs
Mixing and Matching Easy Animal Nail Designs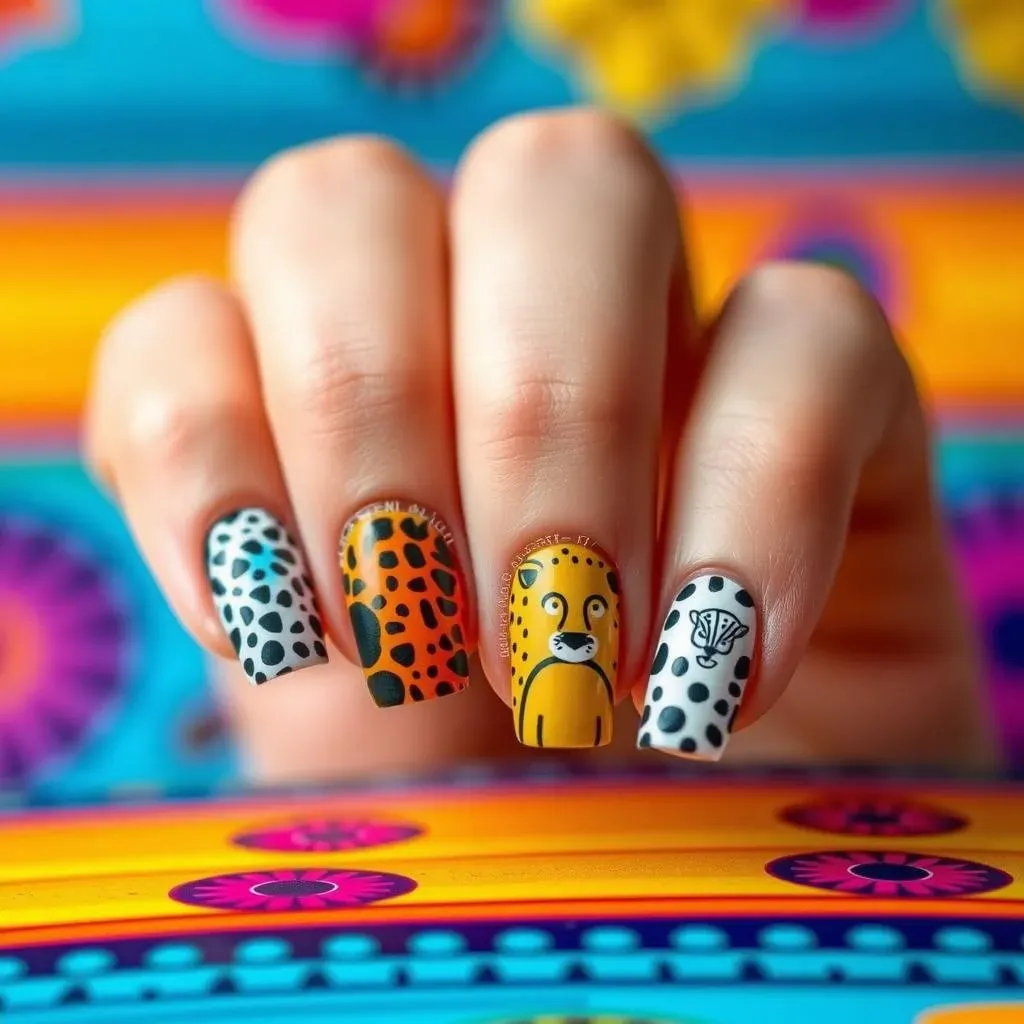
Unleash Your Inner Artist
Okay, so you've mastered the basic prints and even managed to paint a cute kitty face, now what? It's time to play! The best part about easy animal nail designs is that you can mix and match them to create something totally unique. Don't be afraid to put a zebra stripe next to a leopard spot, or a tiny panda next to a cow print. Think of your nails as a tiny art gallery, and you're the curator. There are no rules, just have fun and see what you can come up with. I love doing a different design on each nail; it's like a little party on my fingertips!
One of my favorite things to do is to use a different animal print on each nail, and then tie them together with a single color. For example, I might use a black base for all my nails, and then use white for the animal print. This creates a unified look, while still giving each nail its own personality. It's all about experimenting and finding what you like. Don't be afraid to try something new, even if it sounds a little crazy. Sometimes the best designs come from unexpected combinations.
Mix & Match Idea | Description | Why it Works |
|---|---|---|
Animal Print Frenzy | Different animal prints on each nail | Creates a bold, eclectic look |
Animal Face & Print Combo | Animal face on one nail, print on others | Balances cute with wild |
Themed Animal Set | Different designs from the same animal family (e.g., lion, tiger, cheetah) | Offers a cohesive but varied look |
Tips for a Cohesive Look
Even with mixing, you can still keep your manicure looking cohesive. How? I like to stick to a color palette. For instance, if you're using a lot of black and white, try adding a pop of a bright color that complements it, like red or yellow. Or, you can use a neutral base coat for all of your nails, and then add the different animal designs on top. This creates a unified look, even when the designs are different. Another tip is to use the same style of design. For example, if you're using cartoon animal faces, stick to that style for all your nails. If you're using more realistic prints, keep it consistent. It’s all about making it look intentional, even if it is a little bit messy.
Don't be afraid to use negative space in your designs. Sometimes, leaving some of your nail unpainted can really make the animal designs pop. You could do a small animal face on one side of the nail, and leave the rest bare. Or, you can do a stripe of animal print down the middle of the nail, and leave the rest blank. This can be a great way to create a modern and minimalist look. Remember, nail art is all about having fun and expressing yourself. So, go wild, get creative, and most importantly, enjoy the process!