Table of Contents
Ever looked at those stunning nail art designs and thought, "I wish I could do that?" Well, guess what? You absolutely can! Forget complicated techniques and expensive salon visits. This article is your go-to guide for creating amazing nail looks right at home, even if you're a total beginner. We're diving into the world of easy beginner nail designs, showing you that beautiful nails don't have to be a challenge. We'll start with the basics, exploring the simple tools you’ll need and how to use them. Then, I'll walk you through some easy-to-follow step-by-step guides that will have you creating chic designs in no time. Get ready to be inspired with a bunch of different ideas, from minimalist patterns to fun, creative styles. Plus, I will be sharing some pro tips to make your designs last longer. So, grab your polish, and let’s jump into the exciting world of DIY nail art that’s perfect for beginners!
Simple Tools for Easy Beginner Nail Designs
Simple Tools for Easy Beginner Nail Designs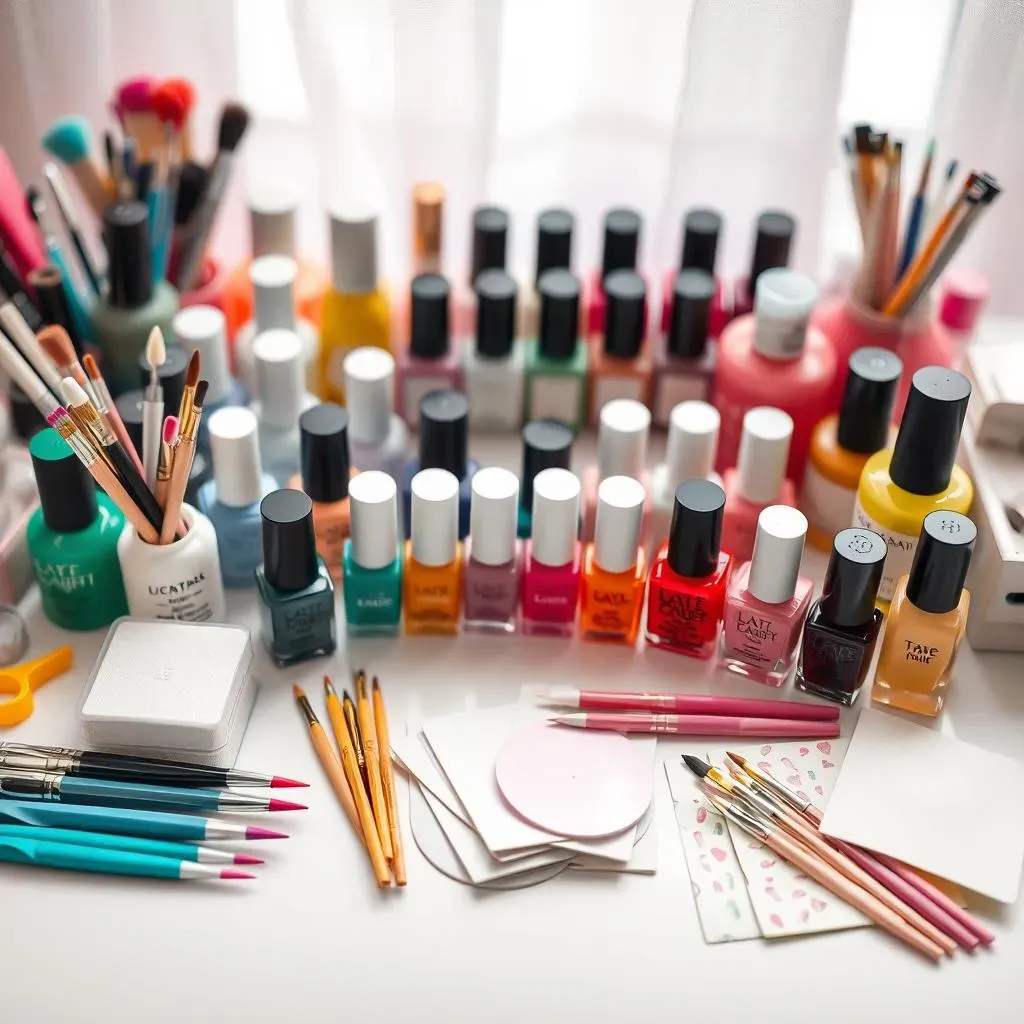
Okay, so you're ready to jump into the world of nail art but don't want to spend a fortune on fancy equipment? I get it. The good news is, you don’t need a ton of stuff to create awesome designs. For real, you can get started with just a few basic tools that are probably already in your house or super easy to find. Think of it like this: you wouldn’t build a house without a hammer and nails, right? Well, nail art is the same! You need some essentials to get the job done. Let's talk about the must-haves that will make your life so much easier and your nails look amazing.
First up is a good base coat and top coat. These are like the unsung heroes of nail art. The base coat helps your polish stick better, preventing chipping, and a top coat adds shine and protects your design. You'll need a few nail polish colors, too, obviously. Start with some basics you love. Also, grab some thin nail art brushes, or even toothpicks, for creating those precise lines and dots. It's amazing how much a tiny tool can change your nail art game. Don't forget about nail polish remover for any oops moments (we all have them!), and some cotton pads or swabs for clean-up. And, if you're feeling extra, grab some nail stickers. They are a cheat code for creating cool designs without any artistic skills.
Tool | Why You Need It |
|---|---|
Base Coat | Protects nails, helps polish stick |
Top Coat | Adds shine, protects design |
Nail Polish Colors | For the actual designs! |
Thin Nail Art Brushes or Toothpicks | For detail work, lines, dots |
Nail Polish Remover | Fix mistakes, clean up |
Cotton Pads or Swabs | For applying remover and cleaning |
Nail Stickers | Quick, easy designs |
StepbyStep Guide to Basic Nail Art
StepbyStep Guide to Basic Nail Art
Prep Your Nails
Before you even think about polish, you've got to get your nails ready. It's like prepping a canvas before you start painting. Start by removing any old polish, then gently file your nails into your desired shape. I like using a glass nail file because it's super gentle, but any file will do. After that, push back your cuticles; this will give your polish a nice, clean edge to work with. Don’t go overboard, just gently push them back. Then, wash your hands and make sure your nails are completely dry. This step is crucial for making sure your polish sticks well and doesn’t peel off in a day.
Now, for the base coat. Apply a thin, even layer of your base coat. Think of it as a primer for your nails. It creates a smooth surface for the polish to adhere to and also protects your nails from staining. Let it dry completely before moving on. I usually wait about 2-3 minutes, but it’s best to follow the instructions on your base coat bottle. Patience is key here, rushing this step can ruin your whole design!
Simple Designs to Start With
Alright, now for the fun part! Let's start with some super easy designs. The first design I always recommend is the classic polka dot. It's so simple, but it looks so fun. Just pick a base color, let it dry, and then use a dotting tool or even a toothpick to make dots in a contrasting color. You can make a pattern or go random – it’s totally up to you. Another great option is stripes. Use a thin nail art brush to paint straight lines across your nails. You can do horizontal, vertical, or even diagonal. If you are not confident with lines, you can use striping tape for clean edges and remove it after painting. It’s like magic!
Another fantastic and easy design is using nail stickers. Seriously, these are lifesavers for beginners. You can find stickers in tons of different designs, from cute little flowers to geometric shapes. Just peel them off the sheet and stick them on your nail. It's that easy! You can also do a simple color block. Paint half your nail one color, and the other half a different color. Use tape to make the line clean. The key to all of this is to take your time and have fun with it. It’s okay if it’s not perfect, it’s just nail art, after all!
Design | How to Do It | Difficulty |
|---|---|---|
Polka Dots | Use a dotting tool or toothpick to create dots on a base color | Easy |
Stripes | Use a thin brush or striping tape to create lines | Easy |
Stickers | Peel and stick on your nail | Super Easy |
Color Blocks | Paint different sections of your nail different colors | Easy |
Finishing Touches
Once your design is dry, it’s time for the top coat. This step is so important. It seals in your design, adds shine, and helps prevent chipping. Apply a thin, even layer of top coat over your entire nail, making sure to cover the edges. Let it dry completely. I usually wait at least 5-10 minutes, but again, follow the instructions on your top coat. Once it’s dry, you’re all done! You’ve created your own fantastic nail art. If you made any mistakes along the way, don’t worry, just use some nail polish remover to clean up the edges and you’re good to go.
Remember, practice makes perfect. The more you do it, the better you'll get. Don’t be afraid to experiment with different colors and designs. It's all about having fun and expressing yourself. Nail art is a form of self-expression, so don't be scared to try new things and see what you can create. You might surprise yourself with how artistic you can be!
Easy Nail Designs: Inspiration and Ideas
Easy Nail Designs: Inspiration and Ideas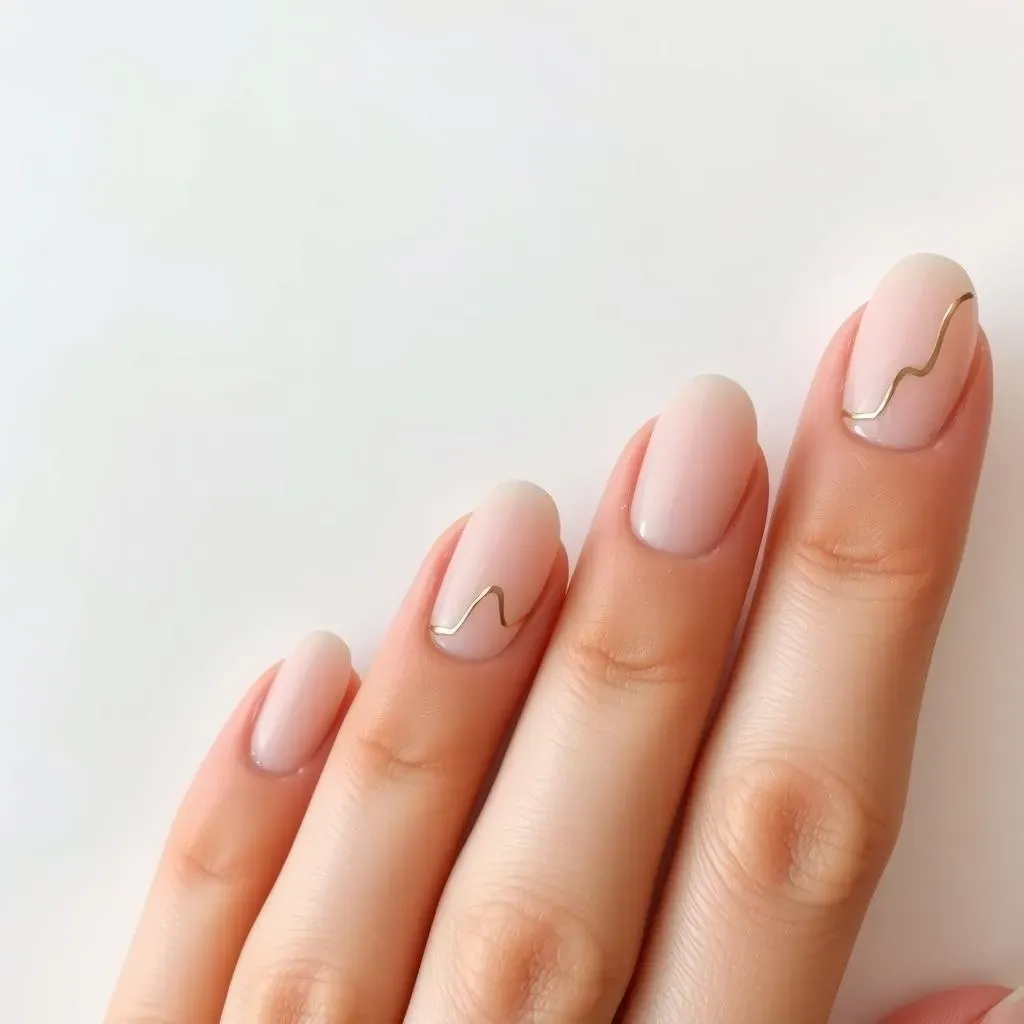
Classic and Chic
Okay, let's talk ideas! If you're into timeless looks, you can't go wrong with classic styles. A simple French manicure is always elegant. Instead of doing the traditional white tip, try a different color, like a metallic silver or gold, for a modern twist. Another great idea is a single color on all your nails but with one accent nail. For example, paint all your nails a soft pink and then do a glitter accent on your ring finger. It's understated but still has a bit of pizzazz. These designs are perfect for any occasion. They’re easy to create and always look put together, which is really what we’re going for, right?
Don't forget about the power of negative space! You can create awesome designs by simply leaving parts of your nail unpainted. Try painting a thin line down the center of your nail or creating a half-moon shape at the base. It’s super minimalist but looks incredibly stylish. Using a matte top coat can also elevate these simple designs, giving them a modern and sophisticated finish. These ideas are all about playing with the basics and adding small touches to make them unique.
Design | Description | Best For |
|---|---|---|
French Manicure with a Twist | Classic French tip in a non-traditional color | Elegant events or everyday wear |
Accent Nail | Single nail with a different color or design | Adding a pop of color |
Negative Space | Using unpainted areas to create designs | Minimalist and modern looks |
Matte Finish | Using a matte top coat for a modern touch | Sophisticated and trendy styles |
Fun and Creative
Now, if you're feeling a bit more adventurous, let's get into some fun and creative designs. Mismatched nails are super popular right now. Paint each nail a different color, or do different designs on each one. It's a great way to express your personality and have some fun with your manicure. You can do different patterns, colors, or even use different stickers for each nail. It's all about being playful and not worrying about things matching perfectly. Another idea is to play around with geometric shapes. Use tape to create triangles, squares, or zigzags on your nails. It's a simple way to add a modern and edgy look.
Don't be afraid to get inspired by everyday things. Look at patterns on your clothes, or in nature, and recreate them on your nails. You can even try some abstract art, by just letting your brush flow and seeing what happens. The key is to not overthink it and just have fun with the process. You can use different colors and tools to create textures and patterns. Remember, there are no rules in nail art, so let your imagination run wild. You will be surprised by what you can create when you just let yourself go.
"Creativity is intelligence having fun." - Albert Einstein
Trendy and Modern
For those of you who love to stay on top of the trends, there are tons of modern nail designs that are easy to achieve. Squiggly lines are everywhere right now. Use a thin brush to create wavy lines on your nails. You can do it in different colors or even use a metallic polish for some extra shine. Another popular trend is the micro French tip. Instead of a thick white tip, do a very thin line at the edge of your nail. It's a subtle way to update the classic French manicure. Marble nails are also a big hit, but they can seem difficult. There are a lot of easy tutorials online that you can follow to get that effect without using complicated techniques.
Another great trend is using different textures. Try adding a bit of glitter or using a textured polish for some extra dimension. You can also use matte and glossy polishes together to create contrasting looks. The possibilities are endless! If you want to add a touch of sparkle, try some nail foil. It’s surprisingly easy to apply and adds a glamorous touch to your nails. These designs are all about playing with different techniques and textures to create something unique and eye-catching. Remember, staying trendy doesn't mean you have to be complicated. There are always ways to adapt trends to make them beginner-friendly.
Tips and Tricks for LongLasting Easy Beginner Nail Designs
Tips and Tricks for LongLasting Easy Beginner Nail Designs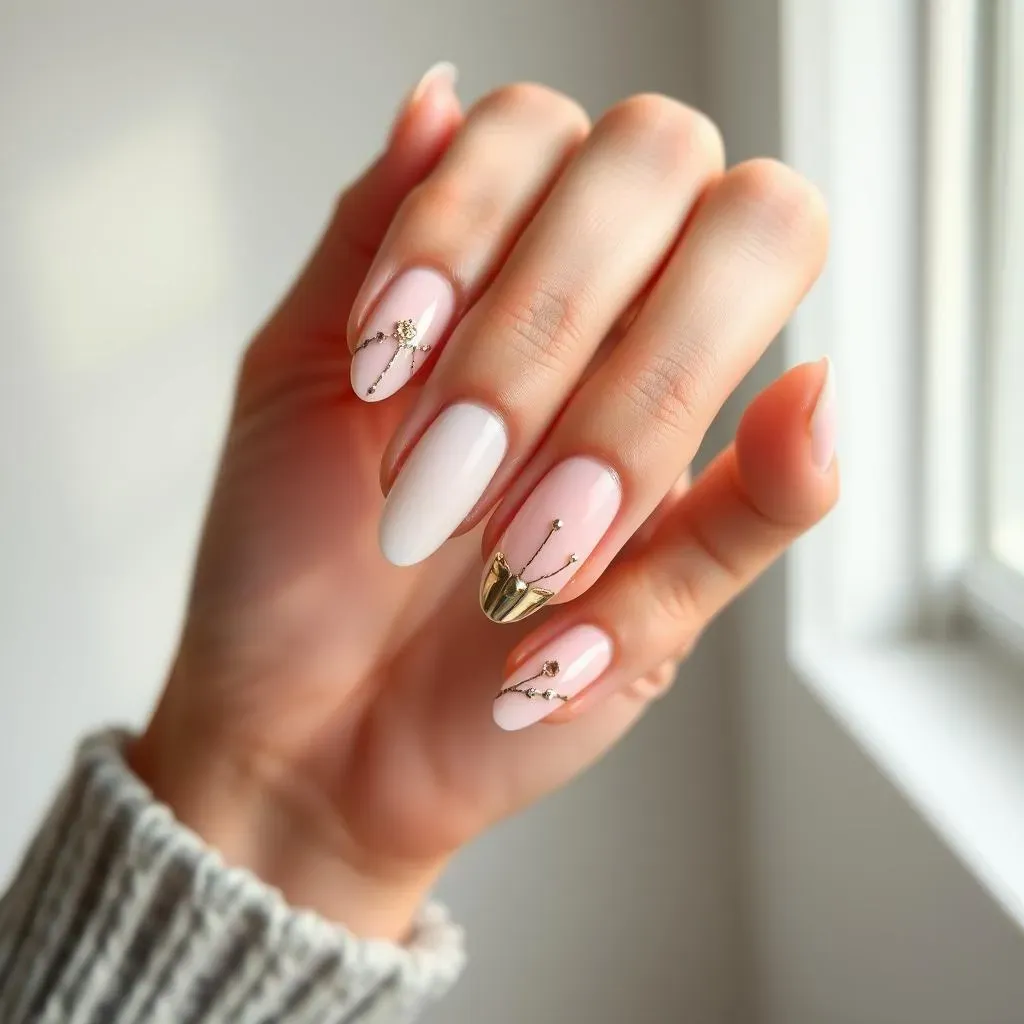
Alright, so you've created these awesome nail designs, and now you want them to last, right? No one wants their beautiful art to chip off within a day. So, let's talk about some essential tips and tricks to make your easy beginner nail designs last longer. First things first, always start with a clean and dry base. Any oils or lotions on your nails can prevent the polish from sticking. Before you apply anything, wipe your nails with a bit of nail polish remover to get rid of any residue. This simple step can make a huge difference. And remember to apply thin coats of polish. Thick coats take forever to dry and are more likely to chip. It’s better to do two or three thin coats than one thick one.
Another key point is to seal the edges of your nails. When you apply your top coat, make sure to run the brush along the edge of your nail. This will help to prevent the polish from lifting. Also, try to avoid using your nails as tools. I know it's tempting to use them to open things, but that can cause your polish to chip. Wear gloves when you're doing dishes or cleaning. The chemicals in cleaning products can also damage your manicure. And, of course, reapply your top coat every two to three days. This will add an extra layer of protection and keep your nails looking shiny and fresh. These little habits can significantly extend the life of your nail art. It is the small things that make a big difference.
Tip | Why It Helps |
|---|---|
Clean and Dry Nails | Removes oils and residue for better polish adhesion |
Thin Coats of Polish | Dries faster, less likely to chip |
Seal the Edges | Prevents polish from lifting |
Avoid Using Nails as Tools | Reduces chipping and damage |
Wear Gloves | Protects from chemicals and water |
Reapply Top Coat | Adds extra protection and shine |