Table of Contents
Ready to transform your nails into a magical wonderland? This article is your passport to creating stunning, yet surprisingly simple, Disney nail designs. Whether you're a seasoned nail artist or a complete beginner, we've got you covered. We'll start with the easiest Disney nail designs, perfect for those just dipping their toes (pun intended!) into the world of nail art. Learn how to master the iconic Mickey and Minnie Mouse designs, adding a touch of whimsy to your fingertips. Then, we'll explore some enchanting Disney princess nail art, showcasing elegant and sophisticated designs that are easier than you think. Finally, we'll elevate your nail game with simple yet dazzling additions like glitter and gems, creating truly magical finishes. Prepare to be amazed by how effortlessly you can achieve these "easy disney nail designs," and get ready to unleash your inner artist!
Simple & Chic: Easy Disney Nail Designs for Beginners
Simple & Chic: Easy Disney Nail Designs for Beginners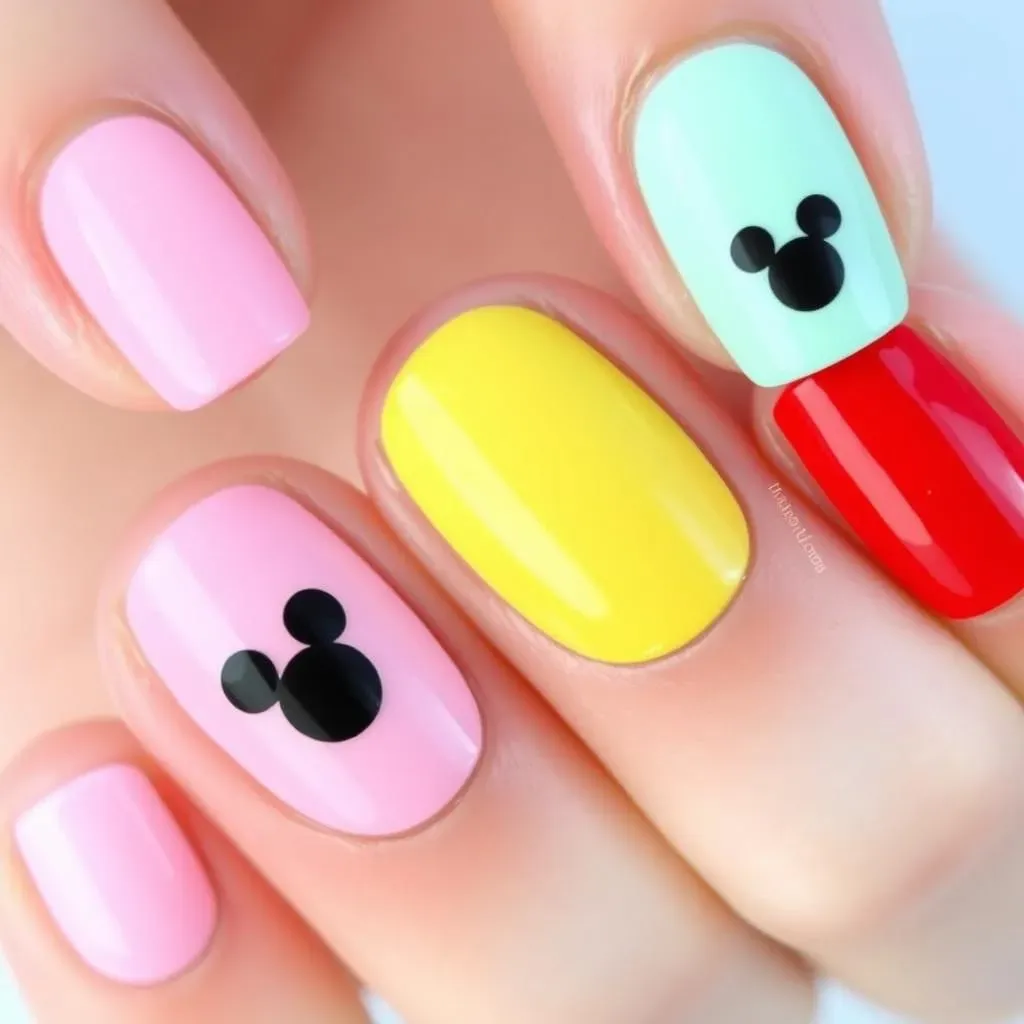
Mickey Mouse Minimalism
Let's start with the simplest of the simple: minimalist Mickey Mouse nails. All you need is black and a base coat of your favorite color. Paint two small black circles on each nail to create Mickey's iconic face. It's that easy! You can even add tiny white dots for extra detail if you're feeling fancy. This design works perfectly on short nails, making it a great choice for everyday wear. For extra inspiration, check out our post on awesome easy cute nail designs.
Keep it super simple by using just one accent nail per hand. This way, you only need to perfect your Mickey design on two nails, instead of ten. You can try using different nail colors for a fun twist! A pastel pink and a bright yellow would look super cute. Want more easy nail art ideas? Check out these easy nail design ideas!
Color | Description | Difficulty |
|---|---|---|
Pastel Pink | Soft and girly | Beginner |
Bright Yellow | Cheerful and sunny | Beginner |
Classic Red | Bold and timeless | Beginner |
Subtle Silhouette Nails
Another super easy design involves creating a subtle silhouette of Mickey or Minnie. Instead of painting the full face, focus on just the outline of the head and ears. Use a thin brush and black polish for a clean, sophisticated look. This style works beautifully on a neutral base color like white, beige, or even a soft pastel like mint green. This is especially great if you have longer nails, as you can create bigger and more defined silhouettes. Looking for more inspiration for short nails? Check out our guide on awesome easy short nail designs.
For a touch of elegance, try using a metallic gold or silver polish for the silhouette instead of black. This adds a touch of glamour without being overly flashy. You could also incorporate a simple French manicure and add the silhouette to the tip of your nails. This is a great approach if you want to incorporate a classic nail style with a fun Disney twist. For more beginner-friendly options, look at our easy nail designs for beginners post.
- Use a thin brush for clean lines.
- Start with a light base color.
- Experiment with different colors for the silhouette.
Solid Color with Hidden Mickeys
Sometimes, the simplest approach is the best. Choose a solid color that you love—a bright sunny yellow, a calming sky blue, or a sophisticated nude shade. Then, on one or two accent nails, paint tiny black Mickey heads. These "hidden Mickeys" add a fun, subtle Disney touch without overwhelming the overall look. This technique is super easy and perfect for those who prefer a more understated aesthetic. Looking for more easy gel nail designs? Check out our gallery of amazing easy gel nail designs.
To make it even easier, use nail stickers or decals! Lots of retailers offer cute Disney-themed nail art stickers that are super simple to apply. This is a great option if you're short on time or lack the steady hand needed for freehand painting. If you're after more inspiration for easy summer nail designs, see our easy nail designs for summer collection!
Magical Mickey & Minnie: Mastering Easy Disney Nail Art
Magical Mickey & Minnie: Mastering Easy Disney Nail Art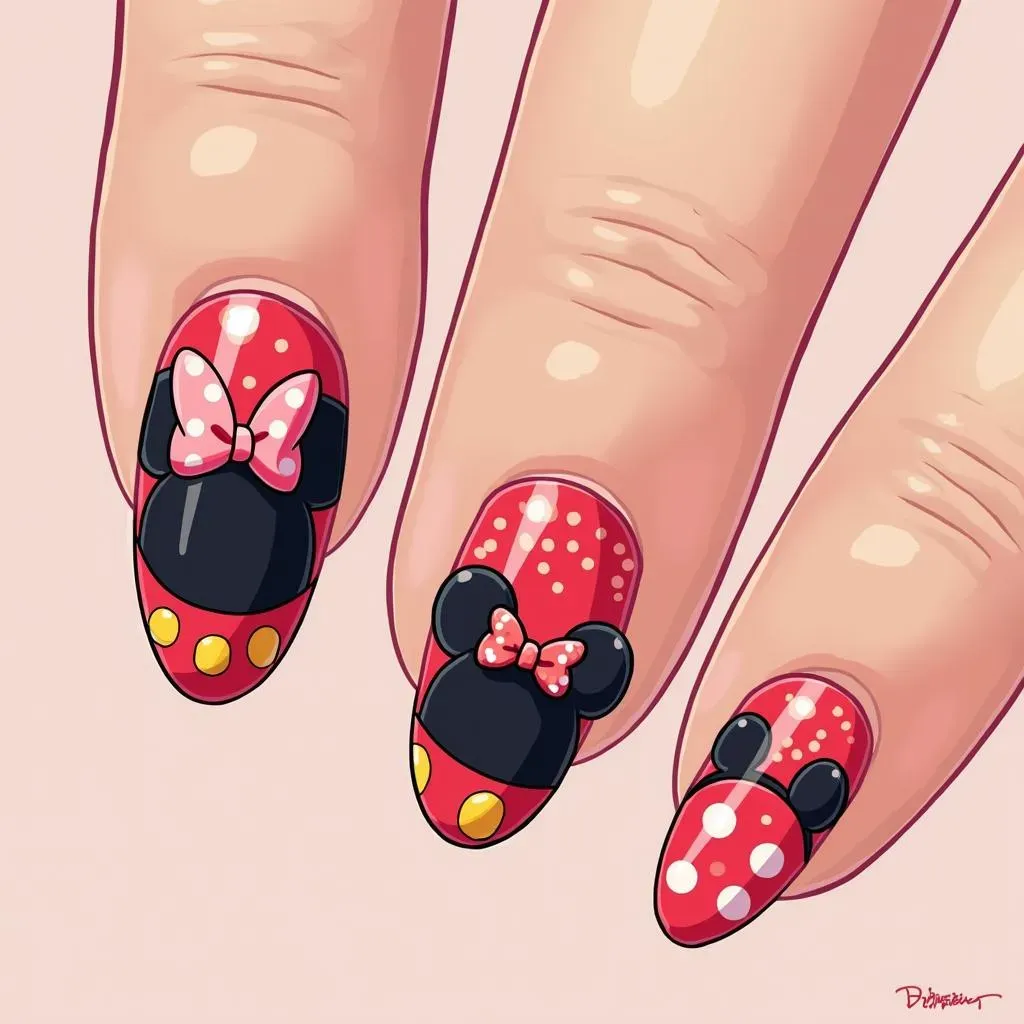
Classic Mickey and Minnie
Let's get those iconic mouse ears onto your nails! This design is a bit more involved than the minimalist versions, but still totally achievable. Start with a base coat, then use a small brush to carefully paint Mickey's head (a large circle) and ears (two smaller circles on either side). Follow up with Minnie's signature bow, perhaps using a bright pink or red. Need more inspiration for cute designs? Check out our awesome easy cute nail designs!
Don't worry about making them perfect! A slightly imperfect, hand-painted look adds charm. You can use different colors for the base coat to change the overall look. A bright yellow base coat with black Mickey heads would look fantastic. For a slightly more advanced take, try adding tiny details like eyes and noses. Want more simple ideas? We have a whole collection of easy nail design ideas to explore!
- Use a small, detailed brush for precise painting.
- Don't stress about perfect circles—a little imperfection adds character.
- Experiment with different base colors and bow colors.
Mickey and Minnie Nail Art
For a more playful approach, consider a design where each nail features either Mickey or Minnie. Alternate between the two characters across your fingers, creating a fun, vibrant manicure. A simple polka dot background can add a touch of whimsy, and you can use different colors for each character to make it extra playful. Looking for simple designs for short nails? We've got some great awesome easy short nail designs for you.
Consider adding small details like hearts or stars to enhance your Mickey and Minnie designs. A thin line of glitter along the edges can also add a touch of sparkle and elegance. You can also incorporate other Disney elements into the design, such as simple silhouettes of Disney castles or other iconic imagery. For more inspiration on simple gel nail art, check out our amazing easy gel nail designs post!
Character | Color Scheme | Added Detail |
|---|---|---|
Mickey | Black and Yellow | Polka Dots |
Minnie | Pink and Red | Hearts |
Character Silhouettes
Another fun approach is to create simple silhouettes of Mickey and Minnie. Use a dark polish on a light background, or vice versa. You only need to outline the basic shapes of their heads and ears. This creates a chic, minimalist look that's easy to achieve, even if you're not the most experienced nail artist. Don't forget to check out our amazing collection of easy nail designs for beginners!
For a more sophisticated twist, use metallic polishes for the silhouettes. This adds a touch of glamour to the design, and it's a subtle way to make your manicure stand out. You could also try using different colors for Mickey and Minnie, or use a gradient effect for a more modern look. For simple designs perfect for summer, visit our easy summer nail art designs page!
Beyond the Mouse: Easy Disney Princess Nail Designs
Beyond the Mouse: Easy Disney Princess Nail Designs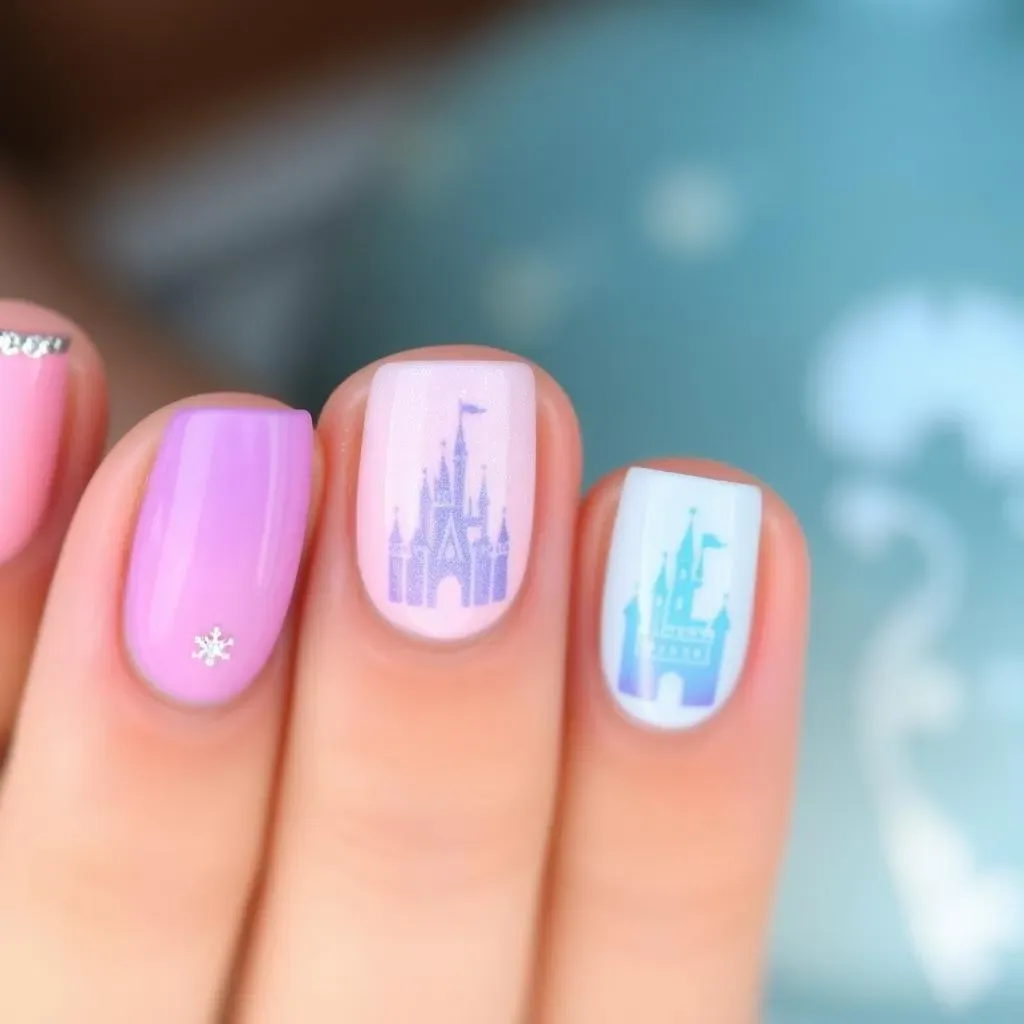
Subtle Princess Accents
Let's add some regal flair without going overboard! Think subtle accents inspired by your favorite princesses. For example, a single nail featuring a tiny crown for Cinderella, or a delicate snowflake for Elsa. Use a fine-tipped brush and metallic polishes for a touch of elegance. A simple glitter topcoat adds extra sparkle. These little details are surprisingly easy to create and add a touch of magic to your manicure. Check out our post on easy nail designs with rhinestones for extra inspiration!
Alternatively, you can incorporate the signature colors of each princess. A soft pastel pink for Belle, a vibrant purple for Rapunzel, or a shimmering blue for Ariel. Keep the base coat simple, perhaps a nude or a pale shade, and accentuate one or two nails with the princess's color. This subtle approach is perfect for those who want a touch of Disney magic without being too loud. If you are looking for more easy designs for short nails, check out our awesome easy short nail designs.
- Use metallic polishes for a touch of elegance.
- Incorporate princess-themed colors subtly.
- Keep the base coat simple and neutral.
Princess-Themed Nail Art
Ready for something a bit more elaborate? Try a princess-themed nail art design. You could paint a simple silhouette of Cinderella's castle, or a whimsical design inspired by Ariel's underwater kingdom. Remember, you don't have to be a professional nail artist to create something beautiful! Start with a base color that complements your chosen princess, then add the details with a fine-tipped brush and your favorite polishes. See our easy nail design ideas for some extra inspiration!
Consider using nail stamping plates for easy princess-themed designs. These plates offer a wide variety of pre-made images that are easy to transfer onto your nails, saving you time and effort. You can find many Disney-themed stamping plates online or in beauty supply stores. This is a great way to add intricate details without needing advanced nail art skills. Looking for more fun and easy designs? Check out our easy summer nail art designs!
Princess | Color Palette | Design Ideas |
|---|---|---|
Cinderella | Blues, silvers, and whites | Castle silhouette, glass slipper |
Ariel | Greens, blues, and purples | Seashells, starfish, ocean waves |
Belle | Yellows, golds, and reds | Rose motifs, castle spires |
Sparkle & Shine: Easy DisneyInspired Nail Designs with Glitter and Gems
Sparkle & Shine: Easy DisneyInspired Nail Designs with Glitter and Gems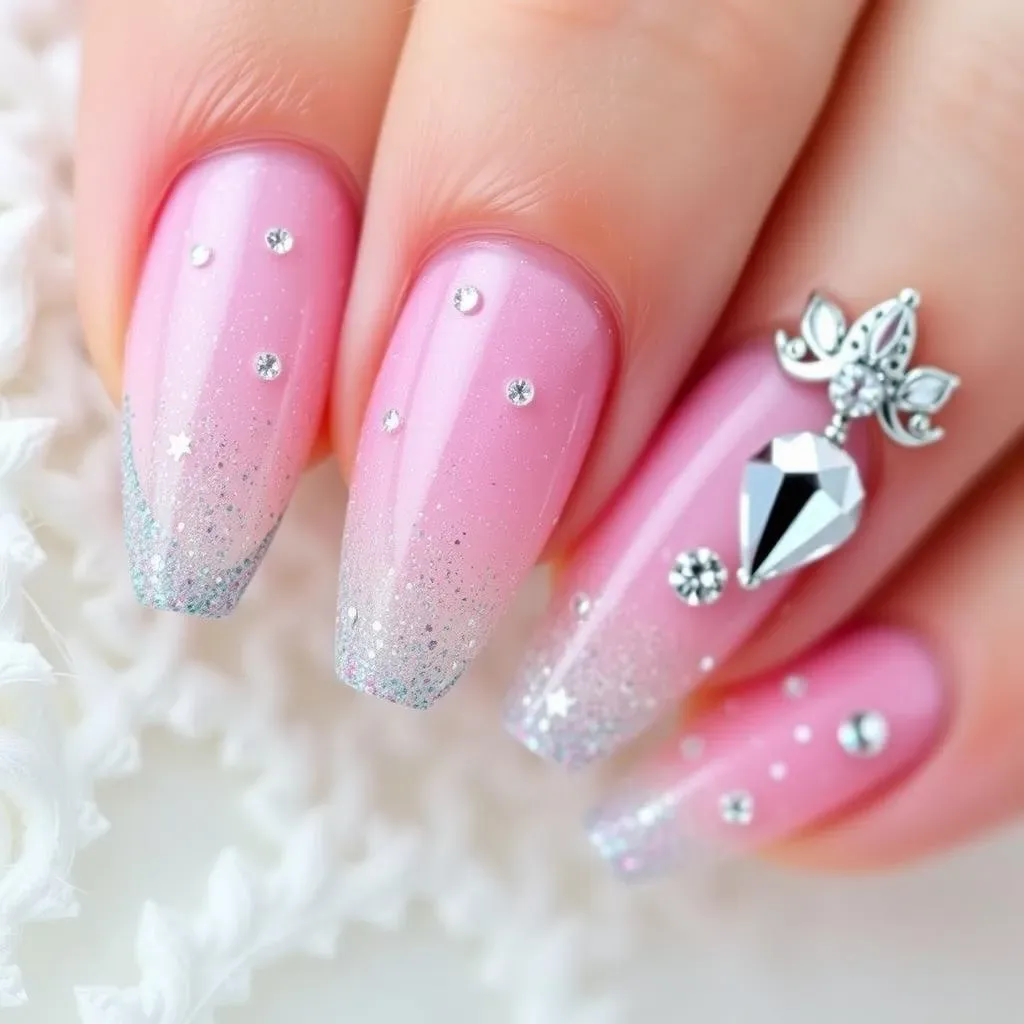
Glitter Accents
Let's add some serious sparkle! A simple way to elevate any Disney nail design is by adding glitter accents. You can use glitter polishes, glitter top coats, or even loose glitter applied with a top coat. Focus the glitter on one or two accent nails to avoid overwhelming the look. For example, you could add glitter to the bow on a Minnie Mouse design, or to the tips of nails featuring a subtle Mickey silhouette. Looking for some more easy glitter nail designs? Check out our rhinestone nail designs for ideas!
Experiment with different glitter colors and textures to find what works best for you. Fine glitter creates a subtle shimmer, while chunky glitter provides a more dramatic effect. You can even mix and match different glitter colors on a single nail for a more unique look. Adding a touch of glitter is a super easy way to make your Disney nail art extra special and festive. For even more simple, yet elegant nail art, see our post on easy nail design ideas.
- Use glitter polish for an easy application.
- Apply loose glitter with a top coat for extra sparkle.
- Experiment with different glitter colors and sizes.
Gemstone Embellishments
Take your Disney nail art to the next level with gemstone embellishments! Small, colorful gems can add a touch of luxury and sophistication to any design. You can use them to create simple accents, such as placing a few gems on the bow of a Minnie Mouse design, or lining the edges of a Mickey Mouse head. Remember to use a good quality top coat to ensure the gems stay securely in place. For more inspiration on easy nail art, see our easy nail design ideas page!
Experiment with different gem shapes and sizes to create unique designs. For instance, you could use small round gems to create a starry night sky effect, or larger, more elaborate gems to add a touch of drama. Remember to use a strong adhesive to ensure your gems stay put, and apply a top coat to protect your design. Want more ideas for simple nail art? Check out our easy nail designs for beginners!
Gem Type | Effect | Disney Theme |
|---|---|---|
Small, Round Gems | Subtle Sparkle | Starry Night (Mickey's Clubhouse) |
Larger, Faceted Gems | Dramatic Effect | Princess Tiara (Cinderella) |
Combining Glitter and Gems
For the ultimate sparkle, combine glitter and gems! This creates a truly dazzling effect that's perfect for special occasions or simply to add an extra touch of magic to your everyday look. You can use glitter as a base, and then add gems as accents, or vice versa. The possibilities are endless! Make sure to use a quality top coat to protect your design and keep everything in place. Looking for more ideas for easy and cute nail designs? We've got a whole collection of awesome easy cute nail designs!
Remember to start with a clean, well-prepped nail surface for the best results. Use a base coat to protect your nails and help the glitter and gems adhere better. And don't be afraid to experiment! Try different combinations of colors, glitter types, and gem shapes to create a unique and personalized look. If you're looking for more easy and fun nail art, check out our easy summer nail art designs!