Table of Contents
Ready to transform your nails into miniature Halloween masterpieces? This article is your ultimate guide to achieving spooktacular results without the fuss! Whether you're a nail art newbie or a seasoned pro looking for some quick and easy inspiration, we've got you covered. Forget complicated designs and hours of painstaking work; we're all about simple, fun, and totally achievable "easy halloween nail art designs." Inside, you'll discover beginner-friendly tutorials that walk you through each step, providing clear instructions and helpful tips. We'll explore a range of creative ideas and themes, from cute and quirky designs to more edgy and dramatic looks – all perfect for Halloween parties, trick-or-treating, or simply adding a touch of spooky flair to your everyday style. Get ready to unleash your creativity and express your Halloween spirit with these simple yet stunning nail designs. Prepare to be amazed by how easily you can achieve professional-looking results, and most importantly, have a blast doing it!
Easy Halloween Nail Art Designs for Beginners
Easy Halloween Nail Art Designs for Beginners
Getting Started: Simple Spooky Nails
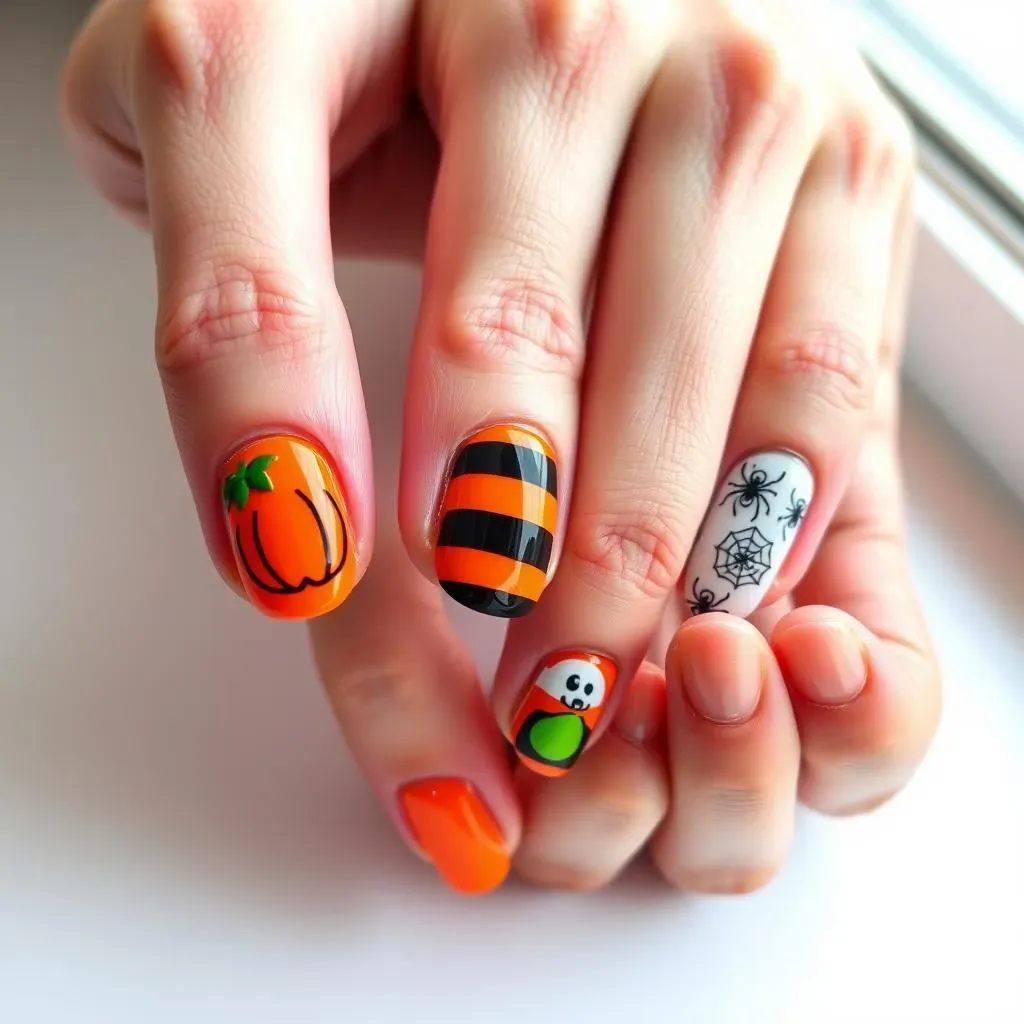
Let's face it, not everyone's a nail art ninja. If you're a beginner, the thought of intricate Halloween designs might seem daunting. But don't worry! This section is all about simple, achievable designs that even the most novice nail artist can master. We're talking about designs that require minimal tools and skills, so you can get your spooky on without spending hours perfecting your technique. Think classic Halloween colors like orange and black, combined with easy techniques like using nail stickers or creating simple shapes with a dotting tool. For example, a few strategically placed black dots can transform a simple orange base into a cute pumpkin design. Or, try using nail tape to create sharp lines and geometric patterns – a great way to add a modern touch to your Halloween mani. If you need even more inspiration for simple designs, check out our post on for more ideas.
Remember, the key is to have fun and not be afraid to experiment! Don't worry about perfection – embrace the imperfections; they add character. Even a slightly wonky spiderweb can still look super cute. And if you’re looking for some inspiration beyond Halloween, check out our guides on for more ideas. For everyday looks, check out our guide on .
Design | Difficulty | Tools Needed |
|---|---|---|
Pumpkin Dots | Easy | Orange polish, black polish, dotting tool |
Black & Orange Stripes | Easy | Orange polish, black polish, striping tape |
Spiderweb Stickers | Very Easy | Base coat, top coat, spiderweb nail stickers |
Nail Art Tools for Beginners
Before you dive into your spooky creations, let's talk about the essential tools you'll need. You don't need a whole salon's worth of equipment – a few basic supplies will do the trick. Firstly, you'll want a good base coat and top coat to protect your nails and make your design last longer. Then, grab some Halloween-themed nail polishes in colors like orange, black, purple, and maybe even some glitter for extra sparkle! You'll also need a dotting tool (or a toothpick in a pinch) for creating dots and other small details. If you're using nail stickers, you'll also need a pair of tweezers for precise placement. That's really all you need to get started. And if you're feeling ambitious, you might consider checking out our guide on .
For even more detailed designs, a thin nail art brush can be really helpful. But for the designs we're focusing on here, a dotting tool is more than sufficient. Remember, the goal is simplicity and fun! And don't forget to have some cotton swabs and nail polish remover on hand for those little mistakes – we all have them! If you're working with short nails, you might find our guide helpful.
- Base coat
- Top coat
- Halloween-colored nail polishes
- Dotting tool or toothpick
- Nail stickers (optional)
- Tweezers (optional)
- Thin nail art brush (optional)
StepbyStep Tutorials for Easy Halloween Nail Art Designs
StepbyStep Tutorials for Easy Halloween Nail Art Designs
Simple Spiderweb Design
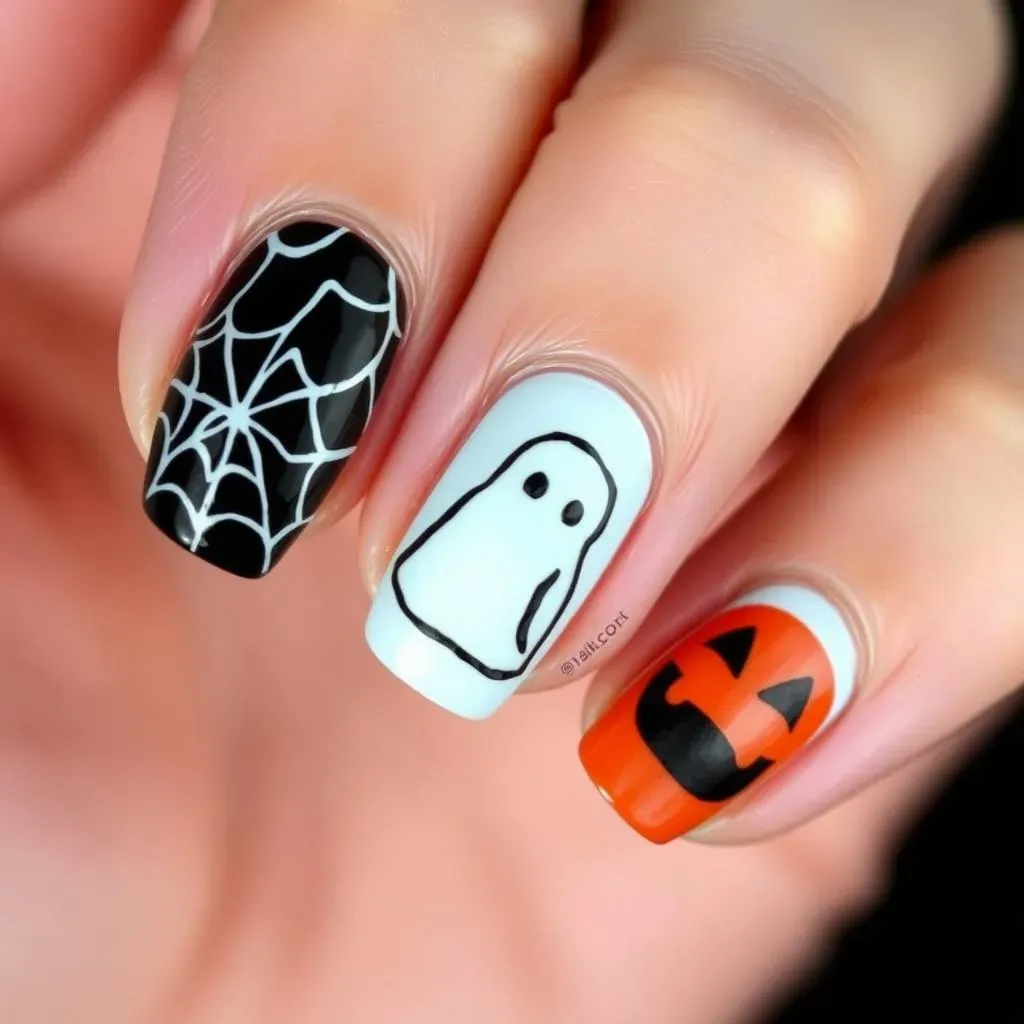
Let's start with a classic: the spiderweb! This design is surprisingly easy to achieve, even for beginners. First, apply a base coat of your favorite color – black is always spooky, but you can get creative with purples, greens, or even a dark blue. Once dry, use a thin nail art brush (or even a toothpick!) dipped in white or silver polish to create a small circle in the center of your nail. From this circle, draw thin lines radiating outwards, like the spokes of a wheel. Then, connect the lines to form the web pattern. Finally, add a tiny spider using a dotting tool and black polish. See? Easy peasy! Check out our for more ideas.
For a slightly different look, try using a dark-colored polish for the web and a light-colored polish for the background. This creates a striking contrast and makes the design pop. Don't worry if your lines aren't perfect – a slightly imperfect web adds to the charm. If you want something even easier, consider using nail stickers! Plenty of Halloween-themed nail stickers are available online or in stores, making it simple to add intricate details without the extra effort.
- Apply base coat
- Create a central circle
- Draw radiating lines
- Connect lines to form web
- Add a spider (optional)
- Apply top coat
Cute Ghost Nails
Next up: adorable little ghosts! This design is perfect for those who prefer a cuter, less scary Halloween vibe. Start with a base coat of white polish. Once dry, use a black polish and a dotting tool to create two small dots for the eyes. Then, using a slightly larger dot, add a small black dot for the mouth. You can even add tiny little arms using small lines drawn from the sides of the body. You can use this technique on all your nails, or just on your accent nails. For more cute nail art ideas, check out our .
For a more detailed ghost, try adding a little blush to the cheeks using a pink polish and a fine brush. You can also experiment with different shapes and sizes for your ghosts. Want to add some extra flair? Use glitter polish to create a shimmering effect. These designs are super simple and look fantastic on any nail length. For more inspiration on short nails, we recommend checking out our article.
Step | Description |
|---|---|
1 | Apply white base coat |
2 | Add black eyes |
3 | Add black mouth |
4 | Add arms (optional) |
5 | Apply top coat |
Jack-o'-Lantern Accent Nails
Let's add some pumpkin spice to your Halloween mani! This design is great for those who want a pop of Halloween spirit without going overboard. Start with an orange base coat. Once dry, use a black nail art pen or a thin brush to draw a simple jack-o'-lantern face on one or two accent nails. You can keep it simple with just triangular eyes and a wide smile, or get more creative with different facial expressions. For additional inspiration for festive nail art, browse our .
For a more polished look, use a stencil to create the jack-o'-lantern shapes. You can find Halloween-themed stencils online or in craft stores. If you're not confident in your freehand drawing skills, this is a great way to achieve a clean and precise design. This design is super versatile and looks great with any nail shape or length. Feel free to customize your pumpkin faces! Remember, there are tons of ideas in our article to help inspire you further!
- Apply orange base coat
- Draw jack-o'-lantern face
- Add details (optional)
- Apply top coat
Creative Ideas and Inspiration: Easy Halloween Nail Art Designs
Creative Ideas and Inspiration: Easy Halloween Nail Art Designs
Spooky Landscapes
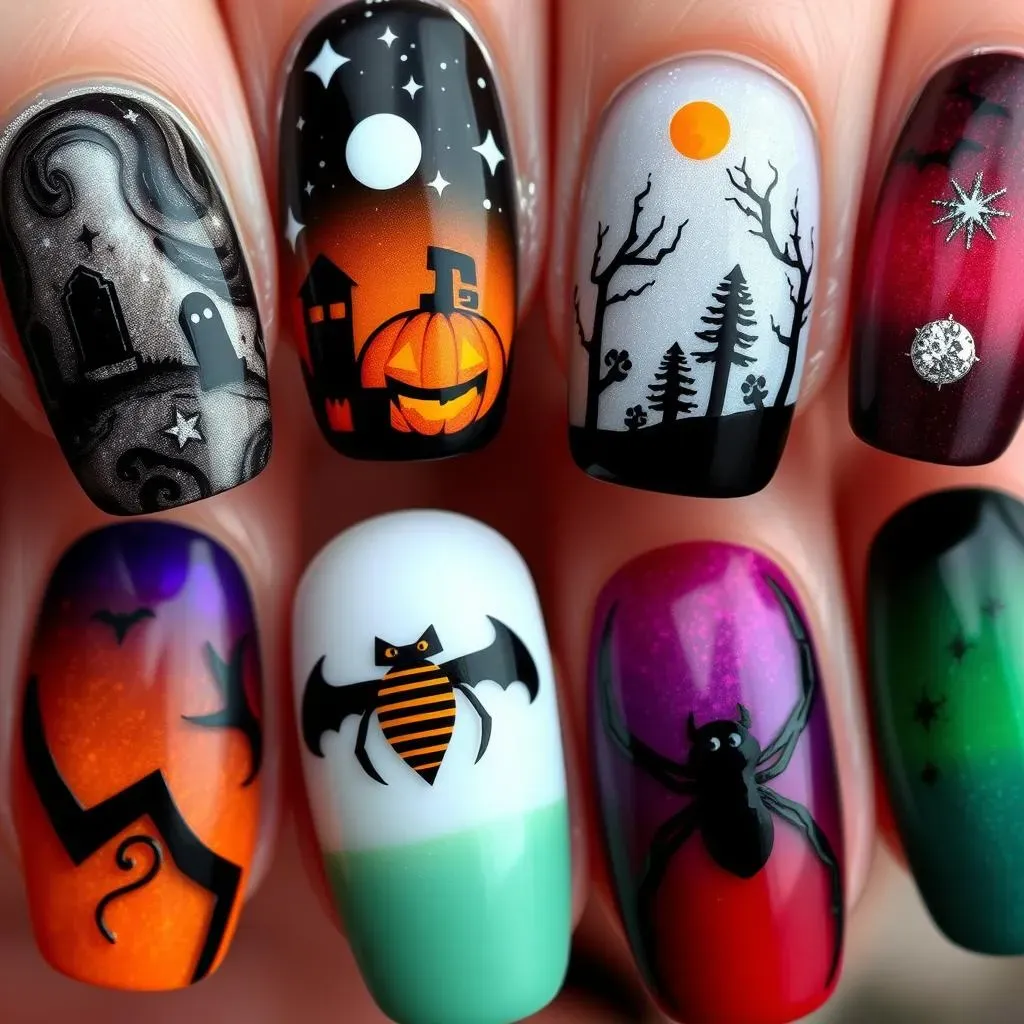
Let's move beyond the basics and explore some more creative avenues! Imagine transforming your nails into miniature spooky landscapes. Think swirling nebulae in deep purples and blues, accented with tiny silver stars and shimmering moons. Or, perhaps a graveyard scene with miniature tombstones and ghostly figures. You could even create a haunted forest with spindly trees and lurking shadows. The possibilities are endless! Remember, even simple shapes and colors can create a dramatic effect when combined thoughtfully. Don't be afraid to experiment with different textures and finishes – matte, glossy, or even glitter – to add depth and visual interest. For some inspiration on adding sparkle, check out our guide on .
For those who love a bit of whimsy, consider incorporating cute Halloween characters like friendly ghosts, black cats, or even adorable pumpkins. These elements can add a playful touch to your spooky landscape, creating a unique and memorable manicure. If you're looking for more cute nail art ideas, be sure to check out our article on for more inspiration. Remember, the beauty of these designs lies in their creativity and personal expression.
- Nebulae with stars and moons
- Graveyard scene with tombstones
- Haunted forest with trees and shadows
- Cute Halloween characters
Geometric Halloween
If you're a fan of clean lines and geometric patterns, Halloween offers a fantastic opportunity to showcase your skills. Think about incorporating classic Halloween symbols – pumpkins, bats, spiders – into geometric designs. For example, you could create a series of interconnected triangles to form a pumpkin shape, or use stripes to create a bat silhouette. These designs can be achieved using nail tape or a steady hand and thin nail art brush. Remember to plan your design beforehand to ensure it flows well across your nails. For even more ideas on geometric nail art, check out some of our other great articles on .
Experiment with different color combinations to create a unique look. You could use a monochromatic palette of blacks, grays, and whites for a sophisticated take on Halloween, or opt for a bolder color scheme using vibrant oranges, purples, and greens. Don't be afraid to mix and match different textures too – a matte black base with glossy orange accents can create a striking contrast. This is a great way to create a modern and stylish Halloween manicure, perfect for those who prefer a more subtle approach to the holiday. For more inspiration on simple designs, you might enjoy our article on .
Shape | Halloween Symbol | Color Combination |
|---|---|---|
Triangles | Pumpkin | Orange, Black, White |
Stripes | Bat | Black, Purple |
Squares | Spider | Black, Green |
Ombre and Gradient Effects
For a truly stunning and unique Halloween manicure, consider incorporating ombre or gradient effects. These techniques involve blending two or more colors together to create a seamless transition. You can achieve this using a sponge or a thin nail art brush. For Halloween, try blending spooky colors like orange and black, purple and green, or even a blood red to deep black gradient. It is truly a striking and stylish way to celebrate the season. For more information on creating stunning gradients, check out our article on .
To make your ombre manicure extra special, add some glitter or shimmer to the mix. This creates a more glamorous and festive look, perfect for Halloween parties. You can also experiment with different placements of your colors. For instance, you could have a dark color at the base of your nail fading into a lighter color at the tip, or vice versa. The key is to have fun and experiment until you find a combination that you love. For extra inspiration, check out our article on to see how these techniques can be used on different nail lengths.
- Orange to Black
- Purple to Green
- Blood Red to Black
- Add Glitter or Shimmer