Table of Contents
Ready to make a statement with your next manicure? Dive into the electrifying world of neon flower nail designs! This trend is taking the nail art scene by storm, blending the vibrancy of neon colors with the delicate beauty of floral patterns. Whether you're a DIY enthusiast or a salon regular, these eye-catching designs are surprisingly achievable. This guide will walk you through everything you need to know, from gathering the right tools and products to mastering essential techniques. We'll explore different styles, from simple daisies to intricate tropical blooms, all glowing with neon intensity. Plus, we'll share expert tips on how to keep your vibrant creations looking fresh and flawless for longer. Get ready to unleash your inner artist and create stunning neon flower nail designs that will turn heads and brighten up any occasion!
Unleashing the Trend: Why Neon Flower Nail Designs Are Blooming
Unleashing the Trend: Why Neon Flower Nail Designs Are Blooming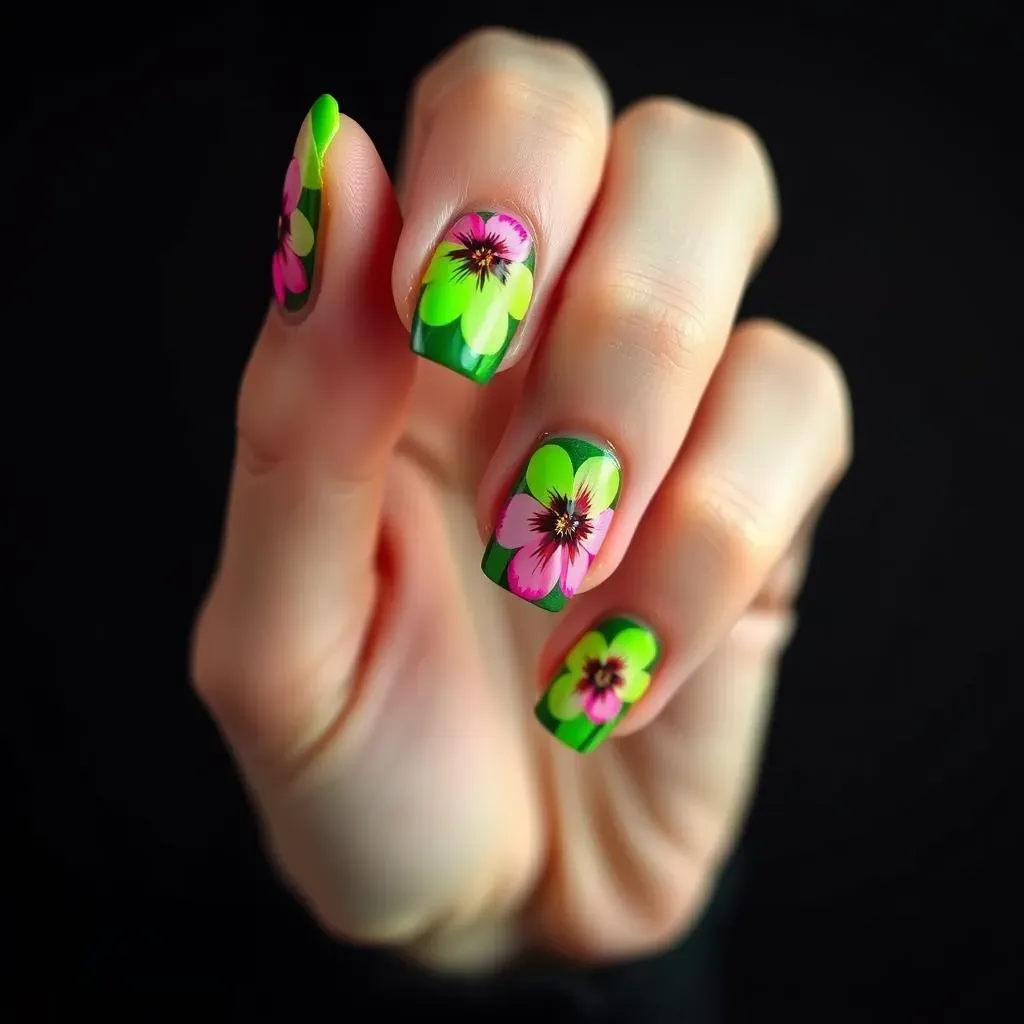
The Allure of Neon Florals
Neon flower nail designs aren't just a fleeting fad; they're a vibrant expression of personality and a bold fashion statement. Think about it: flowers are timeless, but neon? Neon screams modern, edgy, and fun. Marrying these two seemingly contrasting elements creates a unique aesthetic that captures attention and sparks joy. Whether you're hitting up a music festival, a summer party, or just want to add a pop of color to your everyday look, neon florals are the perfect way to express your individuality.
But what makes them so irresistible? It's the unexpected twist on a classic theme. It is like taking something familiar and injecting it with a shot of pure energy. Neon colors have this incredible ability to uplift your mood and make you feel instantly more playful and confident. When combined with the delicate beauty of flowers, the result is a mesmerizing blend of sweet and sassy, innocent and daring. It's a way to embrace your femininity while still showcasing your bold and adventurous side.
From Runways to Reality: Neon Florals Everywhere
You know a trend is legit when it starts popping up everywhere, from high-fashion runways to your favorite social media feeds. Neon flower nail designs have made their mark, gracing the hands of celebrities, influencers, and everyday trendsetters alike. What started as a niche look has quickly evolved into a mainstream obsession, proving its staying power and universal appeal. The reason behind this widespread adoption? It's simple: they're incredibly versatile and adaptable.
Whether you prefer minimalist chic or maximalist glam, there's a neon floral design to suit your style. From subtle neon accents on delicate floral patterns to full-blown neon blooms that dominate your nails, the possibilities are endless. This adaptability makes them accessible to everyone, regardless of their personal aesthetic or skill level. Plus, with the rise of DIY nail art tutorials and affordable at-home gel kits, it's easier than ever to recreate these stunning designs in the comfort of your own home.
The Psychology of Color: Why Neon Makes Us Happy
Ever wondered why neon colors evoke such a strong emotional response? It's all rooted in the psychology of color. Neon hues are inherently attention-grabbing, stimulating our senses and triggering feelings of excitement, energy, and optimism. They're like a visual shot of caffeine, instantly waking up our minds and making us feel more alert and engaged. This is why neon is often associated with fun, youthfulness, and a carefree spirit.
When you incorporate neon into your nail designs, you're not just adding color; you're injecting a dose of positivity and confidence into your everyday life. The simple act of looking down at your vibrant neon florals can instantly brighten your mood and put a spring in your step. It's a small but powerful way to practice self-care and express your unique personality. So, go ahead and embrace the power of neon – your nails (and your mood) will thank you for it!
Here's a quick breakdown of what neon shades can evoke:
- Neon Pink: Playfulness, femininity, and a touch of rebellion.
- Neon Green: Energy, freshness, and a connection to nature.
- Neon Yellow: Optimism, happiness, and a sunny disposition.
- Neon Orange: Enthusiasm, creativity, and a zest for life.
- Neon Blue: Confidence, tranquility, and a sense of adventure.
Essential Tools and Products for Creating Neon Flower Nails
Essential Tools and Products for Creating Neon Flower Nails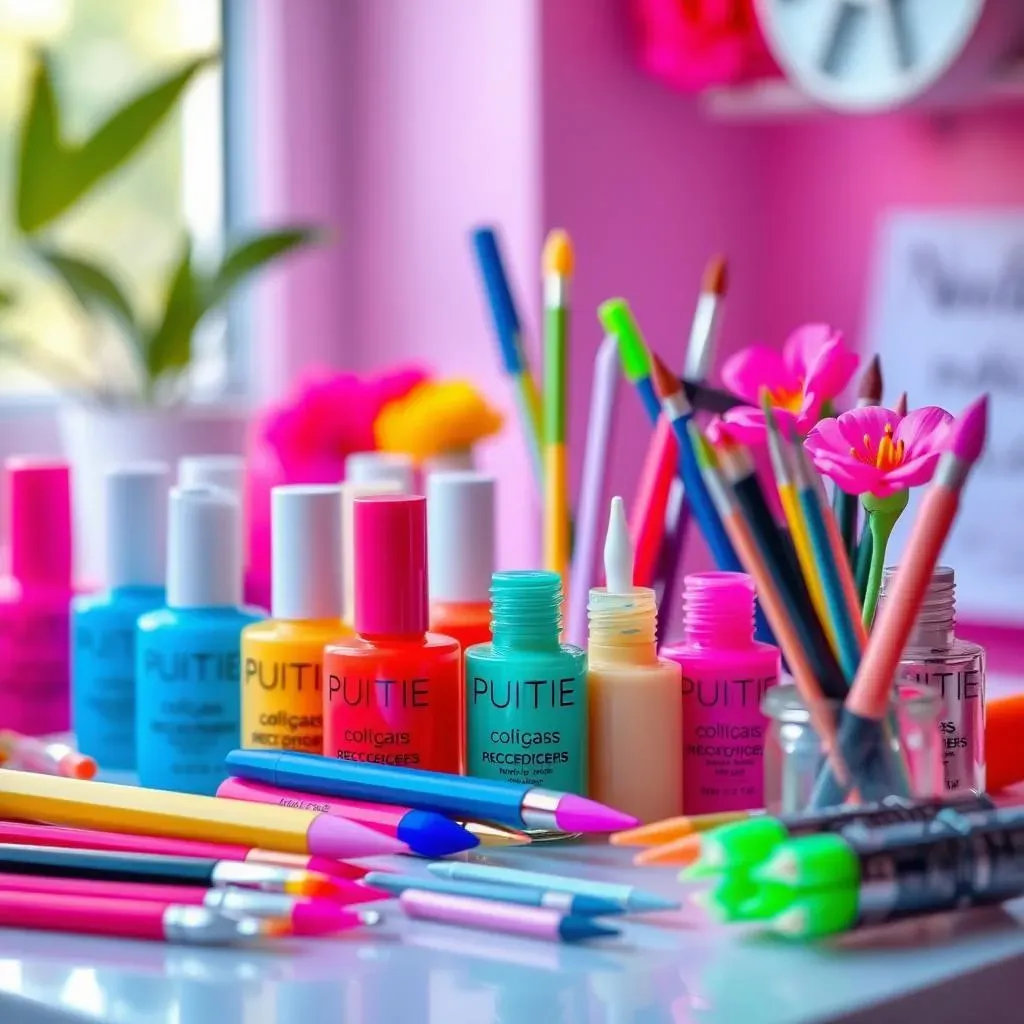
The Neon Polish Palette
First things first, you can't create neon flower nail designs without, well, neon polishes! Invest in a range of vibrant shades – think electric pink, lime green, blazing yellow, and shocking orange. Gel polishes tend to offer the most intense pigmentation and longevity, but regular polishes can work too, especially if you layer them over a white base coat to really make the colors pop. Don't be afraid to experiment with different finishes, like matte or shimmer, to add extra dimension to your designs.
Beyond the core neon shades, consider adding a few complementary colors to your collection. A crisp white for outlining petals, a deep black for creating contrast, and a shimmery silver or gold for adding accents can all elevate your neon floral nail art. Remember, the key is to have fun and let your creativity guide you!
Brushes, Dotting Tools, and More!
While steady hands are a plus, the right tools can make all the difference in achieving intricate neon flower nail designs. A set of fine-tipped nail art brushes is essential for creating delicate petals, leaves, and other details. Dotting tools, which come in various sizes, are perfect for creating uniform dots and adding texture to your floral arrangements. And don't forget a good quality top coat to seal in your design and protect it from chipping!
Other handy tools to have on hand include a nail art palette for mixing colors, a clean-up brush for tidying up edges, and nail art tape for creating crisp lines and geometric patterns. With the right arsenal of tools, you'll be able to tackle even the most complex neon floral nail art designs with confidence and precision.
Tool | Purpose | Why You Need It |
|---|---|---|
Fine-Tipped Nail Art Brushes | Creating petals, leaves, and intricate details. | Precision and control for detailed designs. |
Dotting Tools | Creating uniform dots and adding texture. | Easy way to add dimension and detail. |
Top Coat | Sealing in the design and protecting it from chipping. | Ensures longevity and shine. |
StepbyStep Guide to Painting Your Own Neon Flower Nail Designs
StepbyStep Guide to Painting Your Own Neon Flower Nail Designs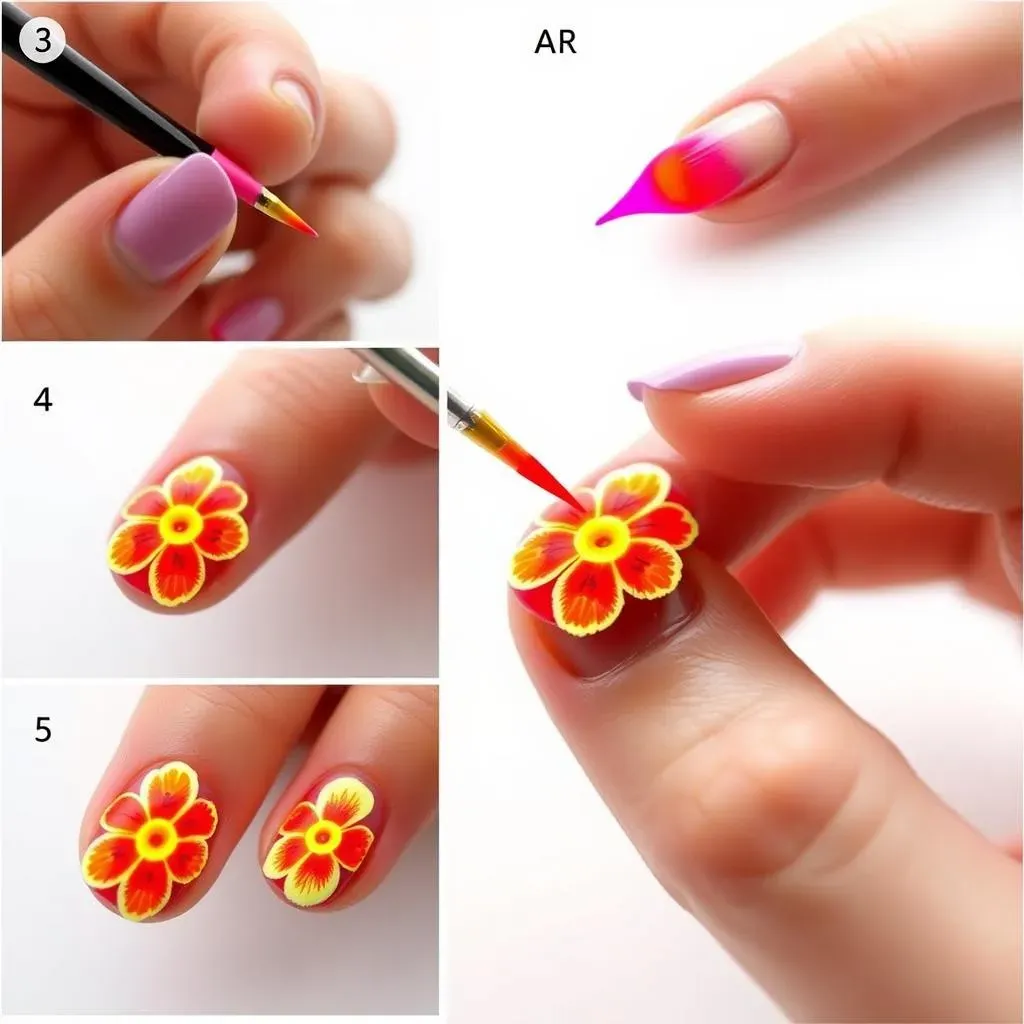
Prep is Key: Laying the Foundation
Before you even think about picking up a neon polish, proper nail prep is crucial. Start by gently pushing back your cuticles and shaping your nails to your desired length and form. Then, lightly buff the surface of your nails to create a smooth canvas for the polish to adhere to. This step is often skipped, but it's essential for preventing chipping and ensuring your design lasts longer. Finally, cleanse your nails with rubbing alcohol to remove any oils or residue – this will help the base coat grip better.
Apply a thin, even layer of base coat and let it dry completely. A good base coat not only protects your natural nails from staining but also provides a sticky surface for the neon polish to adhere to. For neon shades, I recommend using a white base coat. This will make the neon colors pop even more intensely. Let that white base fully dry before moving on to the next step.
Blooming Bright: Painting the Neon Flowers
Now for the fun part! Using your fine-tipped nail art brush, carefully paint your desired floral design onto your nails. Start with the larger petals, then add smaller details like leaves and stems. Don't worry if it's not perfect – practice makes perfect! If you're using regular polish, you may need to apply two or three thin coats to achieve full opacity. With gel polish, one or two coats should be sufficient. Remember to cure each layer under a UV/LED lamp if you're using gel polish.
Experiment with different floral patterns and color combinations to create your own unique neon masterpieces. Try simple daisies, elegant roses, or exotic tropical blooms – the possibilities are endless! You can also use dotting tools to create cute little flower centers or add texture to the petals. For an extra touch of sparkle, consider adding a few strategically placed glitter accents. Let your imagination run wild and have fun with it!
Sealing the Deal: Top Coat and Clean Up
Once your neon flower nail design is complete, it's time to seal it in with a good quality top coat. Apply a generous layer of top coat to protect your design from chipping and add a glossy shine. Be sure to wrap the top coat around the free edge of your nails to prevent shrinkage and extend the life of your manicure. If you're using gel polish, cure the top coat under a UV/LED lamp according to the manufacturer's instructions.
Finally, use a clean-up brush dipped in acetone to tidy up any edges or smudges around your nails. This will give your manicure a professional, polished look. You can also use a cotton swab dipped in acetone to remove any polish that may have gotten on your skin. And that's it – you're now the proud owner of a stunning set of neon flower nail designs! Show them off and get ready to receive tons of compliments.
Step | Description | Tips |
|---|---|---|
Nail Prep | Push back cuticles, shape nails, buff surface, cleanse with alcohol. | Don't skip this step! It's crucial for longevity. |
Base Coat | Apply a thin layer of base coat (white for neon). | Let it dry completely before moving on. |
Neon Flowers | Paint your floral design with fine-tipped brush. | Experiment with different patterns and colors. |
Top Coat | Apply generous layer of top coat and wrap the free edge. | Prevent chipping and add glossy shine. |
Clean Up | Tidy up edges or smudges with acetone and brush. | Professional, polished look. |
Exploring Different Neon Flower Nail Art Styles and Techniques
Exploring Different Neon Flower Nail Art Styles and Techniques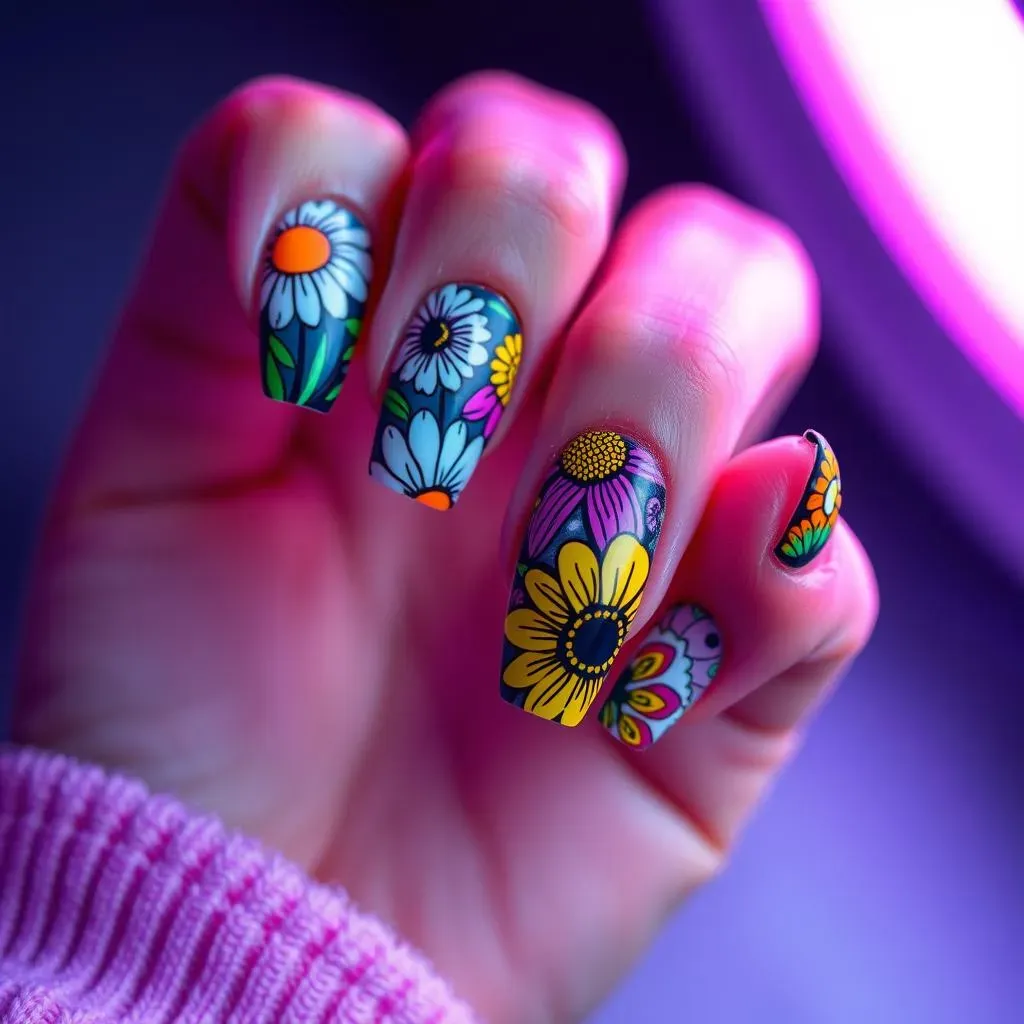
The Classic Neon Daisy
Let's start with a classic! The neon daisy is a simple yet striking design that's perfect for beginners. Using a dotting tool, create a circle of neon-colored dots around a contrasting center (think white petals with a yellow center, or vice versa). You can vary the size and spacing of the dots to create different effects. For an extra pop, add a touch of glitter to the center of the daisy. This design is quick, easy, and always a crowd-pleaser!
Want to elevate your neon daisy? Try creating a gradient effect by using different shades of neon for the petals, blending from a lighter to a darker hue. You can also add some delicate line work with a fine-tipped brush to define the petals and create more dimension. Or, scatter a few tiny neon dots around the daisy to mimic a field of wildflowers. The possibilities are endless!
Tropical Neon Blooms
Dreaming of a tropical getaway? Bring the tropics to your fingertips with vibrant neon floral nail designs inspired by exotic blooms. Think hibiscus flowers in shocking pink and orange, or delicate orchids in electric purple and blue. These designs can be a bit more intricate, but the results are well worth the effort. Use fine-tipped brushes to create the intricate petal shapes and add details like stamens and pistils.
To really capture the essence of the tropics, incorporate lush green leaves and vines into your design. You can also add some playful elements like tiny neon pineapples or flamingos. For a touch of sparkle, consider using iridescent or holographic polishes to mimic the shimmer of tropical waters. And don't forget a glossy top coat to protect your masterpiece and enhance the vibrancy of the colors!
Geometric Neon Florals
For a more modern and edgy take on neon flower nail designs, try incorporating geometric elements into your floral patterns. Think sharp lines, bold shapes, and unexpected color combinations. This style is all about creating a visual contrast between the organic curves of the flowers and the structured angles of the geometric designs.
Use nail art tape to create clean lines and geometric shapes, then fill them in with vibrant neon colors. You can also use stencils or freehand paint geometric patterns around your floral designs. Experiment with different textures and finishes to add extra dimension and interest. For example, try combining matte neon flowers with glossy geometric accents, or vice versa. This style is perfect for those who want to make a bold and unique statement with their nails.
Style | Description | Difficulty |
|---|---|---|
Classic Neon Daisy | Simple dots around a center. | Beginner |
Tropical Neon Blooms | Hibiscus, orchids, exotic flowers. | Intermediate |
Geometric Neon Florals | Flowers with lines and shapes. | Advanced |
Caring for Your Neon Flower Nail Designs: Tips for Longevity
Caring for Your Neon Flower Nail Designs: Tips for Longevity
Hydration is Key: Moisturize, Moisturize, Moisturize!
Just like your skin, your nails need hydration to stay healthy and strong. Regularly moisturizing your hands and cuticles is crucial for preventing your neon flower nail designs from chipping or peeling prematurely. Use a high-quality cuticle oil or hand cream several times a day, especially after washing your hands. Pay extra attention to your cuticles, as they're the first line of defense against damage. Well-hydrated nails are more flexible and less prone to breakage, which means your vibrant floral art will last longer.
Think of it like watering a garden – without enough moisture, the flowers will wilt and fade. The same principle applies to your nails! Keeping them properly hydrated will ensure that your neon colors stay vibrant and your floral designs stay intact. Plus, healthy cuticles make your nails look instantly more polished and refined, enhancing the overall look of your manicure.
Handle with Care: Protect Your Nails from Damage
Our hands go through a lot in a day, from washing dishes to typing on a keyboard. All of these activities can take a toll on your nails, causing them to chip, crack, or break. To protect your neon flower nail designs, wear gloves when doing household chores, gardening, or anything that involves prolonged exposure to water or harsh chemicals. Avoid using your nails as tools to open packages or scrape off stickers – this can easily damage the polish and the underlying nail structure.
Also, be mindful of activities that can cause friction or impact on your nails. For example, if you're a frequent gym-goer, consider wearing gloves to protect your nails from the impact of weights. And if you're prone to nail-biting, try to break the habit – it's one of the biggest enemies of a beautiful manicure! By taking these simple precautions, you can significantly extend the life of your neon flower nail designs and keep them looking flawless for longer.
The Top Coat Touch-Up: Maintain the Shine and Seal
Even with the best care, your top coat can start to wear down after a few days, leaving your neon flower nail designs vulnerable to chipping and fading. To combat this, apply a fresh layer of top coat every two to three days. This will not only refresh the shine but also create an extra layer of protection against damage. Be sure to wrap the top coat around the free edge of your nails to prevent shrinkage and seal the design completely.
If you notice any minor chips or imperfections, don't wait for them to get worse. Use a fine-tipped brush to carefully touch up the damaged area with the corresponding neon polish, then seal it with a top coat. This will prevent the chip from spreading and keep your manicure looking its best. With a little bit of maintenance, you can keep your neon flower nail designs looking vibrant and flawless for weeks!
Tip | Description | Why It Works |
|---|---|---|
Moisturize Regularly | Apply cuticle oil/hand cream daily. | Prevents chipping and keeps nails flexible. |
Wear Gloves | Protect nails from water and chemicals. | Reduces damage from daily activities. |
Touch Up Top Coat | Apply a fresh layer every 2-3 days. | Maintains shine and provides extra protection. |
Blooming Brilliantly: Embrace the Neon Flower Nail Design Trend
From simple daisies to elaborate tropical blooms, neon flower nail designs offer a fantastic way to express your creativity and add a pop of color to your style. By following the tips and techniques outlined in this guide, you can confidently create stunning nail art that reflects your personality. Don't be afraid to experiment with different color combinations, floral arrangements, and embellishments to make each design uniquely yours. So, go ahead, embrace the neon, celebrate the flowers, and let your fingertips bloom with vibrant artistry!