Table of Contents
Ready to add some serious sparkle to your fingertips? If you're obsessed with the allure of "red and glitter nail designs," then you've landed in the right place. This isn't just about slapping on some polish; it’s about creating miniature works of art that catch the light and turn heads. Whether you're a seasoned nail pro or just starting your DIY journey, get ready to explore a world where ruby reds meet dazzling glitter. We'll kick things off by checking out the different shades of red and glitter finishes, from deep crimsons to shimmering sparkles. Then, we'll get into the fun part: tons of creative ideas for every occasion, whether it's a holiday party or a casual night out. Finally, we'll give you the lowdown on how to get those salon-worthy red glitter nails right at home. So, grab your favorite polish, get comfy, and let’s dive into the sparkly side of nail design!
All About Red Glitter: Exploring Different Shades and Finishes
All About Red Glitter: Exploring Different Shades and Finishes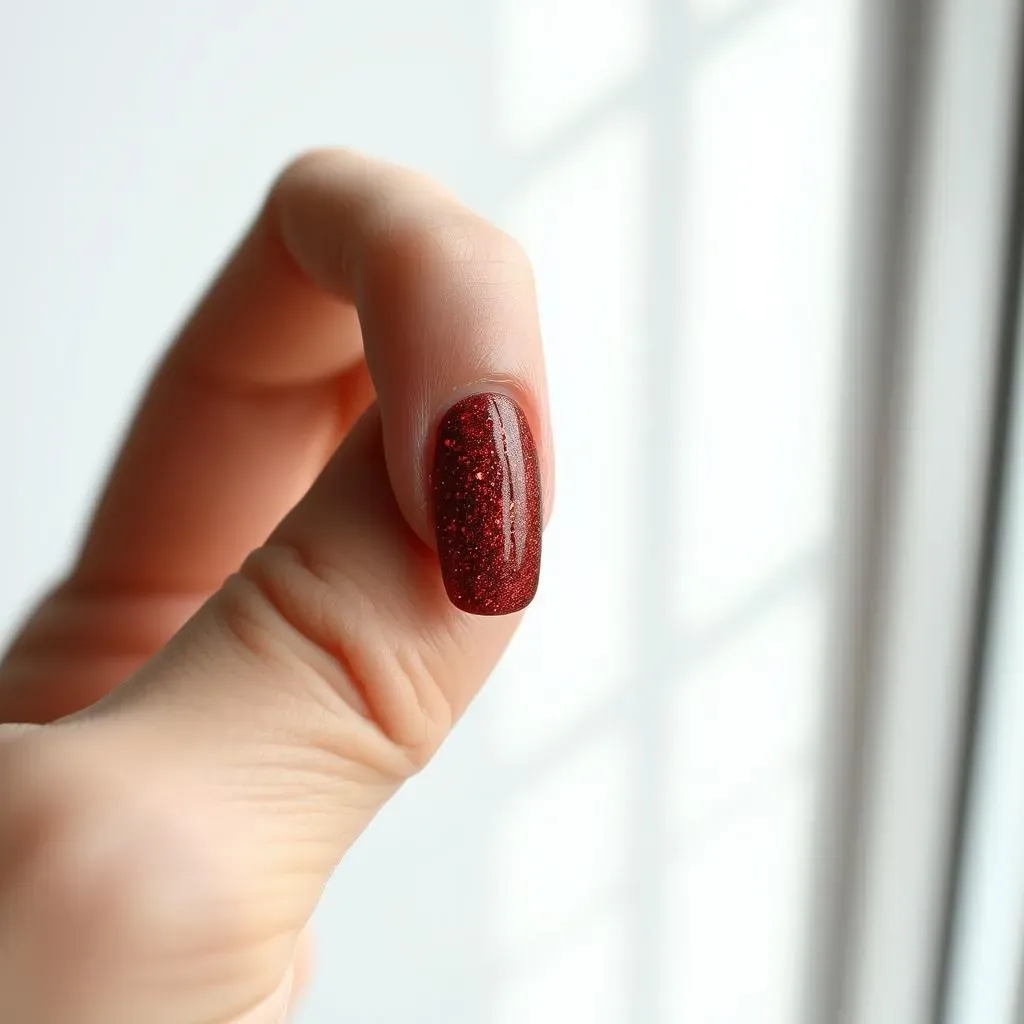
The Spectrum of Reds
Okay, so when we say "red," we're not just talking about one shade, right? It's like opening a box of crayons, and suddenly you've got a whole family of reds to play with. Think about it: there's the classic, bold cherry red, the kind that screams "look at me!" Then, you've got deeper, moodier burgundies, almost like a glass of rich red wine. And don't even get me started on the fiery, orange-tinged reds that practically glow. Each one brings a different vibe, a different energy. So, when you're choosing your red for your glitter nails, it's not just about picking a color; it's about picking a mood.
And the finish? That's a whole other level of fun. You can have a creamy, opaque red that's super smooth, or a jelly-like finish that's a bit more transparent. It's the base for all that sparkle, so choose wisely! I once tried a red that was so glossy, it looked wet even after it was dry. It was wild, but I loved it. It's all about experimenting to see what works for you. Don't be afraid to mix and match different reds and finishes to find your perfect combo.
Red Shade | Description | Best For |
|---|---|---|
Cherry Red | Classic, bright, and bold. | Making a statement, summer looks |
Burgundy | Deep, rich, and sophisticated. | Autumn, winter, elegant events |
Fiery Red | Orange-toned, vibrant, and energetic. | Parties, festivals, bold looks |
Crimson | Slightly purple tone, luxurious and mysterious. | Evening wear, sophisticated styles |
Glitter, Glitter Everywhere
Now, let's talk glitter—the real star of the show! Glitter isn't just one thing either. We're talking about chunky glitter that looks like tiny disco balls, fine glitter that's almost like a shimmer, and holographic glitter that shifts colors in the light. It's a glitter buffet, and we're invited! I've used chunky glitter that felt like it was going to take over my entire hand, and then I've used fine glitter that gave the most subtle, elegant sparkle. It's amazing how different they can look.
The way the glitter catches the light is also a huge deal. Some glitters have a really intense shine, others have a softer, more subdued sparkle. You can even get glitter with different shapes, like stars or hearts, if you're feeling extra playful. It really is all about picking the right glitter to go with your red and your mood. And here's a pro tip: don't be afraid to layer different glitters to get a super unique look. It's like mixing paint, but with sparkles, and who doesn't love that?
- Chunky Glitter: Bold, eye-catching, and great for a statement.
- Fine Glitter: Subtle, elegant, and perfect for everyday sparkle.
- Holographic Glitter: Color-shifting, mesmerizing, and super fun.
- Shaped Glitter: Playful, unique, and perfect for themed looks.
Creative Red Glitter Nail Art Ideas for Every Occasion
Creative Red Glitter Nail Art Ideas for Every Occasion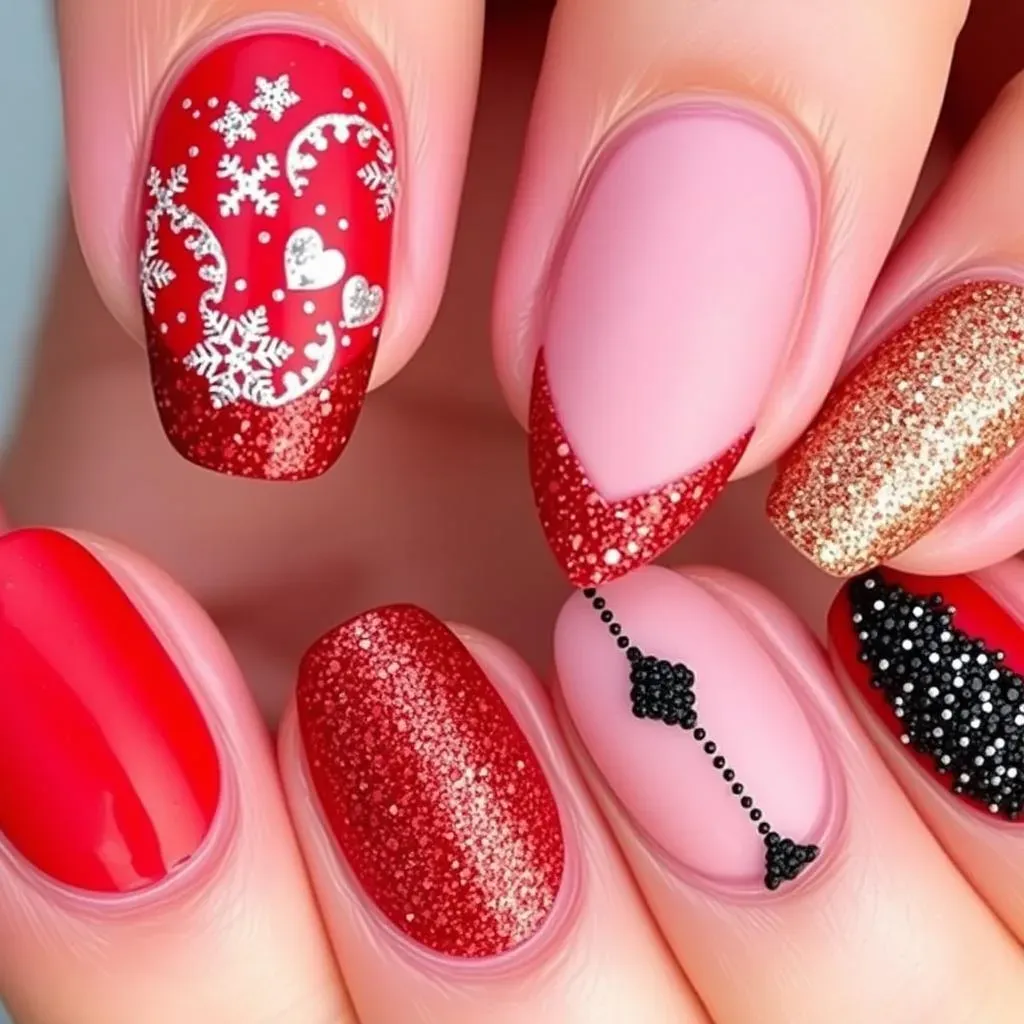
Alright, so you've got your reds and your glitters, now let's get creative! When it comes to "red and glitter nail designs," the possibilities are pretty much endless. For a holiday party, you could do a classic red base with a dusting of silver glitter, almost like a sparkly snowfall on your nails. Or, for something more romantic, picture a deep red with a heart-shaped glitter accent at the tip. I've even seen some folks get super detailed and do full-on winter scenes with tiny snowflakes and glittery snowmen – it's like having a tiny Christmas village on your hands! And don't think that red and glitter are just for special occasions. A simple red with a subtle gold glitter ombre is perfect for everyday wear. It's all about finding that balance between festive and functional.
And it's not just about the glitter being on top, you know? I've seen some super cool designs where the glitter is layered under a clear coat, creating this 3D effect. It's like the sparkle is trapped in a little bubble, and it looks so mesmerizing. Or you can try the "velvet" look, where you use a matte red and then add a glitter accent that looks like velvet in the light. I once did a design like that for a wedding, and it was a total showstopper. The key is to play around with different textures and placements. Don't be afraid to try something unexpected, like a geometric design with glitter stripes or mixing different glitter colors for a rainbow effect. Seriously, your nails are your canvas; go wild!
Occasion | Design Idea | Description |
|---|---|---|
Holiday Party | Snowfall Glitter | Red base with silver glitter dusting. |
Romantic Date | Heart Glitter Tip | Deep red with heart-shaped glitter accent. |
Everyday Wear | Gold Glitter Ombre | Simple red with gold glitter fade. |
Wedding | Velvet Glitter | Matte red with glitter velvet accent. |
Let's talk about some specific ideas. If you're into something bold, try a red glitter gradient, where the glitter is concentrated at the tips and fades towards the base of your nail. It's a classic look that's always in style. Or, for something a bit more edgy, you could use a matte red base and then add some black glitter accents. It's like a rock-and-roll version of red glitter nails! And for those who love a bit of a vintage vibe, a red french manicure with a glittery tip is always a winner. It's sophisticated, elegant, and just a little bit sparkly. The point is, you don't have to stick to the same old designs. Red and glitter are incredibly versatile, so feel free to experiment and find what makes you feel awesome. I once mixed red glitter with some blue and purple, and it looked like a galaxy on my nails! It was totally unexpected but became one of my favorite designs.
And just a quick note, don't forget that you can use nail art tools to get even more creative. Things like dotting tools, striping brushes, and even small pieces of tape can help you create patterns and designs that would be almost impossible to do freehand. I've used tape to create perfect geometric lines with glitter, and the effect is always super sharp. Don't worry if your first few attempts aren't perfect. Nail art is all about practice and having fun. So, grab your tools, your favorite reds and glitters, and let's get those creative juices flowing!
- Red Glitter Gradient: Glitter concentrated at the tips, fading towards the base.
- Matte Red with Black Glitter: Edgy and bold, perfect for a rock-and-roll vibe.
- Glitter French Manicure: Classic red with a glittery tip for a vintage look.
- Geometric Glitter: Use tape to create sharp lines and patterns with glitter.
How to Achieve the Perfect Red Glitter Nail Look at Home
How to Achieve the Perfect Red Glitter Nail Look at Home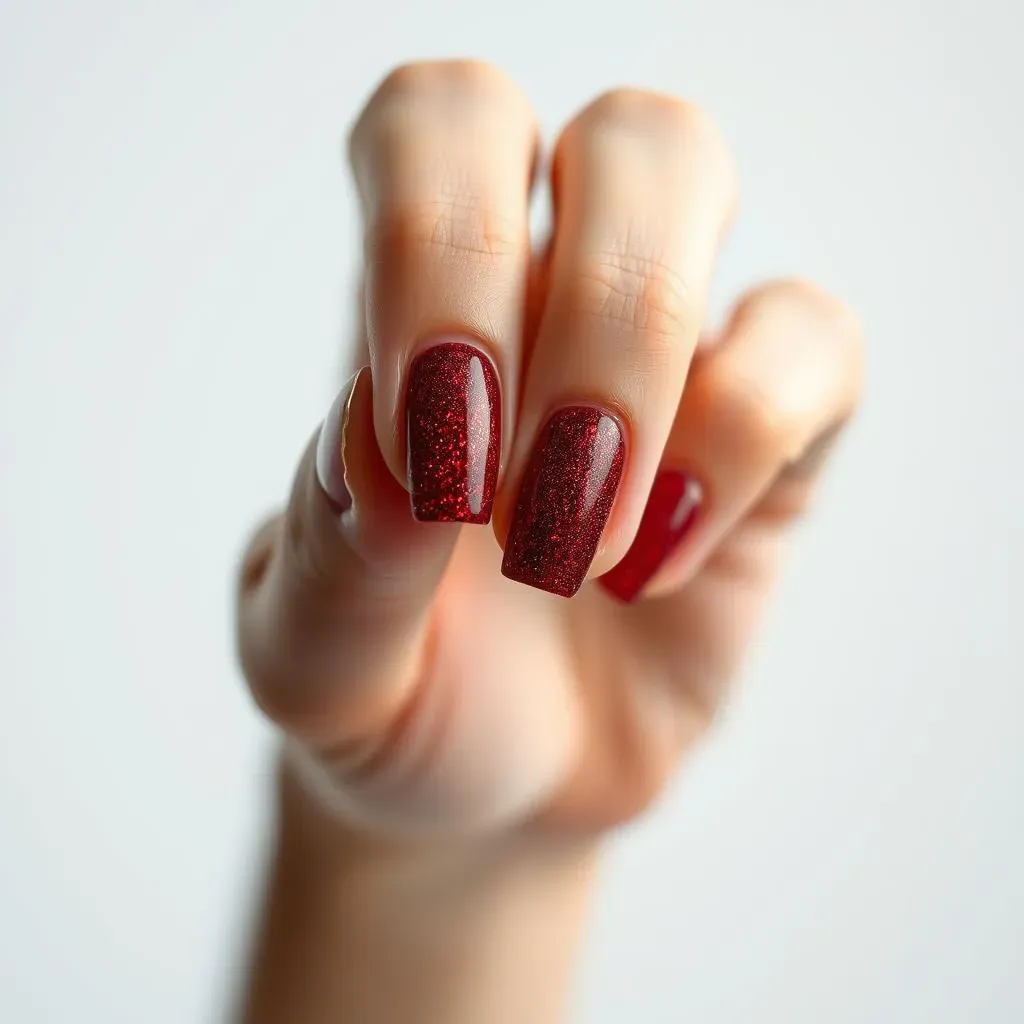
Okay, so you're ready to bring the salon magic home? Getting those perfect "red and glitter nail designs" yourself is totally doable, and honestly, it's a lot of fun. First things first, you've gotta start with clean, prepped nails. I mean, nobody wants to put gorgeous polish on a messy base, right? So, grab your nail file, a cuticle pusher, and some nail polish remover. Shape your nails, gently push back those cuticles, and clean off any old polish. Trust me, this step is key for a smooth, even finish. It’s like prepping a canvas before you paint, you wouldn't skip it, so don't skip your nails.
Next, it's all about the base coat. This is the unsung hero of any good manicure. It helps your polish stick better, prevents staining, and gives you a nice, even surface to work with. Apply a thin coat and let it dry completely. Then, it's red polish time! Apply one thin layer of your chosen red, let it dry, and then do a second. Two thin coats are way better than one thick gloopy coat, trust me on this. It's all about patience, and it’s worth it for the final result. I remember when I first started doing my nails, I would rush this part, and my polish would always end up looking a mess. So, take a deep breath, relax, and let the layers dry properly. You'll thank me later.
Step | Action | Why it's Important |
|---|---|---|
Prep Nails | File, push cuticles, clean | Ensures a smooth, clean base. |
Base Coat | Apply a thin layer | Helps polish stick and prevents staining. |
Red Polish | Apply two thin coats | Provides even color and avoids clumps. |
Once your red polish is completely dry, it's time to bring on the glitter! There are a few ways to do this, depending on the look you're going for. If you want a light dusting of sparkle, you can use a glitter polish with a clear base. Apply a thin layer over your red, and you're good to go. For a more intense glitter effect, you can try using a makeup sponge to dab on loose glitter. This will give you a concentrated, super sparkly look. Just make sure to do this over a piece of paper or something, because glitter gets everywhere! I once tried to do loose glitter on my bed, and I was finding sparkles for weeks. Lesson learned: be prepared for the glitter explosion.
And here's a pro tip: if you're using chunky glitter, use a toothpick or a small brush to place each piece of glitter exactly where you want it. It takes a bit more time, but it gives you a lot more control. Finally, once you're happy with your glitter placement, seal everything in with a top coat. This will protect your design and give it a nice, glossy finish. And don't forget to let your top coat dry completely too. Seriously, the waiting is the hardest part, but it’s crucial for a long lasting manicure. So, grab a book, watch a movie, and let your nails dry. You've earned it!
- Light Dusting: Use a glitter polish with a clear base.
- Intense Sparkle: Dab loose glitter with a makeup sponge.
- Chunky Glitter: Place each piece with a toothpick for control.
- Seal with Top Coat: Protect your design and add gloss.