Table of Contents
Ready to add some sparkle to your fingertips without spending hours at the salon? You're in the right place! This guide is all about simple nail jewel designs that anyone can create at home. Forget complicated techniques and expensive tools. We're diving into easy-to-achieve looks that will make your nails pop, whether you're heading to a party or just want to jazz up your everyday style.
Effortless Elegance: Exploring Simple Nail Jewel Designs
Effortless Elegance: Exploring Simple Nail Jewel Designs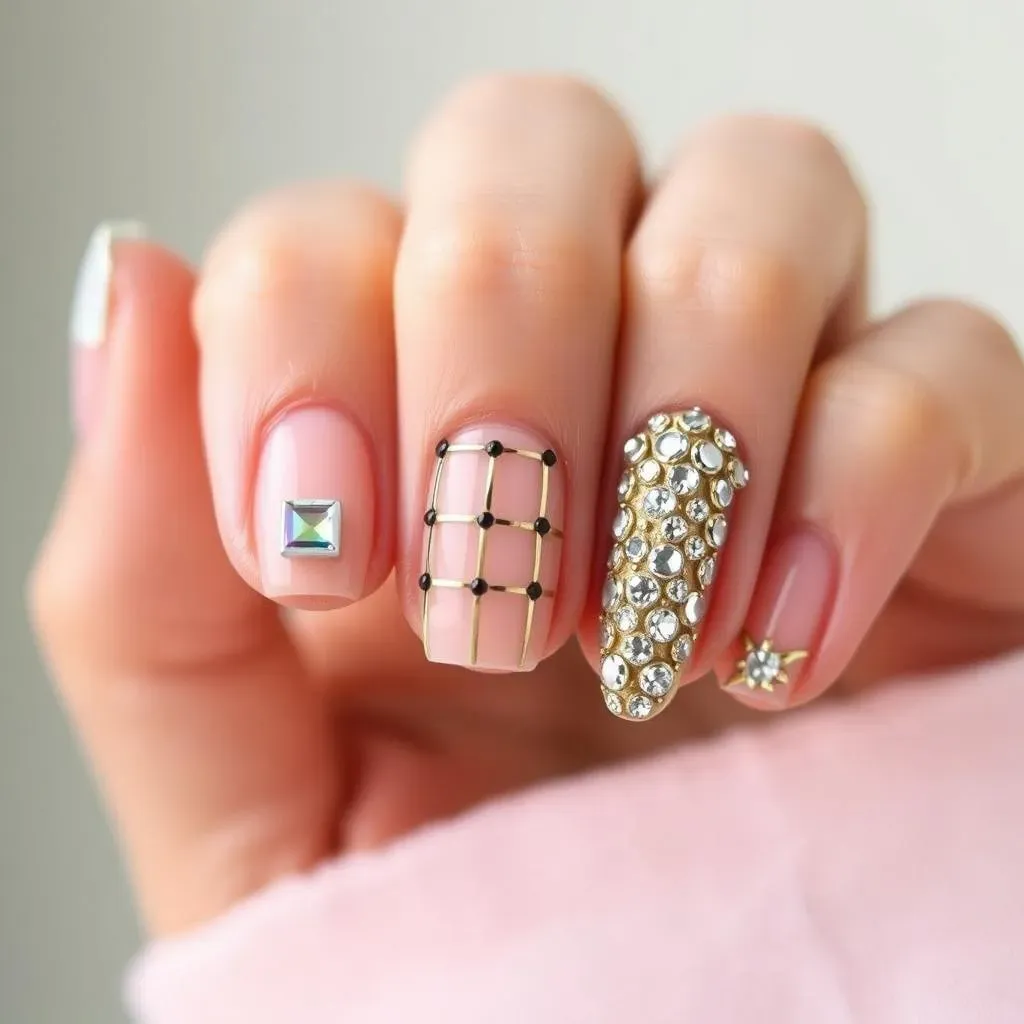
Subtle Sparkle: Less is More
When it comes to simple nail jewel designs, sometimes less really is more. Think tiny rhinestones clustered at the base of your nail, or a single, strategically placed gem near the cuticle. It's about adding a touch of glamour without overwhelming your nails. I've seen some amazing looks with just a few iridescent gems on a nude polish – super chic and understated.
One of my favorite techniques is to use a dotting tool to apply a tiny dab of nail glue, then carefully place the jewel with tweezers. This gives you precise control and prevents the glue from spreading. The result is a clean, polished look that's perfect for any occasion. A classic French manicure with a tiny gem at the tip? Timeless!
Geometric Glam: Lines and Angles
Geometric patterns are super trendy right now, and they translate beautifully to nail art. Use striping tape to create clean lines, then add small jewels along those lines for a modern, edgy vibe. Think minimalist triangles, squares, or even just a simple vertical stripe down the center of your nail. It’s a great way to elevate a basic manicure without needing advanced skills.
I once saw a design that used thin gold striping tape to create a grid pattern, with tiny black rhinestones placed at each intersection. It looked incredibly sophisticated and was surprisingly easy to recreate. You can also play with negative space by leaving some areas of your nail unpolished. It adds an extra layer of visual interest and makes the jewels stand out even more.
Accent Nail Magic: Jewel Focus
If you're hesitant to commit to a full set of jeweled nails, try focusing on just one accent nail per hand. This allows you to experiment with bolder designs without feeling overwhelmed. I often use my ring finger as the accent nail and create a mini masterpiece with a cluster of different sized jewels. It’s a fun way to showcase your creativity and add a pop of personality to your look.
For example, you could paint all your nails a soft pastel color, then create a jeweled gradient effect on your accent nail, starting with larger stones at the base and gradually fading to smaller ones towards the tip. Or, you could create a focal point with a single, statement jewel in the center of your accent nail. The possibilities are endless!
MustHave Tools and Jewels for Easy Nail Art
MustHave Tools and Jewels for Easy Nail Art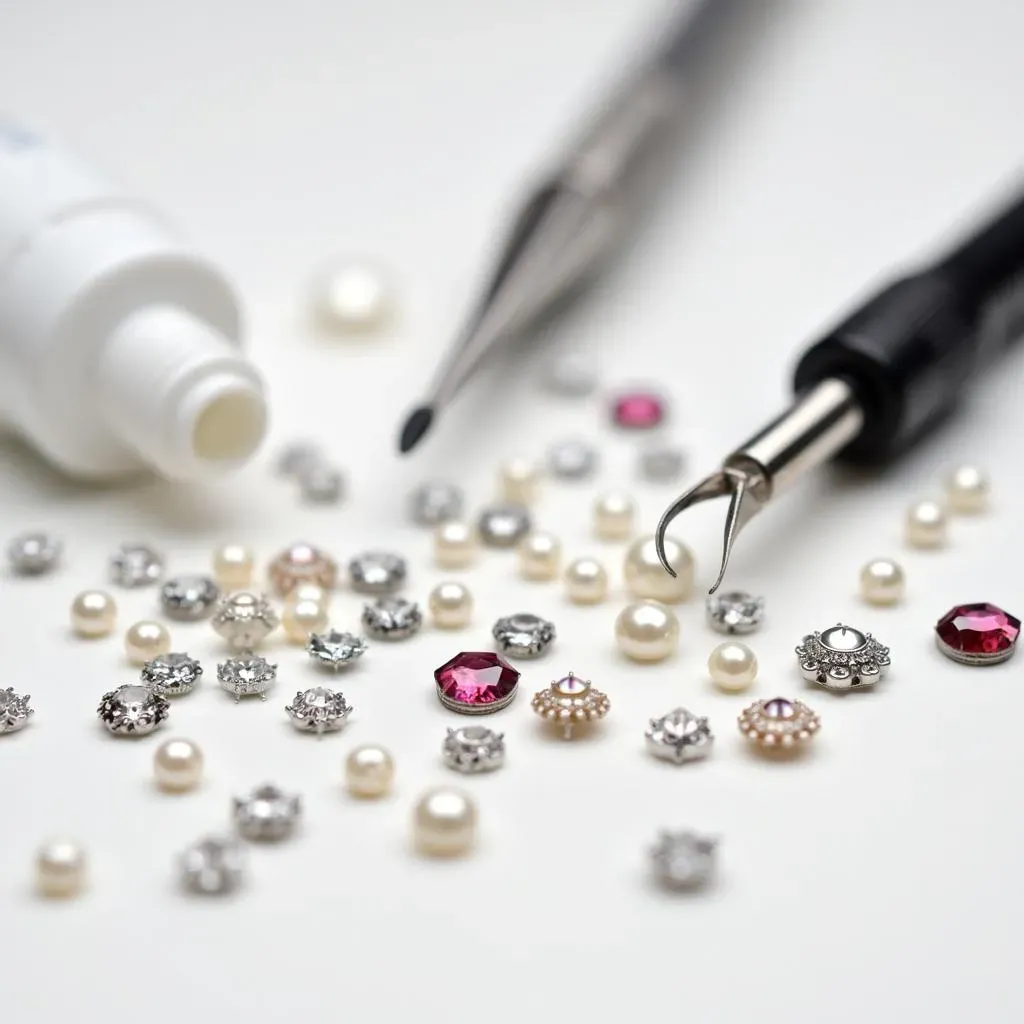
The Essential Toolkit: Setting Yourself Up for Success
so you're ready to dive into must-have tools and jewels for easy nail art? Awesome! First, let's talk tools. You don't need a ton of fancy stuff, but a few key items will make your life so much easier. Think of it as building your nail art arsenal. I always start with a good base coat, your favorite nail polish colors, and a reliable top coat. These are non-negotiable. Then, grab a dotting tool – it’s a game-changer for precise jewel placement. Trust me, trying to pick up tiny rhinestones with your fingers is a recipe for disaster. A pair of tweezers (specifically designed for nail art if possible) is also super helpful. And don't forget nail glue! You'll want something strong enough to hold the jewels in place, but not so harsh that it damages your nails.
Now, for the jewels! This is where the fun really begins. Start with a variety of sizes and shapes. Rhinestones are a classic, of course, but don’t be afraid to experiment with pearls, studs, and even tiny charms. I love having a mix of colors on hand so I can create different looks. And remember, quality matters! Cheaper jewels can sometimes look dull or lose their sparkle quickly. It’s worth investing in a few higher-quality pieces that will really make your designs shine. Also, a clean-up brush dipped in acetone is a must for tidying up any stray polish or glue. Keeps everything looking sharp!
Tool/Jewel | Why You Need It | My Favorite Brands |
|---|---|---|
Dotting Tool | Precise jewel placement | Beetles Nail Art Dotting Pen |
Nail Art Tweezers | Picking up tiny jewels | Tweezerman Slant Tweezers |
Nail Glue | Securing jewels | NYK1 Nail Bond |
Rhinestones (various sizes) | Classic sparkle | Swarovski Crystals |
StepbyStep Guide to Creating Stunning Simple Nail Jewel Designs
StepbyStep Guide to Creating Stunning Simple Nail Jewel Designs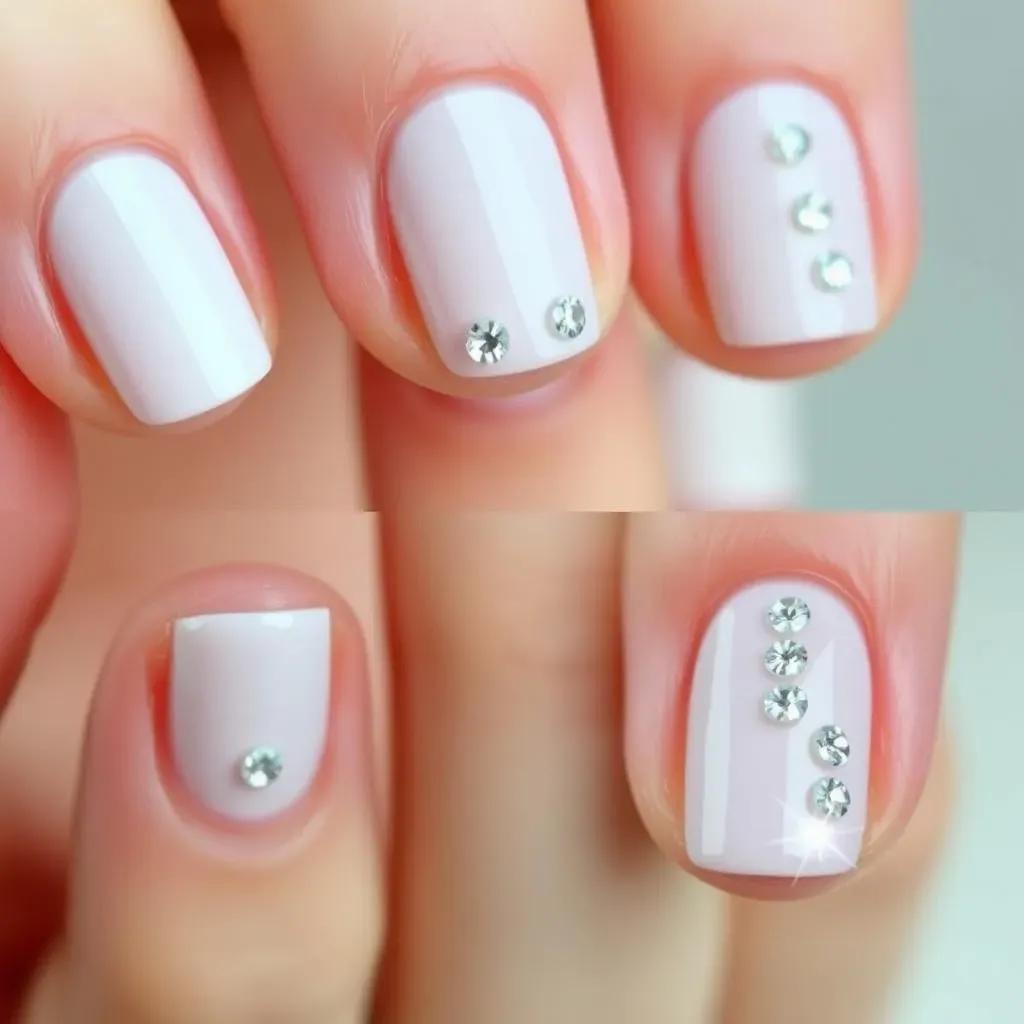
Prep is Key: The Foundation for Fabulous Nails
Alright, let's get down to business! Before you even think about sticking on those sparkly gems, nail prep is crucial for step-by-step guide to creating stunning simple nail jewel designs. Trust me, a little bit of prep goes a long way in ensuring your design lasts and looks its best. Start by removing any old polish with a gentle, acetone-free remover. Then, shape your nails to your desired look – whether you're into square, oval, or almond shapes. Push back your cuticles gently with a cuticle pusher, and trim any hangnails. This creates a clean canvas for your nail art.
Next, lightly buff the surface of your nails with a fine-grit buffer. This helps to create a slightly rough texture that the base coat can grip onto. Apply a thin layer of base coat and let it dry completely. This protects your natural nails from staining and provides a smooth surface for your polish. Now you're ready to apply your chosen nail polish color. I usually recommend two thin coats for the best coverage. Make sure each coat is completely dry before moving on to the next step. Patience is key, my friend!
Jewel Placement: Precision and Perfection
Now for the fun part: jewel placement! Grab your dotting tool or tweezers – whichever you feel more comfortable with. Place a tiny drop of nail glue where you want to position your first jewel. Gently pick up the jewel with your tool and carefully place it onto the glue. Press down lightly to secure it. Repeat this process for all your jewels, working one nail at a time. Remember, precision is key here. Take your time and don't be afraid to reposition the jewels until you're happy with the arrangement. A little tip: if you're using different sizes of jewels, start with the larger ones first and then fill in the gaps with the smaller ones.
Once all your jewels are in place and the glue is completely dry, apply a generous layer of top coat. Make sure to encapsulate the jewels completely to prevent them from snagging or falling off. You might need to apply two coats of top coat for extra protection. Let the top coat dry completely before doing anything with your hands. I know it's tempting to touch them, but resist the urge! And that's it! You've just created your own stunning, simple nail jewel design. Now go show off those sparkly digits!
Caring for Your JewelAdorned Nails and Making the Design Last
Caring for Your JewelAdorned Nails and Making the Design Last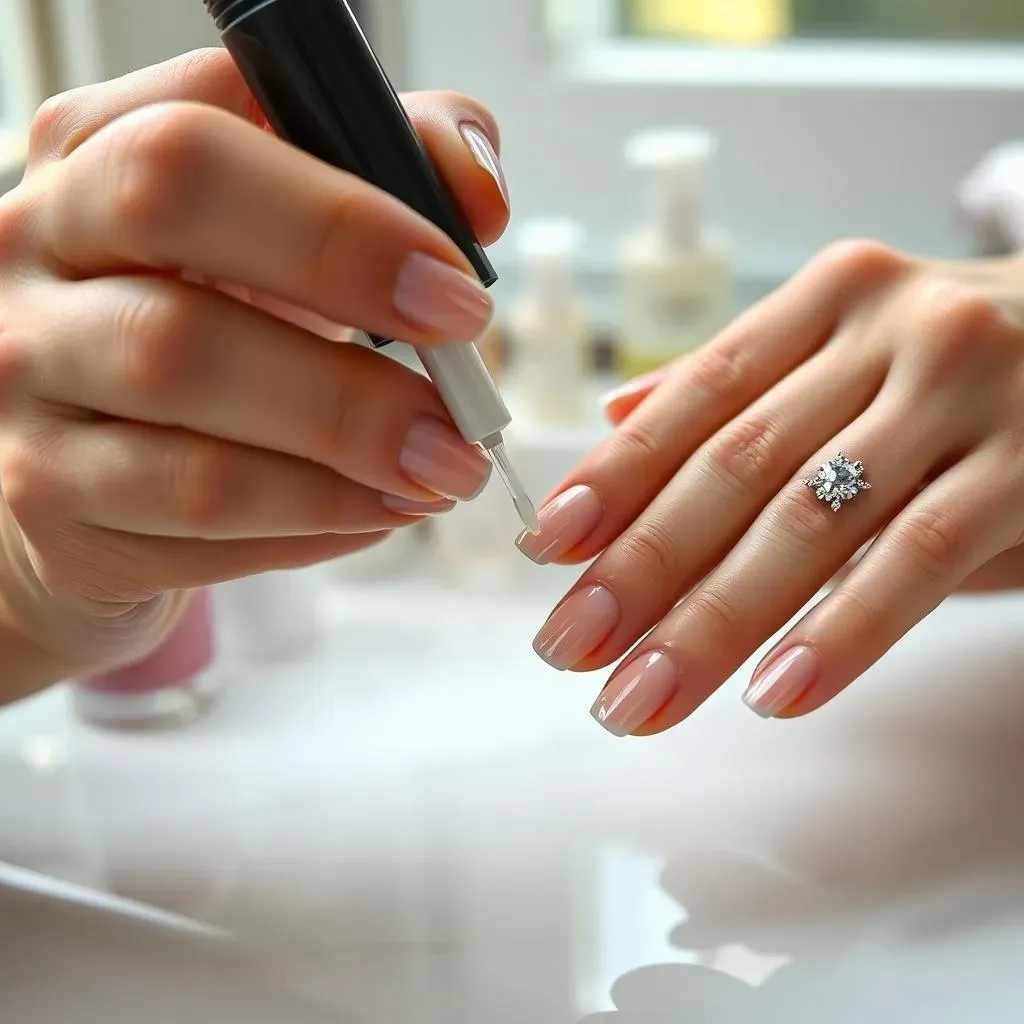
Handle with Care: Everyday Precautions
so you've got these amazing simple nail jewel designs, and you want them to last, right? First things first: be gentle! Think of your nails as precious little works of art (because they are!). Avoid using them as tools. I know it's tempting to scrape off a sticker or open a can with your nails, but resist! This is a surefire way to chip your polish and dislodge those beautiful jewels. When you're doing dishes or any kind of cleaning, wear gloves. Harsh chemicals can dull the sparkle of your jewels and weaken the glue.
Also, be mindful of activities that could potentially damage your nails. Typing for long periods, gardening, or even just rummaging through your purse can put stress on your manicure. Take breaks, wear gloves when necessary, and try to be aware of how you're using your hands throughout the day. It sounds like a lot, but trust me, it becomes second nature after a while. And the payoff – longer-lasting, gorgeous nails – is totally worth it. I always tell my friends, "Treat your nails like tiny treasures!"
Activity | Precaution |
|---|---|
Washing Dishes/Cleaning | Wear gloves |
Typing | Take breaks, use a light touch |
Gardening | Wear gloves |
Top Coat Touch-Ups: Extending the Life of Your Manicure
One of the best ways to keep your jewel-adorned nails looking fresh is to apply a top coat every other day. This helps to seal in the jewels and prevent them from lifting or snagging. I like to use a quick-drying top coat so I don't have to wait forever for my nails to dry. When you're applying the top coat, make sure to brush it over the entire surface of the nail, including the edges and around the jewels. This creates a protective barrier that will help to keep everything in place. If you notice any jewels that are starting to come loose, you can use a tiny drop of nail glue to reattach them.
Also, pay attention to any chips or cracks in your polish. These can weaken the overall structure of your manicure and make it more prone to damage. If you spot a chip, touch it up immediately with a matching polish color. A little bit of maintenance can go a long way in extending the life of your beautiful nail art. Think of it as giving your nails a little TLC – they'll thank you for it!
Conclusion: Shine Bright with Simple Nail Jewel Designs
And there you have it – a complete guide to creating stunning, simple nail jewel designs right at home! From selecting the perfect jewels to mastering easy application techniques and ensuring your designs last, you’re now equipped to add a touch of sparkle to any occasion. Remember, nail art is all about expressing your personal style, so don't be afraid to experiment and have fun with different colors, jewel placements, and design ideas. So go ahead, unleash your inner nail artist and let your fingertips shine!