Table of Contents
Ready to transform your nails into miniature masterpieces? This article is your passport to the exciting world of cute and easy nail art designs! Whether you're a complete beginner or just looking to refresh your nail game, we've got you covered. We'll walk you through simple techniques that anyone can master, even with shaky hands. From perfectly placed dots to elegant stripes and beyond, you'll discover a range of cute and easy nail art designs perfect for any occasion – from a casual weekend brunch to a special night out. Forget expensive salon appointments; we'll show you how to create professional-looking manicures at home, saving you time and money. Get ready to explore a collection of inspiring designs and step-by-step tutorials that will unleash your inner nail artist. Let's dive in and discover the joy of creating your own unique and adorable nail art!
Mastering Cute and Easy Nail Art Designs at Home
Mastering Cute and Easy Nail Art Designs at Home
Getting Started: Essential Tools and Prep
Before you unleash your inner artist, gather your supplies! You'll need some base coats, top coats, and a few fun colors. Don't forget those cute nail art brushes – thin ones are perfect for details, while wider ones are great for filling in larger areas. Think of them as your paintbrushes, only much tinier and cuter! Nail polish remover is your best friend for those little mistakes (we all make them!), and cotton buds are fantastic for cleaning up any spills. And finally, a good base coat will help your manicure last longer and protect your nails. For extra sparkle, consider adding some glitter or rhinestones – check out these rhinestone nail designs for inspiration!
Prep your nails like a pro! Start by gently pushing back your cuticles – this gives your nail art more space to shine. Then, file your nails into your favorite shape, whether it's square, oval, or something more adventurous. A quick buff will smooth out any ridges and create a perfect surface for your nail polish. And don’t forget to clean your nails with nail polish remover to remove any excess oils or residue. This will ensure your polish adheres perfectly. A little prep goes a long way in creating a long-lasting and professional-looking manicure.
Tool | Purpose |
|---|---|
Base Coat | Protects nails, improves polish adhesion |
Top Coat | Seals design, adds shine, increases longevity |
Nail Art Brushes | Precise application of designs |
Simple Techniques: Dots, Stripes, and More
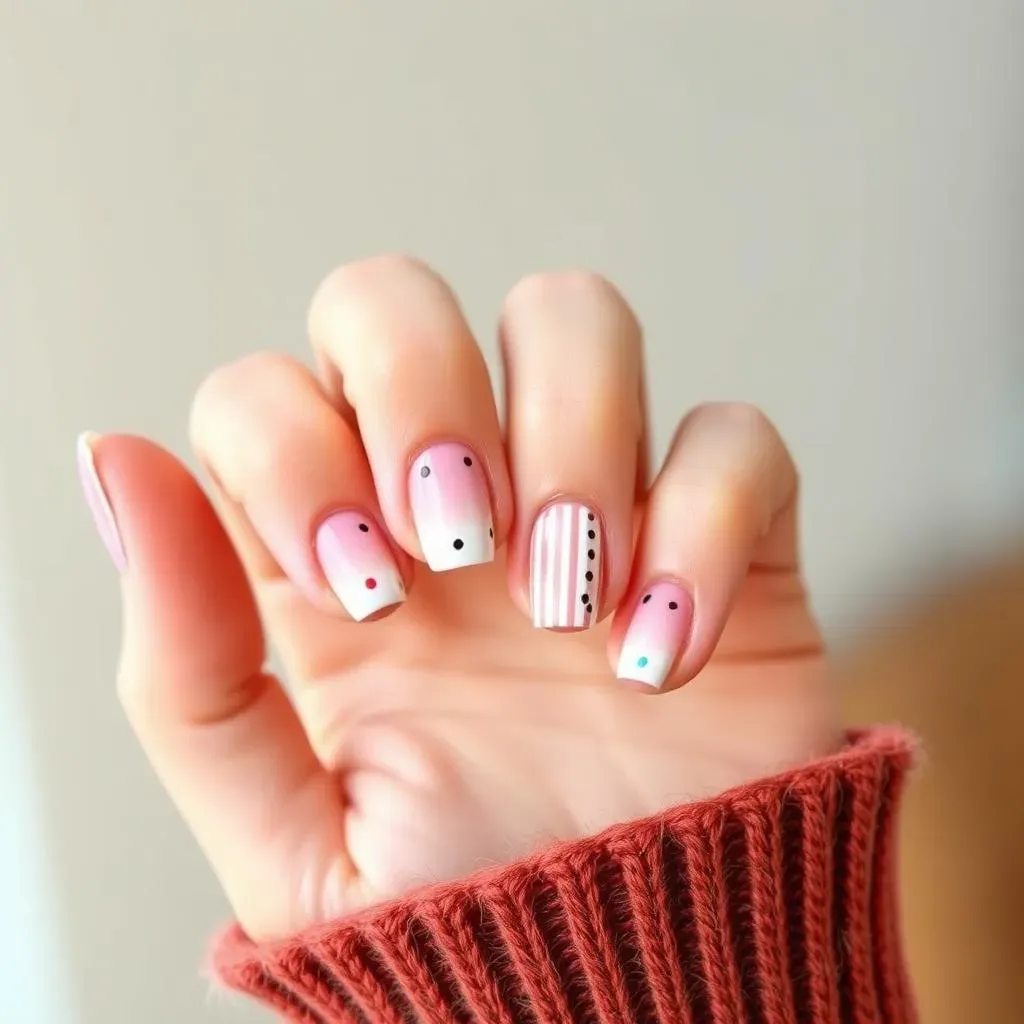
Let's start with the basics! Creating dots is super easy. You can use a toothpick, a bobby pin, or even a special dotting tool. Dip your chosen tool into the nail polish and gently dab it onto your nail. Experiment with different sizes and colors to create fun patterns! Stripes are just as simple. Use a thin nail art brush or striping tape to create clean lines. Try varying the thickness and placement of your stripes for a unique look. For example, you could do vertical stripes, horizontal stripes, or even diagonal stripes! These simple nail art ideas are a great starting point.
Once you've mastered dots and stripes, you can move on to more advanced techniques. Try using a sponge to create ombre effects. Simply dab a sponge into different colors of nail polish and then gently press it onto your nail. This creates a beautiful gradient effect. You can also use stencils to create intricate designs. These are readily available online or in craft stores. Just place the stencil on your nail and apply polish over it. Peel off the stencil to reveal your design. Remember to practice! The more you practice these techniques, the better you'll get. Don't be afraid to experiment, and most importantly, have fun!
- Dots: Use a toothpick or dotting tool.
- Stripes: Use a thin brush or striping tape.
- Ombre: Use a sponge to blend colors.
- Stencils: Use pre-made stencils for intricate designs.
Nail Art Inspiration: Cute Designs for Every Style
Now for the fun part – choosing your design! There are endless possibilities when it comes to cute nail art. Consider your personal style. Do you prefer bold colors or something more subtle? Do you like floral designs, geometric patterns, or something completely unique? Think about the occasion. Are you creating nail art for a special event or just for everyday wear? Look for inspiration online. Pinterest and Instagram are great resources for finding cute and easy nail art ideas. Search for hashtags like #nailartideas or #easynailart. There are tons of tutorials available that can guide you through the process step-by-step. You can even try out some cute easy nail art designs for inspiration!
Don't be afraid to experiment with different colors and techniques. Try mixing and matching different designs. For instance, you could create a half-moon manicure with dots or stripes. Or you could combine a floral design with a geometric pattern. The possibilities are endless! Remember that nail art is a form of self-expression. So have fun with it and let your creativity shine through. You might even discover your hidden talent for creating stunning nail art. And when you're ready for something new, you can always check out these holiday nail designs.
Simple Nail Art Techniques for Cute and Easy Manicures
Simple Nail Art Techniques for Cute and Easy Manicures
Mastering the Art of the Dot
Let's start with the cutest and easiest technique: dots! Think polka dots, tiny flowers, or even whimsical animal faces – the possibilities are endless. You don't need fancy tools; a simple toothpick, bobby pin, or even the end of a pen can create perfectly sized dots. Just dip the tip into your chosen nail polish, then gently dab it onto your nail. Experiment with different sizes and colors for a playful look. Want some extra inspiration? Check out these cute designs for short nails for some ideas. Remember, practice makes perfect, so don't be afraid to get a little messy – it's all part of the fun!
For perfectly consistent dots, consider investing in a dotting tool. These little tools come in various sizes and make creating uniform dots a breeze. They're inexpensive and readily available online or in craft stores. Once you've mastered the art of the dot, you can start creating more complex designs by combining different sizes and colors. Think about creating a gradient effect by using progressively darker shades of the same color. Or try creating a cute pattern, such as a daisy, by arranging dots in a circular formation. The sky's the limit!
- Use a toothpick, bobby pin, or dotting tool.
- Experiment with size and color variations.
- Create gradients or patterns with multiple dots.
Creating Stunning Stripes
Stripes are another incredibly versatile and easy technique to master. Whether you're aiming for bold, graphic lines or delicate, subtle accents, stripes can instantly elevate your manicure. For perfectly straight lines, striping tape is your new best friend. Simply apply the tape to your nail to create your desired pattern, and then paint over the exposed areas. Peel off the tape once the polish is dry to reveal crisp, clean lines. If you prefer a more freehand approach, a thin nail art brush is your go-to tool. Practice makes perfect, so don't worry if your first few attempts aren't perfectly straight. You'll get the hang of it with a little patience.
Beyond basic vertical or horizontal stripes, consider experimenting with diagonal lines, zigzags, or even chevron patterns. Mix and match colors for a bold look, or stick to a monochromatic palette for a more sophisticated feel. You can also combine stripes with other techniques, such as dots or negative space. For instance, create a base of horizontal stripes, then add a few vertical stripes in a contrasting color. Alternatively, leave some sections of your nail unpainted to create a modern, negative-space effect. Need some more ideas? Check out these easy nail designs for school to find more inspiration.
Tool | Technique | Result |
|---|---|---|
Striping Tape | Apply tape, paint, remove tape | Clean, straight lines |
Thin Nail Art Brush | Freehand painting | More organic, less precise lines |
Exploring Ombre and Gradient Effects
Ombre and gradient nail art create a soft, dreamy look that’s surprisingly easy to achieve. This technique involves blending two or more colors together to create a seamless transition. The easiest way to create an ombre effect is by using a makeup sponge. Apply a few stripes of your chosen nail polish colors onto the sponge, then gently dab the sponge onto your nail. Repeat this process until you achieve your desired gradient. Remember to use thin coats of polish to avoid a thick, clumpy finish. A good quality top coat will help to seal the design and add extra shine.
For a more sophisticated ombre, you can use a small brush to blend the colors together more precisely. This technique requires a bit more practice, but it allows for more control and the creation of more intricate gradients. You can also experiment with different color combinations to create unique ombre effects. For example, try blending pastel shades for a soft, romantic look, or use bold, contrasting colors for a more dramatic effect. Don't be afraid to experiment and see what works best for you. If you're looking for more ideas, there are tons of easy nail art ideas online. Have fun experimenting!
Cute and Easy Nail Art Design Ideas for Every Occasion
Cute and Easy Nail Art Design Ideas for Every Occasion
Everyday Chic: Simple Designs for the Week
Let's face it, sometimes you want a cute manicure that's not too fussy. For those everyday occasions, think simple, elegant designs that complement your everyday style. A classic French manicure with a twist, like using a pastel color instead of white, is always a winner. Or try a subtle ombre effect with nude shades for a sophisticated, understated look. A few strategically placed dots or a delicate stripe can add a touch of personality without being overwhelming. For extra inspiration, check out these cute and easy nail designs perfect for everyday wear!
Negative space manicures are another fantastic option for a minimalist yet stylish look. Simply paint a portion of your nail, leaving the rest bare for a modern, chic effect. You can create a half-moon design at the cuticle or leave a stripe of negative space down the middle of each nail. Experiment with different shapes and placements to find what suits your style best. And for an extra touch of glam, add a few tiny rhinestones or glitter to one or two nails. Remember, even the simplest designs can look stunning when executed well. Want to try some more designs? Check out our collection of simple nail art designs.
- Pastel French Manicure
- Nude Ombre
- Subtle Stripes or Dots
- Negative Space Designs
Party Ready: Festive Nail Art for Special Events
When it's time to celebrate, your nails deserve a festive makeover! For parties and special occasions, you can get a little more creative with your nail art. Bright, bold colors are a great way to make a statement. Try a vibrant rainbow manicure or use contrasting colors to create a fun, eye-catching look. For a touch of elegance, consider adding glitter, metallic accents, or even some delicate floral designs. For some inspiration, check out these easy nail designs for holidays!
If you're feeling adventurous, you can try more complex designs, such as intricate patterns or even small hand-painted images. Remember, though, that even simple designs can look festive when done with a bit of flair. For example, a simple polka dot manicure in holiday colors can be just as effective as a more elaborate design. And don't forget about the power of accessories! Adding small charms, stickers, or other embellishments can instantly elevate your nail art to the next level. No matter what you choose, make sure your nail art reflects your personality and the celebratory mood of the occasion. For more ideas, browse these Thanksgiving nail designs for inspiration!
Occasion | Design Ideas |
|---|---|
Birthday Party | Rainbow manicure, glitter accents |
Wedding | Delicate floral designs, subtle shimmer |
Holiday Party | Festive colors, themed stickers |