Table of Contents
Ready to transform your nails into miniature masterpieces? This article is your passport to the exciting world of easy black nail art designs. Forget complicated techniques and expensive salon visits – we're diving headfirst into simple, stylish, and totally achievable nail art that anyone can master. Whether you're a complete beginner or just looking to refresh your manicure routine, we've got you covered. We'll start by exploring the basics of easy black nail art designs, guiding you through fundamental techniques and essential tools. Next, we'll walk you through several step-by-step tutorials, perfect for practicing your skills and creating stunning looks. Finally, we'll unleash your creativity with a collection of inspiring and unique easy black nail art designs to spark your imagination. Get ready to unleash your inner artist and discover the endless possibilities of easy black nail art designs!
Mastering Simple Black Nail Art Designs
Mastering Simple Black Nail Art Designs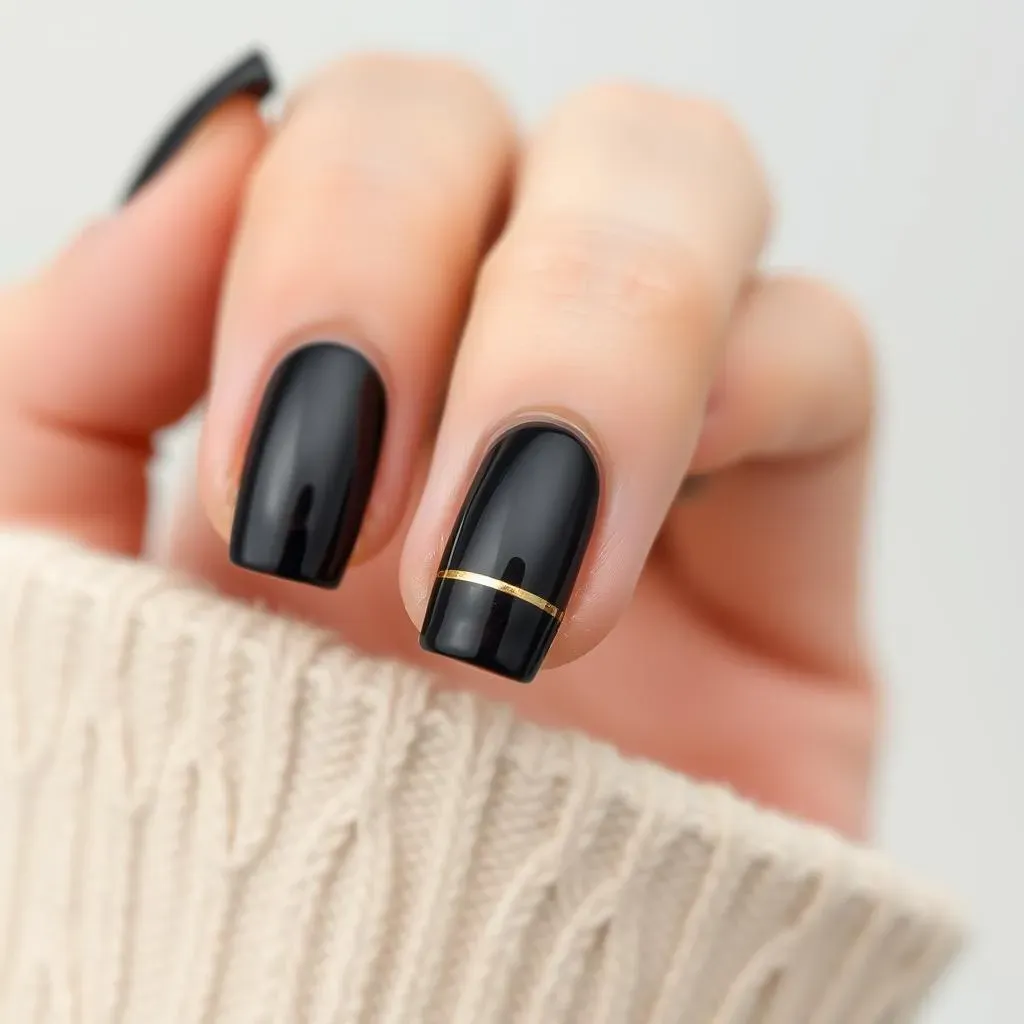
Essential Tools and Techniques
Before you dive into creating stunning nail art, let's gather the essentials. You'll need a good quality black nail polish (a matte black is super trendy!), a base coat, a top coat, and some simple tools. A thin nail art brush is perfect for detailed work, but even a toothpick can work wonders for simple designs! Don't forget a good quality nail polish remover to clean up any mistakes. Practice makes perfect, so don't be afraid to experiment and have fun with it. Remember, even the simplest designs can look amazing with a little attention to detail. For more inspiration on simple nail designs, check out these easy simple nail art designs!
Prep is key! Start with clean, dry nails. Apply a base coat to protect your nails and help the polish adhere better. Two thin coats of your black nail polish will give you a smooth, even base for your designs. Once dry, you're ready to unleash your creativity! Remember to let each coat dry completely before moving on to the next step. This will prevent smudging and ensure your masterpiece lasts longer. If you're looking for easy designs for everyday wear, take a peek at these easy everyday nail designs.
Tool | Purpose |
|---|---|
Black Nail Polish | The star of the show! |
Base Coat | Protects nails and improves adhesion. |
Top Coat | Adds shine and durability. |
Thin Nail Art Brush | For precise designs. |
Toothpick | A surprisingly versatile tool! |
Simple Black Nail Art Design Ideas
Now for the fun part – the designs! One classic and incredibly easy design is a simple black accent nail. Paint all your nails except one with a neutral color, and paint the accent nail black. You can add a touch of elegance with a single, thin line of gold or silver polish on the black nail. Another easy option is using black polish to create geometric shapes, like stripes or triangles, on a neutral background. This is super easy to create and looks very modern. Alternatively, you can create a chic ombre effect by blending black polish with a lighter shade, creating a gradual transition from dark to light. For even more ideas, look at our amazingly simple manicures!
Don't be afraid to experiment! Try using different techniques, like dotting, stamping, or even freehand painting. If you're feeling adventurous, try adding some subtle glitter or other colors to your black nail art. Remember, the most important thing is to have fun and let your creativity shine. The beauty of nail art is that there are no rules! Once you've finished your design, apply a top coat to seal it and add a glossy finish. For inspiration on cute and easy designs, check out these cute and easy nail art designs.
- Simple Black Accent Nail
- Geometric Shapes (stripes, triangles)
- Black and White Combo
- Ombre Effect
Easy Black Nail Art Designs for Beginners: StepbyStep Tutorials
Easy Black Nail Art Designs for Beginners: StepbyStep Tutorials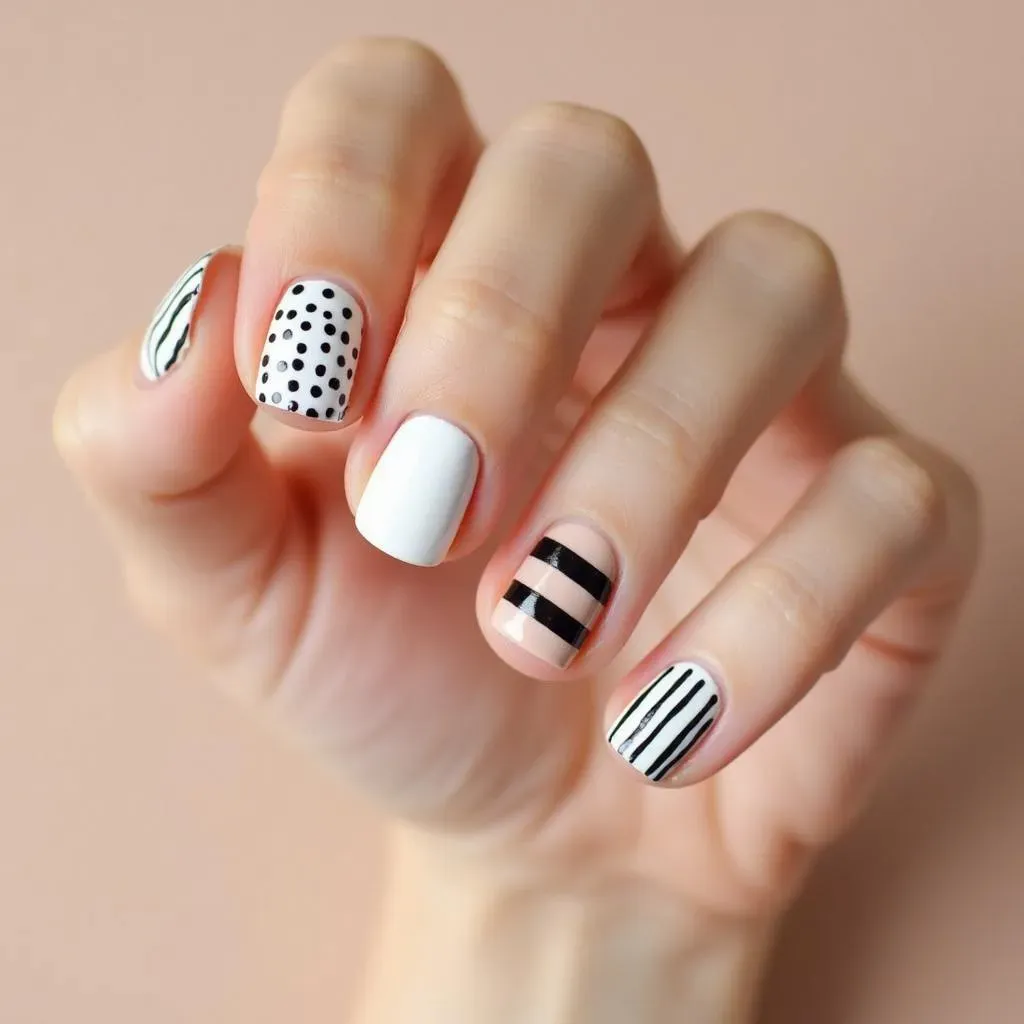
The Classic Black & White Combo
Let's start with a super simple, yet chic design: black and white! This is perfect for beginners. You'll only need two colors – a classic black and a crisp white. Start with a base coat, then apply two coats of white polish to all your nails. Once dry, use a thin brush or even a toothpick to create simple shapes on one or two accent nails. Think tiny dots, stripes, or even a half-moon design at the base of the nail. Finish with a top coat for extra shine and longevity. This combo is so versatile; it can be dressed up or down, perfect for any occasion! For more inspiration on black and white nail art, check out these easy black and white designs.
Don't stress about perfection. Nail art is all about having fun and expressing your creativity. If you make a mistake, simply use some nail polish remover and a cotton swab to clean it up. Remember, practice makes perfect – so keep trying different techniques until you find what works best for you. Looking for more easy and pretty designs? Check out these easy pretty nail designs for more ideas!
- Apply base coat
- Apply two coats of white polish
- Add black designs using a thin brush or toothpick
- Finish with a top coat
Geometric Black Nail Art
Geometric designs are another fantastic option for beginner nail artists. They’re all about clean lines and sharp angles, which are surprisingly easy to achieve. Start with a base coat, and then choose a neutral background color (like beige or nude) or even keep it simple with a clear base. Once dry, use black polish and a thin brush to create geometric shapes. You could try stripes, triangles, or even a simple checkerboard pattern. Keep the lines straight and crisp for a polished look. Remember to let each layer dry completely before adding the next. Looking for more geometric nail art ideas? Check out these easy line designs!
For extra flair, you can incorporate metallic accents like gold or silver. A thin line of gold along the edges of your geometric shapes adds a touch of luxury. Or, you could add tiny metallic studs for a more edgy look. Remember, the key is to keep it simple and focus on creating clean, well-defined lines and shapes. Need some quick and easy nail art inspiration? Check out these easy fast nail designs.
Step | Description |
|---|---|
1 | Apply base coat |
2 | Apply neutral background color |
3 | Create geometric shapes with black polish |
4 | Add metallic accents (optional) |
5 | Finish with top coat |
Elevate Your Style: Creative and Easy Black Nail Art Designs
Adding a Touch of Sparkle
Let's amp up the glam factor! Black is a fantastic base for adding some serious sparkle. Try incorporating glitter – either a fine shimmer or chunky glitter – for a touch of luxurious shine. You can apply glitter over your entire nail or use it to accentuate specific designs. For example, a simple black base with a glitter accent nail looks both elegant and festive. Experiment with different glitter colors to find your perfect match – gold, silver, and even colored glitters can add a unique twist. Remember, a little glitter goes a long way!
Another fun way to add some sparkle is by using metallic polishes. Gold and silver are classic choices, but you could also try copper or bronze for a more unique look. Use these metallic polishes to create thin lines, dots, or even larger shapes on your nails. You can also mix and match metallic and glitter polishes for a truly dazzling effect. Check out these amazingly simple manicures for more inspiration!
Glitter Type | Effect |
|---|---|
Fine Shimmer | Subtle sparkle |
Chunky Glitter | Bold and dramatic |
Floral Accents and Intricate Designs
For those who want to step up their nail art game, incorporating floral designs can add a touch of elegance and sophistication. Start with a solid black base, then use a thin brush and a contrasting color (white, gold, or even a pastel shade) to paint delicate floral patterns. Don't worry about perfect precision – a slightly imperfect, hand-painted look can be very charming. Simple designs, like small flowers or leaves, are easy to manage, even for beginners. You can find tons of inspiration online, or even use nail art stencils for help.
If you're feeling particularly creative, you can experiment with more intricate designs. Try adding tiny dots, lines, or other details to your flowers to create a more complex look. You can also incorporate other elements, like butterflies or other insects, to complement your floral theme. Remember, the key is to have fun and let your creativity flow! For more ideas on floral nail art, check out these easy floral nail designs!
- Simple flowers or leaves
- Incorporate other elements (butterflies, etc.)
- Use stencils for assistance
- Experiment with different color combinations