Table of Contents
Easter's just around the corner, and what better way to celebrate spring's arrival than with a festive manicure? Forget complicated salon visits and expensive nail technicians – this article is your guide to achieving stunning, easy Easter nail art designs right at home! Whether you're a nail art novice or looking for some fresh inspiration, we've got you covered. We'll explore a range of adorable designs, from simple polka dots and pastel stripes to charming bunnies and delicate flowers, all achievable with basic tools and techniques. Get ready to unleash your creativity and transform your nails into miniature works of art. Inside, you'll discover step-by-step instructions, helpful tips, and plenty of visual inspiration to help you create the perfect easy Easter nail art designs for your spring celebration. So grab your favorite polishes, and let's get started on creating some egg-cellent nail art!
Simple Easter Nail Art Designs for Beginners
Simple Easter Nail Art Designs for Beginners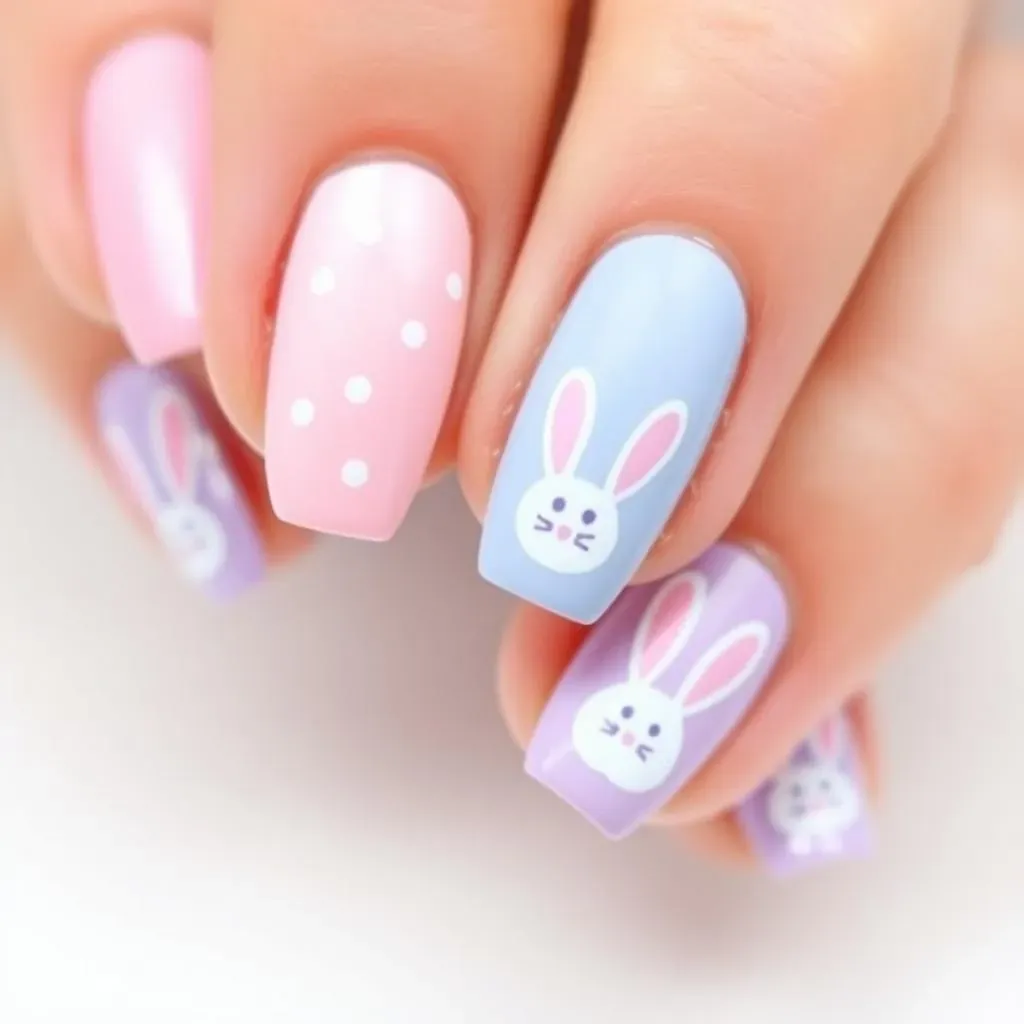
Simple Pastel Designs
Let's start with the easiest Easter nail art designs – simple pastel shades! Think soft pinks, baby blues, and delicate lavenders. These colors are perfect for spring and require minimal effort. Just paint your nails with your chosen pastel shades and add a top coat for extra shine. You can even try a simple ombre effect by blending two similar shades together for a soft, gradient look. For a touch of whimsy, try adding some tiny pastel polka dots using a dotting tool or the end of a bobby pin. It's so simple, yet so effective! Check out some more easy DIY nail designs for inspiration.
Looking for more inspiration? Consider adding a subtle accent nail with a slightly different pastel shade or a sparkly top coat. This adds a little extra flair without being overly complicated. Remember, the key is to keep it simple and fun! Don't be afraid to experiment with different pastel combinations to find your perfect Easter look. And if you want to try something a bit more challenging, you could try a simple spring nail design with some tiny flowers.
Color | Description | Difficulty |
|---|---|---|
Pastel Pink | Classic and versatile | Easy |
Baby Blue | Fresh and airy | Easy |
Lavender | Romantic and sophisticated | Easy |
Bunny Nail Art
Next up: adorable bunny nail art! This might sound tricky, but it's surprisingly easy to achieve with a little patience and some simple tools. Start with a base coat of white or a light pastel shade. Then, use a thin nail art brush or even a toothpick to draw simple bunny shapes. Two small dots for eyes, a small curved line for the nose, and two longer lines for the ears. Add some whiskers with tiny lines and you've got a cute bunny on your nails! For those who are new to nail art, using nail stickers can be a good starting point. You can find cute bunny stickers online or at beauty supply stores. This is a great way to add some Easter cheer to your nails without having to be a nail art expert. Want to explore more cute and easy nail art designs?
For a more advanced bunny design, you can add details like a carrot or a little Easter egg. You could also experiment with different colors for the bunnies, such as pastel pink or light yellow. The possibilities are endless! Remember to apply a top coat to protect your design and add a glossy finish. And don't forget to check out our other articles for more easy nail designs for beginners that will help you to achieve your goals.
- Base coat of white or pastel
- Draw simple bunny shapes
- Add details like carrots or eggs
- Apply top coat
Adorable Easter Nail Art Ideas Using Basic Tools
Adorable Easter Nail Art Ideas Using Basic Tools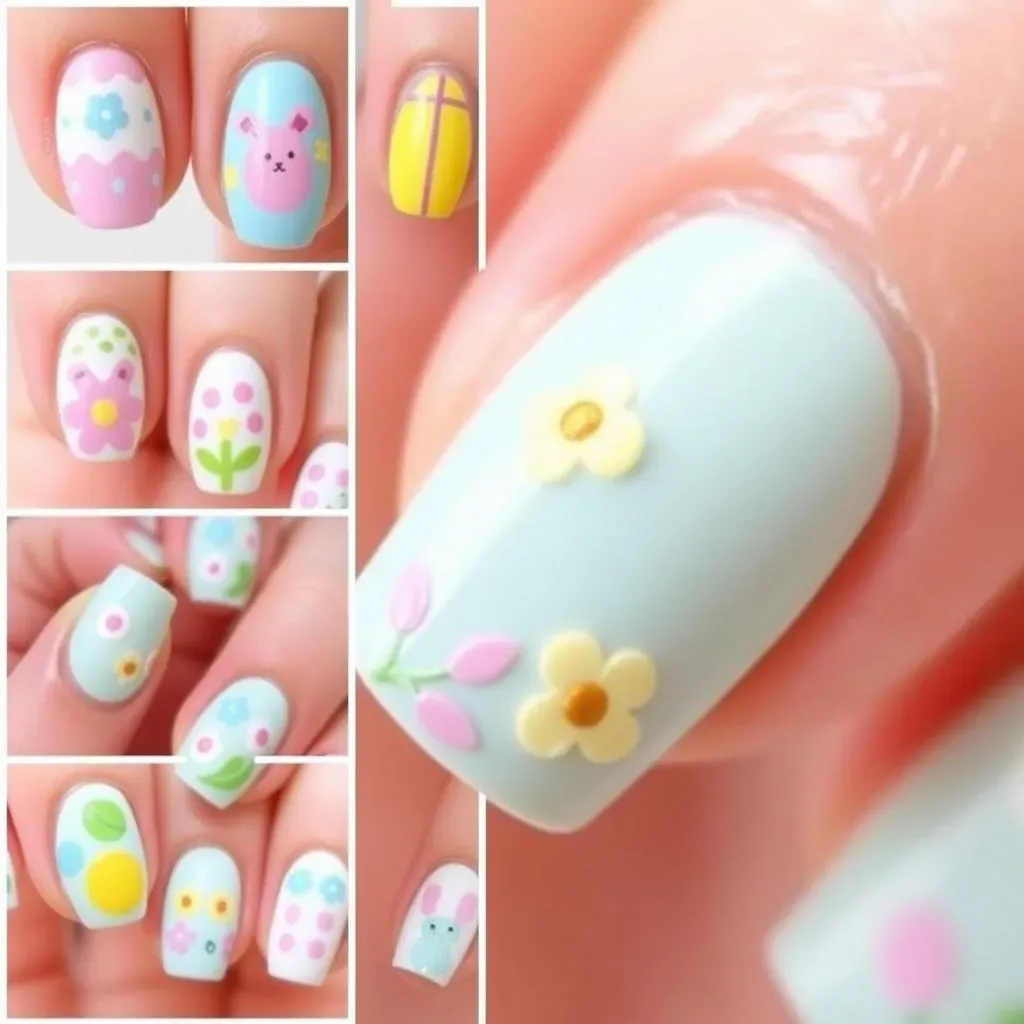
Egg-cellent Egg Designs
Let's crack open some creativity with easy egg designs! These are super fun and festive. You can use a simple dotting tool to create speckled eggs on a pastel background. Or, try painting tiny eggs onto your nails using different colors and patterns. Think stripes, polka dots, or even tiny floral details. For a super simple look, just paint your nails a solid pastel color and add a few small, perfectly round dots to represent eggs. It's amazing what a little bit of creativity can do! Need more inspiration? Check out these amazingly simple manicures for more ideas.
Don't be afraid to experiment with different colors and patterns. You can even use a fine-tipped brush to add delicate lines or swirls to your egg designs. A top coat will seal everything in place and give your eggs a beautiful, glossy shine. Remember, the goal is to have fun and create something you love! And, for those who are new to nail art, using nail stencils can be very helpful!
- Pastel base coat
- Use dotting tool or brush
- Create speckled or painted eggs
- Add details like lines or swirls
- Apply top coat
Flower Power Manicures
Spring is all about flowers, so let's add some blooms to your Easter nail art! Simple floral designs can be achieved using a toothpick, a thin brush, or even a dotting tool. Start with a pastel base coat. Then, create simple flower shapes using dots or small strokes. You can create a variety of flowers with just a few dots and lines. Simple daisies, tiny roses, or even abstract floral patterns all work well. Want to see more easy floral nail designs?
For a more polished look, consider using nail art stickers or stencils. These are great for beginners because they provide a perfect guide for your designs. Experiment with different color combinations to create your perfect Easter bouquet. You can use bright, bold colors for a fun, vibrant look, or stick to pastel shades for a softer, more delicate feel. Remember to use a top coat to protect your design and add some extra shine.
Flower Type | Tools Needed | Difficulty |
|---|---|---|
Daisies | Dotting tool | Easy |
Roses | Thin brush | Medium |
Abstract Flowers | Toothpick | Easy |
Bunny Butt Bonanza
Who doesn't love a cute bunny butt? These are surprisingly easy to paint! Start with a pastel base coat, then use a small brush to paint a simple circle. Add two smaller circles for the tail and a few dots for the fluffy texture. You can use different pastel colors for a fun, mismatched look. A simple cute and easy nail design like this is perfect for Easter.
These little bunny bums are so charming, and they are extremely easy to paint. You can add a tiny carrot or a simple flower next to the bunny for some extra detail. Finish with a top coat for a glossy finish, and you're all set! Remember to keep your brush strokes light and fluid for the best results. Don’t forget to explore more easy nail art designs at home to find more inspiration.
Stunning Easter Nail Art Designs That Are Surprisingly Easy
Stunning Easter Nail Art Designs That Are Surprisingly Easy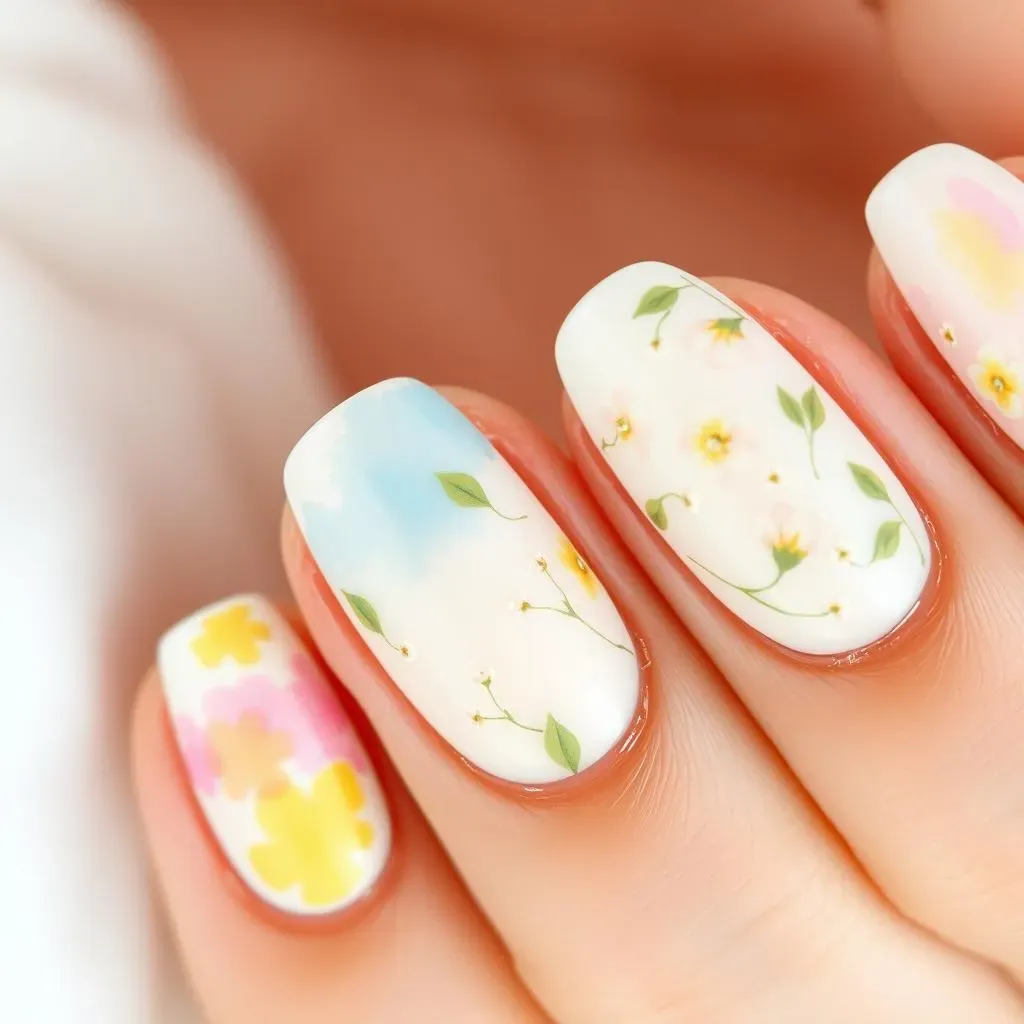
Watercolor Easter Eggs
Let's dive into some more sophisticated designs! Watercolor Easter eggs create a stunning, artistic look that's surprisingly easy to achieve. Start with a light pastel base coat, like a pale yellow or soft pink. Then, using a thin brush and diluted nail polish, create a soft, blended effect by dabbing and spreading the colors to mimic the look of watercolor paints. Experiment with different pastel shades to create a unique and eye-catching design. You can create a gradient effect by blending colors together or create distinct sections with separate colors. For extra flair, add some tiny glitter accents near the edges of your "eggs". This technique gives a professional look without requiring advanced nail art skills. For more inspiration on achieving a professional look at home, check out these easy at-home nail art designs.
Remember to let each layer dry completely before applying the next to avoid smudging. A top coat will protect your delicate design and add a beautiful shine. The key is to keep your brushstrokes light and allow the colors to blend naturally. Don't be afraid to experiment with different color combinations and techniques to create your own unique watercolor masterpiece. This technique is perfect for those who want to impress with minimal effort. For some more advanced techniques, you can use a sponge to create a textured watercolor effect.
- Light pastel base coat
- Diluted nail polish
- Dab and blend colors
- Add glitter accents (optional)
- Apply top coat
Intricate Floral Arrangements
Ready to take your Easter nail art to the next level? Intricate floral arrangements might seem daunting, but with the right approach, they're surprisingly manageable. Start with a neutral base coat, like a creamy white or a soft beige. Then, use a fine-tipped brush to create delicate floral designs, focusing on simple shapes and lines. You can create tiny blossoms, elegant leaves, or even a whimsical arrangement of different flowers. Using a variety of colors and techniques will add depth and visual interest. If you want to explore more easy floral nail art designs, there are plenty of tutorials available online.
Consider using a dotting tool to create small dots that form the center of your flowers or the petals of smaller blossoms. You can also use thin striping tape to create sharp lines and geometric patterns around your floral designs. Remember to work slowly and patiently, allowing each layer to dry completely before adding more detail. A final top coat will protect your beautiful work of art and give it a professional, glossy finish. Don't be afraid to experiment with different color palettes and floral arrangements to find your perfect Easter style. For beginners, using nail stencils can make creating intricate floral designs much easier.
Design Element | Technique | Difficulty |
|---|---|---|
Flowers | Fine-tipped brush | Medium |
Leaves | Thin brushstrokes | Easy |
Geometric Patterns | Striping tape | Easy |