Table of Contents
Ready to unleash your inner goth goddess (or just have some seriously fun nail art)? This guide is all about mastering easy skull nail designs. Whether you're a seasoned nail artist or just starting out, we've got the perfect spooky-cute designs for you. Forget complicated tutorials and expensive salon visits; we're focusing on simple, step-by-step instructions that anyone can follow. We'll start with basic skull designs perfect for beginners, showing you how to create the iconic skull shape and add simple details like eyes and bone structures. Then, we'll get creative, exploring variations like sugar skulls and other fun additions. Finally, we’ll share our top tips and tricks to ensure your easy skull nail designs are flawlessly executed. Get ready to create some seriously killer nail art – because even the simplest designs can be totally awesome! Let's dive into the world of easy skull nail designs and discover your perfect spooky manicure.
Simple Skull Nail Art Designs for Beginners
Simple Skull Nail Art Designs for Beginners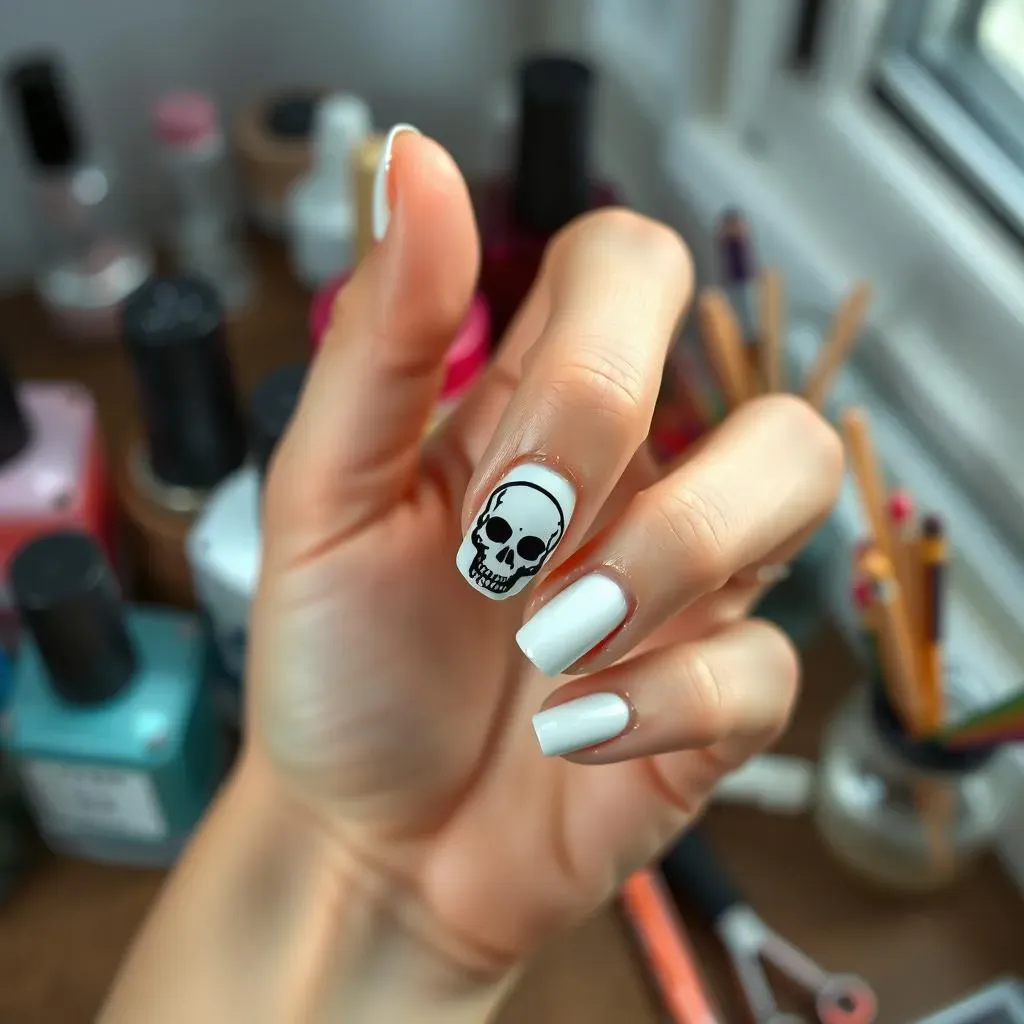
Let's start with the easiest skull nail art designs, perfect if you're new to nail art or just want a quick and simple look. Think of it like learning to draw a basic circle before tackling a complex portrait – you'll build confidence and skills you can use later for more intricate designs. A great starting point is a classic black and white skull. Begin with a base coat of white polish on your nails. Once that's dry, use black nail polish to paint two simple circles for the eyes, and a slightly larger, upside-down "U" shape below for the skull's base. Add two smaller black circles inside the eye circles for pupils. You can make these simple skulls look even better by adding a few simple details, like a line for the nose and some small, curved lines for the mouth. For extra fun, try adding some simple crossbones next to your skull. Check out our post on easy nail art at home for more beginner-friendly techniques!
Once you’ve mastered the basic skull, you can start experimenting with different colors. Instead of black, try using dark grey, deep purple, or even a vibrant red for a more dramatic look. If you're feeling bold, try painting the entire nail a color, like a deep red or black, before adding the skull details. This can create a really striking effect. Remember, the beauty of nail art is that there are no strict rules! You can also try adding small details like glittery accents around the eyes or along the jawline. This can add a touch of glam to your spooky design. Don't forget to finish with a top coat to protect your artwork and give it a nice shine. For more inspiration on easy designs, explore our collection of easy nail designs for beginners.
Design Element | Description | Tip |
|---|---|---|
Base Coat | A light color like white or pastel makes the skull pop! | Let each coat dry completely before applying the next |
Skull Shape | Use simple shapes like circles and curves for the eyes, nose and mouth. | Practice drawing skulls on paper first to get a feel for the shapes. |
Details | Add tiny details like pupils or teeth after the main skull shape is dry. | Use a thin brush for precise details. |
Another fun and easy way to add a skull to your manicure is by using nail stickers or decals. There are tons of cute skull decals available online or in craft stores, allowing you to create a skull design without the hassle of freehand painting. Simply apply them onto your nails after painting a base color, and seal with a top coat. This is a great option if you're short on time or prefer a less messy approach to nail art. For more seasonal ideas, check out our easy Halloween nail art designs.
Don’t be afraid to experiment! Try using different colors, add some glitter, or incorporate other elements like flowers or hearts to create a unique design that reflects your personality. The most important thing is to have fun and let your creativity shine. Remember, practice makes perfect, so don't be discouraged if your first attempts aren't flawless. Keep practicing, and you’ll soon be creating amazing skull nail art in no time. Need more ideas for everyday wear? Check out our easy nail designs for everyday looks.
- Start with simple shapes.
- Use stencils or stickers for easier designs.
- Don't be afraid to experiment with colors and details.
- Finish with a top coat for a shiny, long-lasting manicure.
Adding Details: Eyes, Bones, and More
Adding Details: Eyes, Bones, and More
Adding Eyes and a Nose
Now that you've got the basic skull shape down, let's add some details! Start with the eyes. Using a thin brush and black nail polish (or a contrasting color if you're feeling adventurous!), carefully paint two small circles inside the larger eye circles you already created. These are the pupils. You can make them look more realistic by adding tiny highlights with a touch of white polish. Next, let's add a nose. A simple, small, upside-down "V" shape works perfectly. Place it neatly between the eyes. For a bit of extra flair, try adding a tiny line below the nose to suggest the mouth. This is a subtle detail that adds a lot of character.
Adding these small details really brings your skull to life! Don't be afraid to experiment with different shapes and sizes for the eyes and nose to create a unique look. A simple change, like making the eyes slightly larger or closer together, can dramatically alter the expression of your skull. And remember, a little imperfection can add to the charm! For more complex designs, explore our easy goth nail designs for inspiration.
- Use a thin brush for precise details.
- Practice on paper first if you're unsure.
- Don't be afraid to experiment with different shapes and sizes.
Adding Bones and Other Elements
Once you've mastered the eyes and nose, you can move on to more intricate details like bones! Adding crossbones to your skull design is a classic touch. Use a thin brush and black nail polish (or another contrasting color) to paint two thin, slightly curved lines that intersect to form an "X" shape. You can place them next to your skull, or even incorporate them into the skull itself. For example, you could paint the crossbones behind the skull, making it appear as though the skull is wearing them. This is a simple way to add a bit of extra spookiness to your manicure.
But the fun doesn't stop there! You can also add other elements to your skull design, such as small flowers, hearts, or even tiny stars. These elements can create a beautiful contrast with the skull and add a touch of whimsy to your design. For example, you could paint a small heart on the skull's forehead, or add a few tiny flowers around the edges. The possibilities are endless! Want more ideas for adding details? Check out awesome easy DIY nail designs for extra inspiration.
Element | Placement | Effect |
|---|---|---|
Crossbones | Next to the skull or behind it | Adds a classic spooky vibe |
Flowers | Around the skull or on the forehead | Creates a beautiful contrast |
Hearts | On the forehead or cheekbones | Adds a touch of whimsy |
Finishing Touches and Top Coats
Once you've added all your desired details, it's time to finish your masterpiece. Apply a top coat to protect your artwork and give it a shiny, long-lasting finish. A top coat not only makes your nail art look better, but it also helps prevent chipping and smudging. If you prefer a matte finish, you can use a matte top coat instead of a glossy one. This will give your skull nail art a more subdued and sophisticated look. Experiment to see which finish you prefer.
Remember to let each coat of polish dry completely before applying the next. This will prevent smudging and ensure your design looks its best. Take your time, and don't be afraid to make mistakes. Nail art is all about having fun and expressing your creativity. For more ideas on finishing touches, check out amazing easy gel nail designs which can help you achieve a polished look.
"Practice makes perfect. Don't be afraid to experiment and have fun with it!" - Unknown Nail Artist
Creative Skull Nail Art Variations: Sugar Skulls and More
Creative Skull Nail Art Variations: Sugar Skulls and More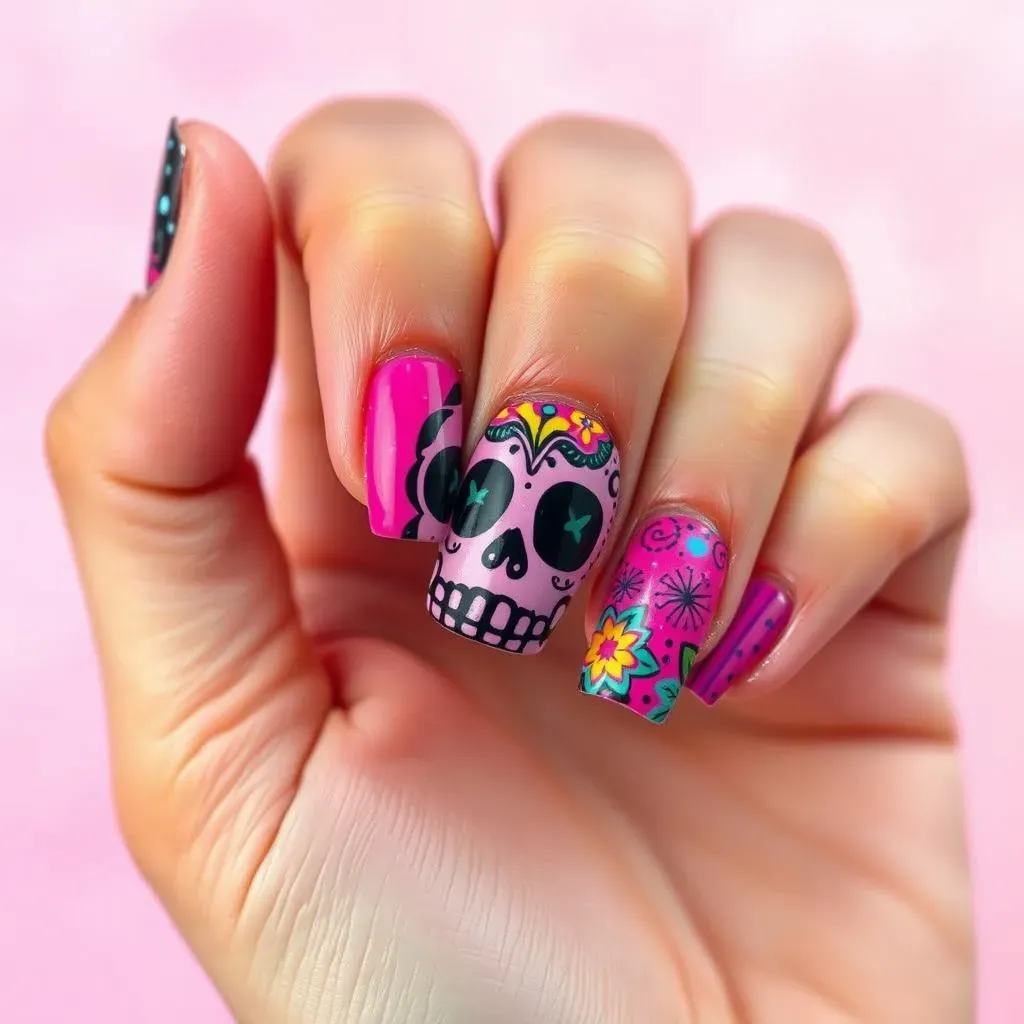
Sugar Skull Designs
Let's crank up the creativity! Sugar skulls, inspired by the Mexican holiday Dia de los Muertos (Day of the Dead), are incredibly fun and festive. They're a fantastic way to add a vibrant, colorful twist to your skull nail art. Start with a bright base coat—think hot pink, sunny yellow, or even a deep turquoise. Then, using black nail polish, carefully paint the classic skull shape. But instead of keeping it simple, let's add some serious flair. Use bright colors to paint intricate floral designs around the skull, adding tiny dots and swirls for extra detail. These designs are a fantastic way to show off your artistic side!
For those who like a little extra sparkle, consider adding glitter or rhinestones to your sugar skull design. A few strategically placed glittery accents can add a touch of glamor and make your nails truly shine. You can also add tiny details, like small hearts or stars, around the floral patterns to bring a unique touch to your design. Remember, sugar skulls are all about expressing your creativity. Don't be afraid to experiment with different colors and patterns to make your designs truly unique. For more creative inspiration, explore our collection of cute and easy nail art designs.
- Choose a bright, vibrant base color.
- Paint the skull shape in black.
- Add colorful floral designs and details.
- Consider adding glitter or rhinestones for extra sparkle.
Gothic Skull Nail Art
If sugar skulls aren't your style, perhaps a more gothic approach will appeal to you. Gothic skull nail art often features darker colors, intricate details, and a generally edgier aesthetic. Start with a dark base coat, such as black, deep purple, or dark grey. Then, using a lighter color like silver or white, carefully paint the skull shape. Add details like intricate lines, shading, and even small spiderwebs to create a truly gothic look. The key is to build layers and depth, so don't be afraid to use multiple shades of the same color to create shadows and highlights.
For a truly dramatic effect, try incorporating other gothic elements, such as roses, thorns, or even bats, into your design. These elements can add a touch of mystery and intrigue to your manicure. You can also experiment with different textures, such as matte and glossy polishes, to create a more complex and visually interesting design. Remember, gothic skull nail art is all about showcasing your unique style. Don't be afraid to experiment with different colors, textures, and elements to create a look that truly reflects your personality. For more ideas, check out our post on easy goth nail designs.
Color Palette | Details | Additional Elements |
|---|---|---|
Black, grey, purple | Intricate lines, shading | Roses, thorns, bats |
Deep red, black | Detailed skull features | Spiders, cobwebs |
Tips and Tricks for Perfect Skull Nails
Tips and Tricks for Perfect Skull Nails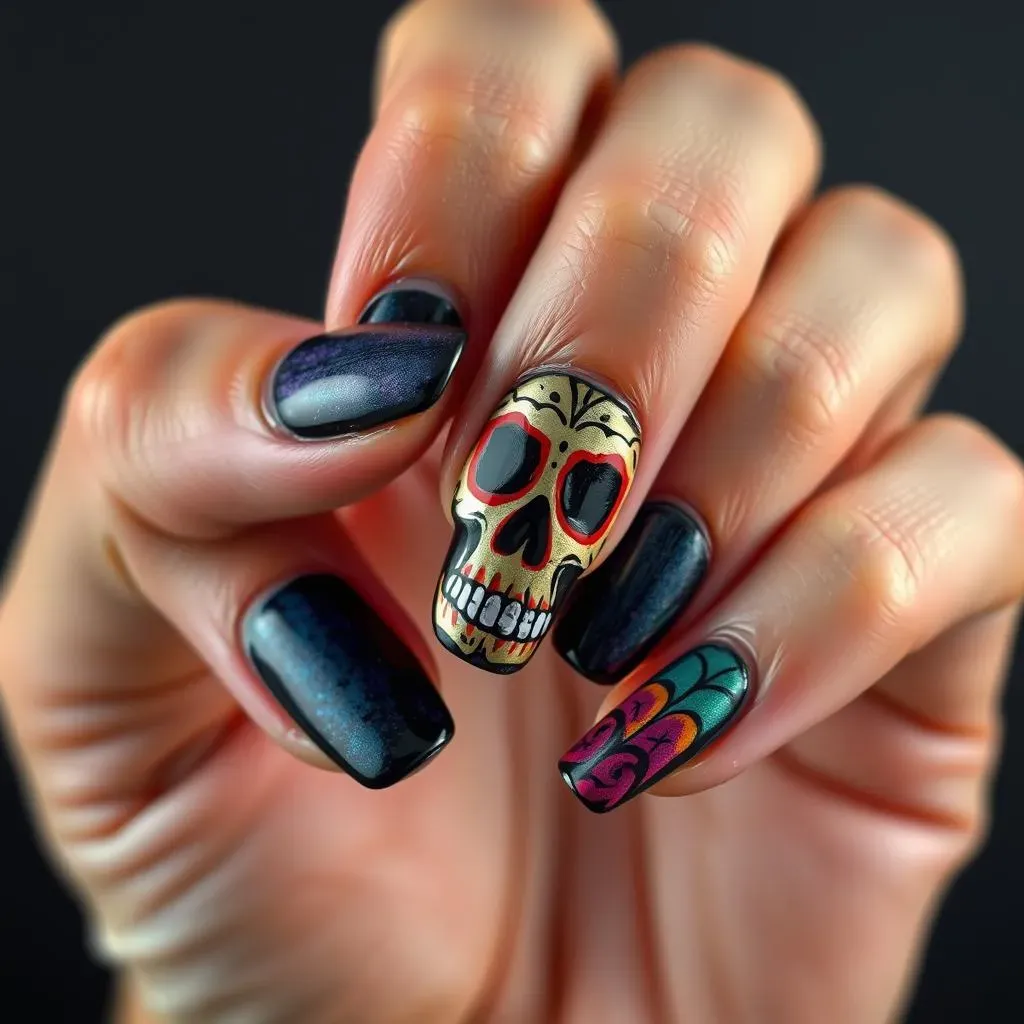
Prep Work is Key
Before you even think about picking up a nail polish brush, proper nail prep is crucial for a long-lasting and professional-looking manicure. Start by gently pushing back your cuticles. Then, give your nails a quick buff to create a smooth surface for better adhesion. This simple step makes a huge difference in how well your polish adheres and how long your manicure lasts. Trust me, it's worth the extra minute or two!
Next, apply a base coat. This not only protects your nails from staining but also helps your nail polish adhere better and prevents chipping. A good base coat is like the foundation of a house—it's invisible but essential for a solid and long-lasting structure. After your base coat is dry, you're ready to start painting those awesome skulls! For more tips on nail prep, check out our guide on easy nail designs for beginners.
- Gently push back your cuticles.
- Buff your nails for a smooth surface.
- Apply a base coat for protection and better adhesion.
Thin Coats are Your Friend
When painting your skull designs, resist the urge to apply thick coats of polish. Thin coats dry faster, are less prone to smudging, and create a more even, professional finish. Think of it like painting a wall – multiple thin coats give you a smoother, more even color than one thick, gloopy coat. It might take a few extra minutes, but the result is well worth the effort.
Let each coat dry completely before applying the next. This prevents smudging and helps ensure your design looks sharp and clean. If you're impatient (like me!), a quick blast of cool air from a hairdryer can help speed up the drying process. But be careful not to hold it too close or for too long. For more advanced techniques, explore our amazing easy gel nail designs.
Coat | Drying Time | Tip |
|---|---|---|
Base Coat | 2-3 minutes | Apply a thin, even layer |
Color Coats | 2-3 minutes per coat | Apply thin layers; let each dry completely |
Top Coat | 2-3 minutes | Apply a thin layer for a smooth finish |
Mastering the Fine Details
Adding those tiny details, like pupils or tiny teeth, can be tricky. A steady hand and a fine-tipped brush are your best friends. If you're struggling to get precise lines, try using a toothpick or a dotting tool. These tools can help you create small, perfectly placed dots and lines, especially for the eyes and mouth of your skull.
Don't be afraid to practice! Before you start on your actual nails, practice your design on a piece of paper or an old nail polish bottle. This will help you get a feel for the brush and develop your technique. If you're feeling overwhelmed, remember that you can always simplify the design. Sometimes, less is more! For more inspiration on simple designs, explore our awesome simple nail designs for 2024.
- Use a fine-tipped brush or a dotting tool for small details.
- Practice your design on paper before applying it to your nails.
- Don't be afraid to simplify your design if needed.