Table of Contents
Ready to flaunt fabulous Valentine's Day nails without spending a fortune or needing a professional manicure? This article is your guide to achieving adorable and easy valentine nail designs, perfect for any skill level. Whether you're a nail art newbie or just looking for some quick and cute inspiration, we've got you covered. We'll start with super simple designs ideal for beginners, showing you how to create stunning looks with minimal tools and effort. Next, we'll explore the world of nail stickers and decals, revealing how easy it is to elevate your manicure with pre-made designs. Then, we'll dive into some charming nail art achievable with just a few basic supplies, proving you don't need a ton of equipment to create a show-stopping look. Finally, we'll share a gallery of additional easy valentine nail designs to spark your creativity and help you find the perfect match for your Valentine's Day plans. Get ready to unleash your inner artist and create a manicure that's as unique and beautiful as you are! Let's get started on those easy valentine nail designs!
Simple Easy Valentine Nail Designs for Beginners
Simple Easy Valentine Nail Designs for Beginners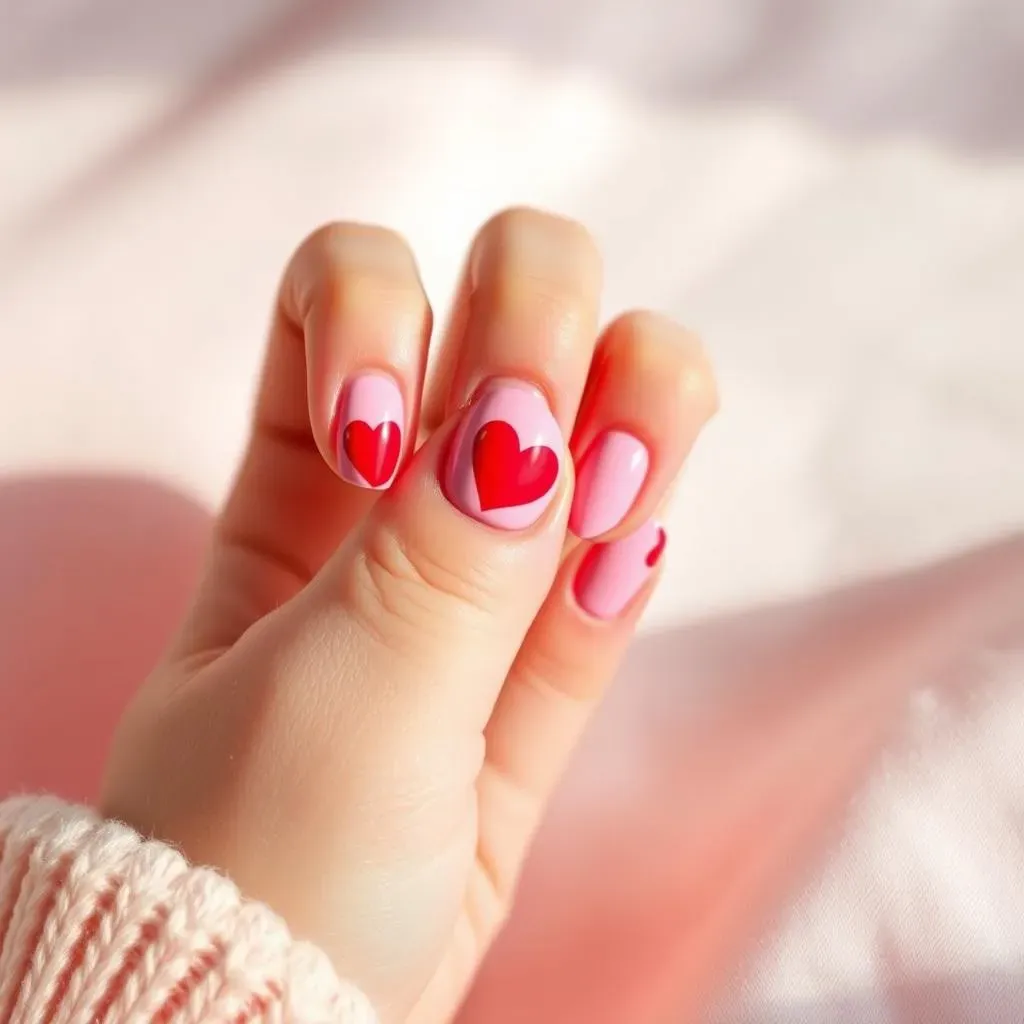
Classic Red & Pink Hearts
Let's start with a Valentine's Day classic: hearts! This is super easy. Paint your nails a base coat of pale pink or nude. Once dry, use a fine brush or even a toothpick to carefully paint small red hearts onto each nail. You can cluster them together or space them out – it's all up to you! For a slightly fancier touch, try adding a tiny white dot to the center of each heart. This is a great way to practice your nail art skills and create a look that's both simple and festive. Don't worry about perfection; a slightly imperfect heart adds charm! If you need more ideas for simple nail designs, check out our post on easy everyday nail designs.
Need some inspiration for different heart shapes and placements? Pinterest is a treasure trove of ideas! You can also try looking for nail art tutorials on YouTube. Many channels showcase simple Valentine's Day designs that are perfect for beginners. Remember, the most important thing is to have fun and experiment! Don't be afraid to try different colors or add your own personal touch.
Step | Action |
|---|---|
1 | Apply base coat |
2 | Paint hearts |
3 | Add details (optional) |
4 | Apply top coat |
Simple Valentine's Day French Manicure
A French manicure is always a chic choice, and it's surprisingly easy to adapt it for Valentine's Day. Instead of the classic white tip, paint the tips of your nails a pretty shade of pink or red. You can use a striping tape to get perfectly straight lines, or freehand it for a more relaxed look. If you're feeling adventurous, add some tiny hearts along the cuticle line or at the base of the nail. For an extra touch of elegance, consider adding some glitter to the tips, or use a shimmery polish instead of a solid color. This design is subtle enough for everyday wear but festive enough for Valentine's Day. For more inspiration on French manicures, check out our guide to easy wedding nail designs – many of the ideas translate perfectly to a Valentine's Day theme!
Remember that practice makes perfect! If your first attempt isn't flawless, don't get discouraged. Keep practicing, and you'll be amazed at how quickly you improve. Start with one or two accent nails to practice your technique before doing all your nails. And don’t forget to apply a good top coat to protect your lovely manicure and help it last longer. Also, remember to prep your nails properly before you start painting – this will make a huge difference in the overall look and longevity of your design.
- Choose a base color
- Paint tips with a contrasting color
- Add optional embellishments
- Seal with a top coat
Easy Valentine Nail Designs Using Stickers & Decals
Easy Valentine Nail Designs Using Stickers & Decals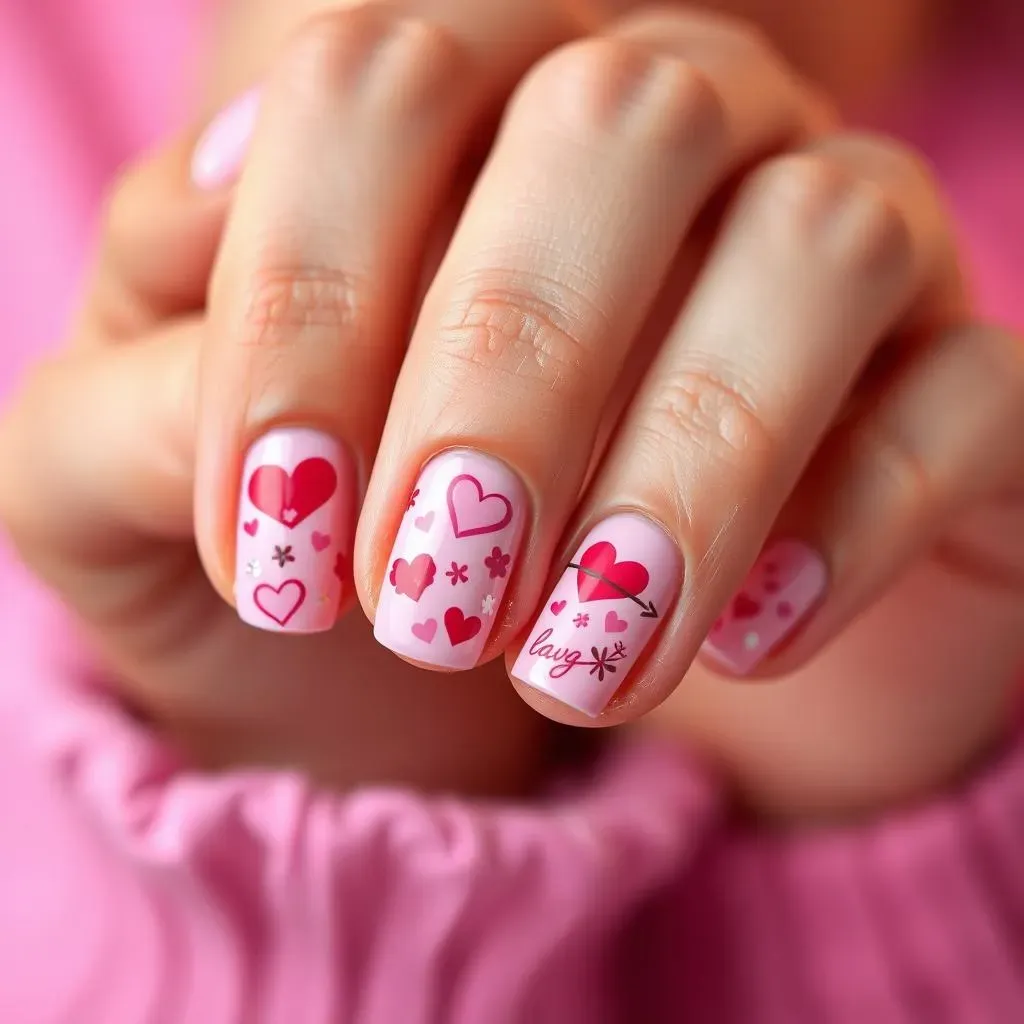
Let's be honest, sometimes freehand nail art is a *tad* more challenging than we anticipated. That's where nail stickers and decals come to the rescue! They're a total game-changer for creating adorable Valentine's Day nails, even if your artistic skills are more "enthusiastic beginner" than "master painter." You can find tons of cute Valentine's Day themed stickers online or in beauty supply stores – hearts, cupids, flowers, and even cute little messages of love are all readily available. Simply choose a base coat color (a neutral pink or even a sparkly white is a great choice), apply it to your nails, and let it dry completely. Then, carefully peel and apply your chosen stickers, pressing firmly to ensure they adhere properly. Finish with a top coat to seal everything in place and add extra shine. It’s so incredibly easy, and the results are seriously impressive!
For even more nail design inspiration, why not check out our post on easy nail art ideas? It's packed with fun and simple designs that you can totally adapt for Valentine's Day. Remember, you can mix and match sticker designs to create a truly unique look. For instance, combine some heart stickers with some glitter accents for an extra touch of sparkle and shine. Or, if you’re feeling particularly creative, you could even cut out smaller shapes from larger stickers to customize them to your nails.
Step | Action |
|---|---|
1 | Apply base coat |
2 | Apply stickers/decals |
3 | Apply top coat |
One of the best things about using stickers and decals is the sheer variety available. You can find everything from minimalist designs to more elaborate, eye-catching ones. If you're going for a more sophisticated look, consider using metallic or holographic stickers to add a touch of glamour. Or, for something more playful, try stickers with fun textures, like glitter or 3D effects. Really, the possibilities are endless!
Don't underestimate the power of a well-chosen base coat! It can really make or break the overall look of your manicure. A creamy nude polish can make your stickers pop, while a bright pink or red can create a more bold and dramatic look. If you’re looking for some inspiration on base coats, you might like our guide to easy nail designs for beginners – it has some great base coat suggestions.
- Choose a base coat
- Select Valentine's Day stickers
- Apply stickers carefully
- Seal with top coat
Cute & Easy Valentine Nail Art with Minimal Tools
Cute & Easy Valentine Nail Art with Minimal Tools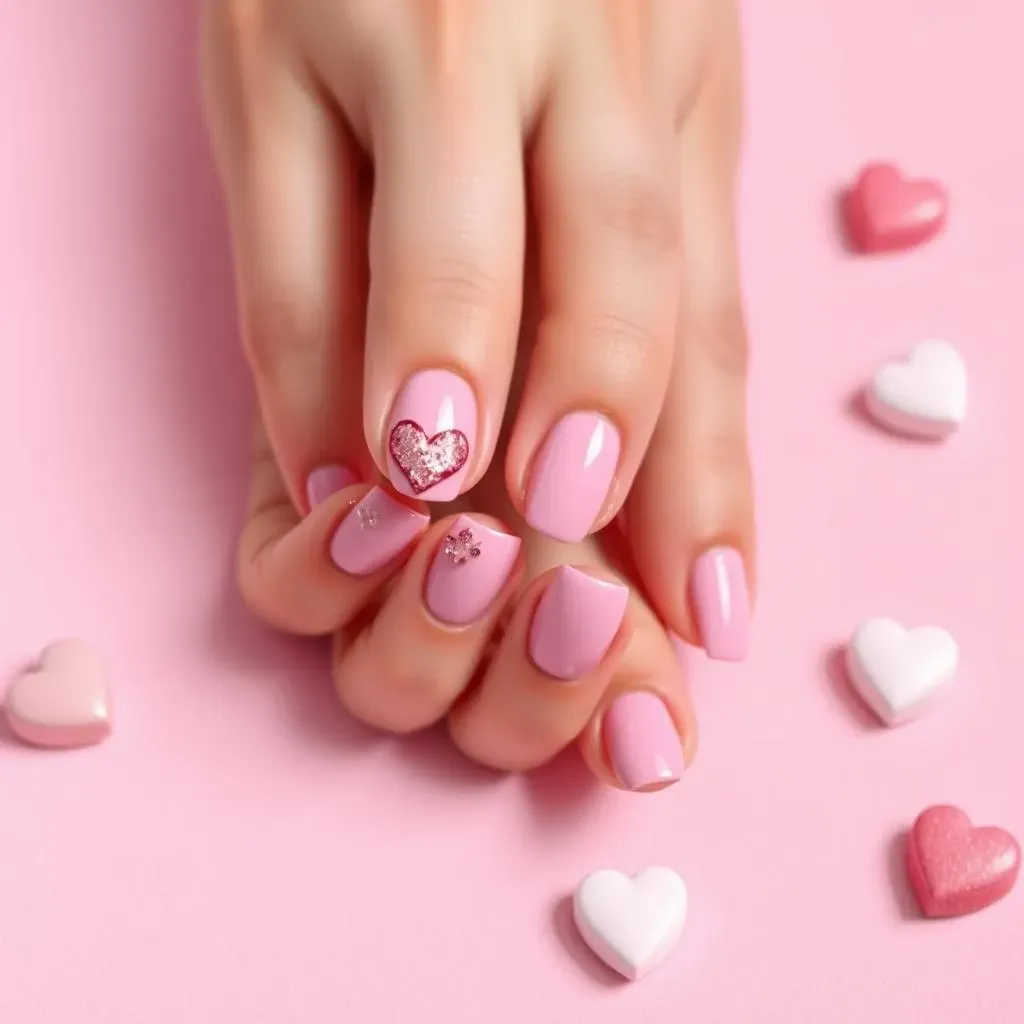
Simple Heart Design
Let's create some cute hearts! You only need a few things: your favorite pink or red nail polish, a thin nail art brush (or even a toothpick!), and a clear top coat. Start with a base coat of a neutral color like a pale pink or nude. Once dry, use your brush or toothpick to make tiny hearts. Two small dots side-by-side, joined by a V-shape at the bottom – that's it! Try different sizes and placements on each nail. Some hearts can be clustered together, others spaced apart. Don't worry about perfect symmetry; a little imperfection adds to the charm. Finish with a top coat to make it last. This simple design is perfect for a beginner and looks incredibly cute for Valentine’s Day! For more simple nail art ideas, check out our guide to easy nail art designs.
Want to add some extra flair? Try using a slightly darker shade of pink or red to outline your hearts, or add a small sparkly accent to the center. You can even use a different color entirely – think a cute pastel blue or green for a fun twist! Adding a little bit of glitter to the top coat can also make your design more festive. Experiment and have fun with it! Remember, there's no such thing as a wrong way to have fun with nail art. The most important thing is to enjoy the process and create a design that makes you happy.
- Apply base coat
- Paint simple hearts
- Add optional details
- Apply top coat
Subtle Glitter Accent
For a super easy yet elegant Valentine’s Day look, try adding a subtle glitter accent to your nails. Start with a base coat of your favorite pale pink or nude shade. Let it dry completely. Then, using a small brush or a sponge, apply a thin layer of pink or red glitter polish to just the tips of your nails, creating a subtle, sparkly French manicure. You could also add a thin line of glitter along the cuticle line for a different look. Alternatively, you can apply the glitter to just one or two accent nails for a more understated approach. A final coat of clear top coat will help keep the glitter in place and add extra shine. This look is incredibly easy to achieve, and it looks surprisingly sophisticated.
This design is perfect if you're short on time but still want something festive for Valentine's Day. It’s also a great choice if you prefer a more understated look. You can adjust the amount of glitter you use to achieve your desired level of sparkle. For a more subtle effect, use a fine glitter; for a bolder look, use a chunky glitter. And, don’t forget, this manicure works with any base coat color! For more inspiration on simple, yet stylish nail designs, have a look at our post on simple and easy nail designs.
Step | Action |
|---|---|
1 | Apply base coat |
2 | Apply glitter accent |
3 | Apply top coat |
More Easy Valentine Nail Designs Ideas & Inspiration
Ombre Effects
Ombre nail designs are super trendy and surprisingly easy to achieve. For a Valentine's Day twist, try a pink and red ombre. Start with a base coat of your lightest shade (pale pink). Then, using a sponge or a small brush, blend in progressively darker shades of pink and finally, red. You can do this vertically, horizontally, or even create a heart shape with the ombre. The key is to blend the colors seamlessly for a soft, gradient effect. Finish with a top coat to protect your beautiful creation. This technique is more forgiving than precise painting, so don't stress about perfection! For more ombre inspiration, check out our article on easy pretty nail designs for short nails — many of the ideas translate perfectly to Valentine's Day.
For a truly unique touch, try adding some glitter to your ombre design. You could add a fine glitter to the entire nail, or focus it on specific areas, like the tips or the center. Experiment with different glitter colors and textures to find what you like best. Remember, the best thing about nail art is that there is no one "right" way to do it. The possibilities are endless, and the best way to find your style is to experiment. Prep your nails properly with a good base coat and cuticle oil for a smoother, longer-lasting result. Don’t be afraid to try different color combinations – the more creative, the better!
- Choose your ombre shades
- Apply base coat
- Blend colors using a sponge or brush
- Add glitter (optional)
- Apply top coat
Negative Space Designs
Negative space nail art is all the rage, and it's perfect for a minimalist Valentine's Day look. Start with a base coat of a neutral color – a milky white or a soft nude works beautifully. Then, use a thin brush or tape to create simple shapes, such as hearts, or just lines, leaving some of your base coat visible. This creates a chic, modern look. You can use a contrasting color (like a bold red or a deep pink) for the shapes or keep it simple with just the base color and the negative space. For more ideas on negative space nails, take a look at our guide to easy nail designs for date night – many of these designs are also perfect for Valentine’s Day.
A key to success with negative space designs is precision. Use painter's tape to help create crisp, clean lines if freehanding isn't your forte. If you make a mistake, don't panic! A little acetone on a cotton swab will quickly clean up any imperfections. Remember to let each layer dry thoroughly before adding the next to prevent smudging. And don't be afraid to experiment with different shapes and colors. A simple heart shape can be incredibly elegant, while a more abstract design can be surprisingly chic. A top coat is essential to protect your design from chipping and to add a beautiful shine.
Step | Action |
|---|---|
1 | Apply base coat |
2 | Create negative space shapes |
3 | Fill in shapes (optional) |
4 | Apply top coat |
Adding Embellishments
Want to add some extra pizzazz to your easy valentine nail designs? Consider adding some embellishments! Small studs, rhinestones, or even tiny charms can elevate a simple design to the next level. Place them strategically on your nails to create a unique and eye-catching look. A few carefully placed rhinestones can add a touch of sparkle to a simple heart design, or you could use small studs to create a subtle pattern. Remember, less is often more – a few well-placed embellishments will have a bigger impact than trying to cram too many onto your nails. For more inspiration on using embellishments, check out our post on easy nail art ideas with simple designs — it's packed with great ideas!
Before applying embellishments, make sure your base polish is completely dry. Use a small amount of nail glue to adhere the embellishments securely to your nails. Once the glue is dry, apply a top coat to seal everything in place and add extra shine. If you’re using rhinestones, you might find it easier to use a dotting tool to place them precisely. For a more subtle look, use smaller embellishments, and for a bolder statement, use larger ones. Don’t be afraid to get creative and experiment with different placements and combinations to find what you like best. And remember, a little bit of patience and precision will go a long way!
- Choose your embellishments
- Apply base coat
- Add embellishments using nail glue
- Apply top coat