Table of Contents
Ready to upgrade your nail game without spending hours in a salon? Then you've come to the right place! This article is your ultimate guide to mastering the art of "black and white easy nail designs." We'll take you from simple stripes and polka dots to more intricate patterns and stylish accents, all while keeping it beginner-friendly. Whether you're a nail art newbie or looking for fresh inspiration, we've got you covered. Get ready to explore a world of elegant and effortless nail designs that are perfect for any occasion. We’ll start with the absolute basics – simple yet effective techniques that anyone can master. Then, we’ll gradually increase the difficulty, introducing fun ways to add some extra flair to your manicure. By the end of this article, you'll be equipped with the skills and ideas to create stunning black and white nail art that will turn heads. Let's dive in and unleash your inner nail artist!
Classic Black and White Nail Art: Simple Stripes, Dots, and Checks
Classic Black and White Nail Art: Simple Stripes, Dots, and Checks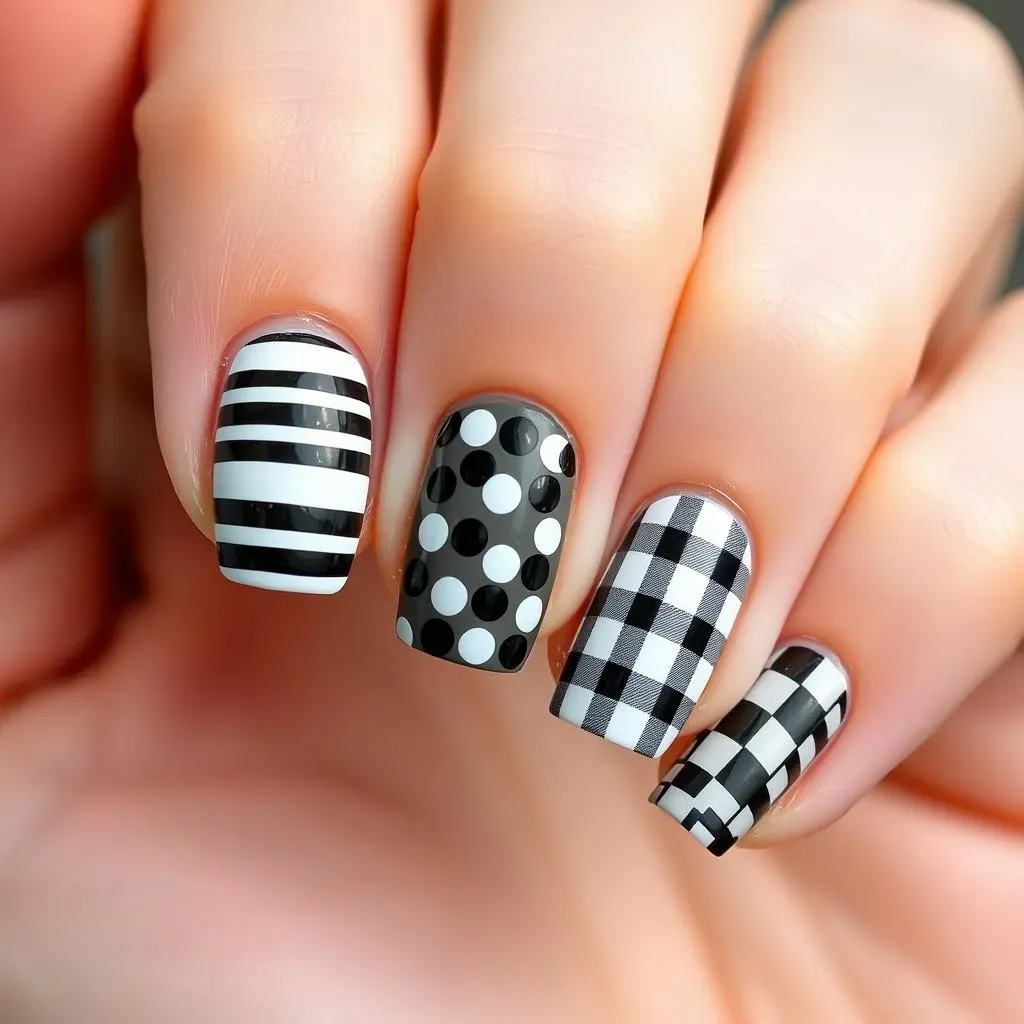
Stripes: The Timeless Classic
Let's start with the simplest and most iconic black and white nail design: stripes! Think classic French manicures, but with a twist. Instead of a simple white tip, try alternating black and white stripes of varying widths. You can use painter's tape for perfectly straight lines, or freehand it for a more relaxed, artistic feel. For a fun, modern update, try diagonal stripes, or even incorporate some negative space by leaving some nail areas unpainted. It’s surprisingly versatile and looks great on any nail shape! Check out these simple square nail designs for more inspiration.
Don't be afraid to experiment! Try thin stripes, thick stripes, or even a combination of both. You can also play around with different stripe placements – horizontal, vertical, or diagonal. The possibilities are endless!
Stripe Width | Placement | Overall Look |
|---|---|---|
Thin | Vertical | Elegant |
Thick | Horizontal | Bold |
Mixed | Diagonal | Modern |
Polka Dots: Playful and Chic
Next up: polka dots! This playful design adds a touch of whimsy to your manicure. You can use a dotting tool for perfectly sized dots, or improvise with a bobby pin or even the end of a toothpick. Vary the size and placement of your dots for a more dynamic look. Try clustering dots together for a bolder statement, or space them evenly for a more refined feel. For a touch of extra elegance, use a matte top coat to give your polka dots a sophisticated finish. Need more ideas? Check out our easy nail art designs gallery!
Consider creating different patterns with your polka dots. For example, you could alternate the colors of the dots or create a gradient effect by using different shades of black and white. For something unique, try creating a heart shape with your dots.
- Use a dotting tool for precision.
- Experiment with dot sizes and spacing.
- Add a matte top coat for a sophisticated look.
Checks and Gingham: A Touch of Preppy
For a touch of preppy charm, try a check or gingham pattern. This classic design is surprisingly easy to achieve with a little patience and precision. Again, painter's tape can be your best friend here! Create a grid of squares, then fill in alternating squares with black and white polish. You can also experiment with different sizes of checks to create a unique look. For a more whimsical vibe, try adding a touch of color with a single accent nail featuring a different design. Try some easy black and white nail designs to get started!
Remember, practice makes perfect! Don't get discouraged if your first attempt isn't flawless. Keep practicing, and you'll soon be creating beautiful check patterns like a pro. And if you're feeling adventurous, try incorporating other simple shapes or patterns into your design.
Adding Flair: Black and White Nail Designs with Glitter, Accents, and Patterns
Adding Flair: Black and White Nail Designs with Glitter, Accents, and Patterns
Glitter Accents: Adding Sparkle
Let's add some sparkle! A little glitter goes a long way in elevating a simple black and white design. You can use glitter polish directly over your base color, or create a glitter accent nail. For a subtle touch, add a thin line of glitter along the cuticle or tip of your nails. For a bolder look, try a full glitter accent nail or incorporate glitter into a more complex pattern. Check out our rhinestone nail designs for more sparkly ideas!
Experiment with different glitter colors and sizes! Fine glitter creates a delicate shimmer, while chunky glitter adds a more dramatic effect. You could even mix and match different glitters for a truly unique look. Remember to seal your glitter with a top coat to prevent shedding.
Glitter Type | Application | Overall Effect |
|---|---|---|
Fine Glitter | Thin line | Subtle shimmer |
Chunky Glitter | Full nail | Bold sparkle |
Mixed Glitter | Gradient | Unique shimmer |
Geometric Accents and Patterns: Modern and Chic
Geometric shapes are another fantastic way to add visual interest to your black and white nails. Simple shapes like triangles, squares, and circles can create surprisingly striking patterns. Use tape to create clean lines, or freehand them for a more artistic feel. You could create a half-moon design with a geometric pattern on the lower half of the nail. Or try incorporating negative space – leaving parts of the nail unpainted – for a modern, minimalist vibe. For more advanced ideas, explore more easy nail art designs online!
Don't limit yourself to just one shape! Combine different geometric shapes and sizes to create unique and unexpected patterns. You could even incorporate other elements like stripes or polka dots for added texture. Remember, the key is to have fun and experiment until you find a look you love.
- Use painter's tape for precise lines.
- Experiment with different shapes and sizes.
- Incorporate negative space for a modern look.
Beyond Basic: More Advanced Black and White Nail Art Techniques for Beginners
Beyond Basic: More Advanced Black and White Nail Art Techniques for Beginners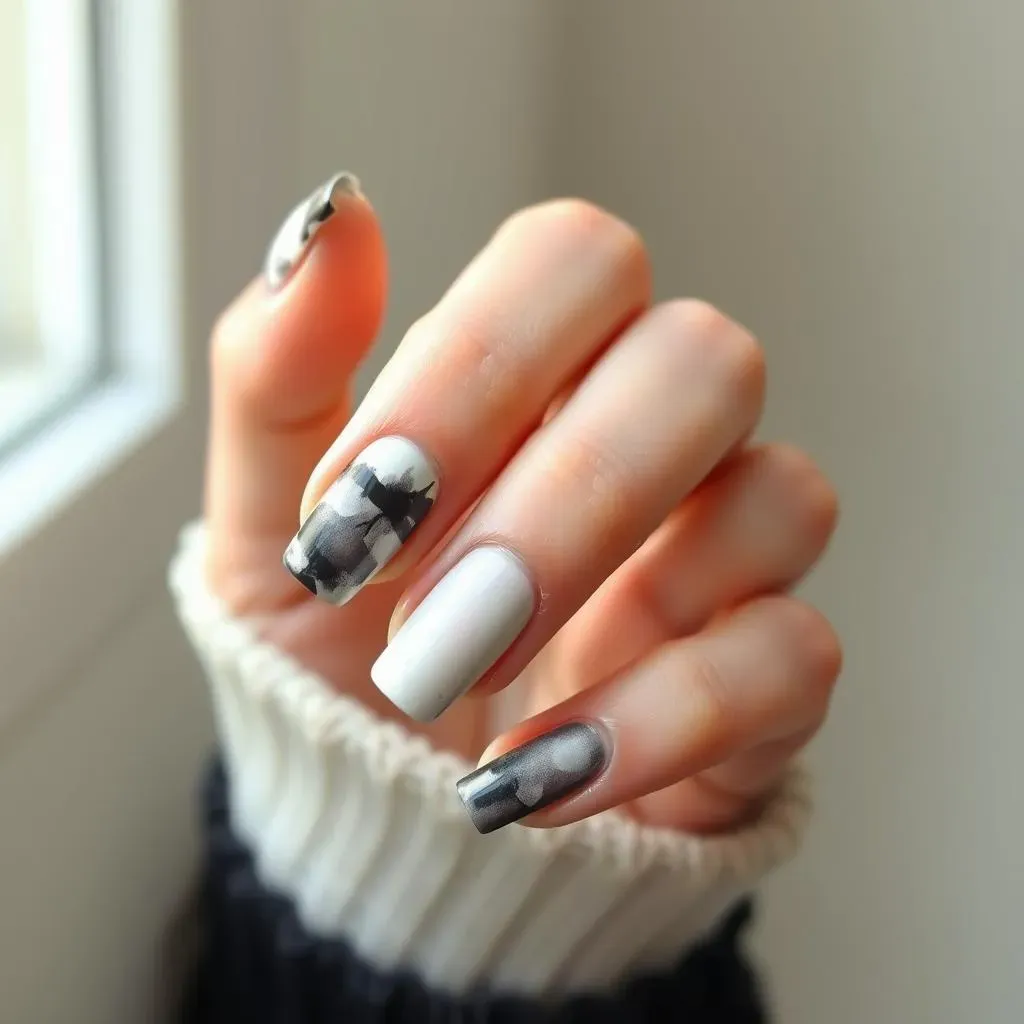
Watercolor Effects: A Touch of Delicate Art
Let's step up the game with watercolor effects! This technique creates a soft, dreamy look, perfect for adding a touch of sophistication to your black and white nails. You'll need some water-based nail paints and a small brush. Start with a base coat, then add diluted black and white paints to create a gradient or abstract design. Blend the colors together using a wet brush or a sponge for a seamless transition. Don't worry about perfection; the beauty of watercolor is its slightly imperfect, organic feel. For more inspiration, check out these easy gel nail designs which often feature similar techniques.
Practice makes perfect! Start with simple gradients before trying more complex designs. Experiment with different brushstrokes and blending techniques to create unique effects. You can also add a touch of glitter or shimmer for extra sparkle. Remember to seal your design with a top coat to protect it and add shine.
- Use water-based nail paints.
- Start with simple gradients.
- Experiment with different brushstrokes.
Negative Space Designs: Minimalist Chic
Negative space designs are all the rage, and for good reason! This minimalist approach uses unpainted areas of the nail to create striking visuals. Think simple shapes like half-moons, geometric cutouts, or abstract forms left unpainted against a black or white backdrop. A little planning goes a long way here. Use painter's tape for crisp lines, or freehand for a less structured feel. The contrast between the painted and unpainted areas is what makes this technique so effective. For more minimalist ideas, see our gallery of simple nail designs from 2022.
Remember, less is often more. Start with a simple shape and build from there. You can also experiment with different placements of the negative space. Try a single accent nail with a bold negative space design, or create a pattern across multiple nails. A matte top coat adds a modern, sophisticated touch.
Shape | Placement | Overall Effect |
|---|---|---|
Half-moon | Cuticle area | Classic |
Geometric | Across nail | Modern |
Abstract | Freehand | Artistic |
Ombre and Gradient Effects: A Smooth Transition
Ombre and gradient nail art is all about creating a smooth transition between two colors. For a black and white ombre, you’ll need two sponges and both black and white polishes. Apply white polish to one side of the nail and black to the other, then blend them together using the sponge. For a more precise gradient, use a makeup sponge and carefully dab the polish onto the nail. You can also use striping tape to create a clean line between the colors. Consider checking out some simple red nail designs for inspiration on gradient techniques.
Experiment with different blending techniques for varied results. A soft, subtle gradient creates a sophisticated look, while a more dramatic transition adds a bold statement. You can also experiment with different placement of the gradient – vertical, horizontal, or diagonal. A glossy top coat brings out the shine and enhances the smooth transition.