Table of Contents
Let's be honest, rocking amazing nails can feel like a mission impossible when you have short nails. But guess what? It doesn't have to be! This article is your ultimate guide to achieving fabulous fingertips, even if your nails are on the shorter side. We're diving headfirst into the world of "cute and easy nail designs for short nails," proving that short nails are anything but boring. Get ready to discover a treasure trove of adorable and simple nail art ideas, complete with easy-to-follow step-by-step tutorials. Whether you're a nail art newbie or a seasoned pro looking for some fresh inspiration, we've got you covered. Prepare to be amazed by the variety of cute designs that perfectly suit short nails – from minimalist chic to playful pops of color. We'll also share some expert tips and tricks to help you achieve salon-worthy results at home. So grab your favorite nail polish, and let's transform your short nails into miniature masterpieces!
Adorable and Easy Nail Art Ideas for Short Nails
Adorable and Easy Nail Art Ideas for Short Nails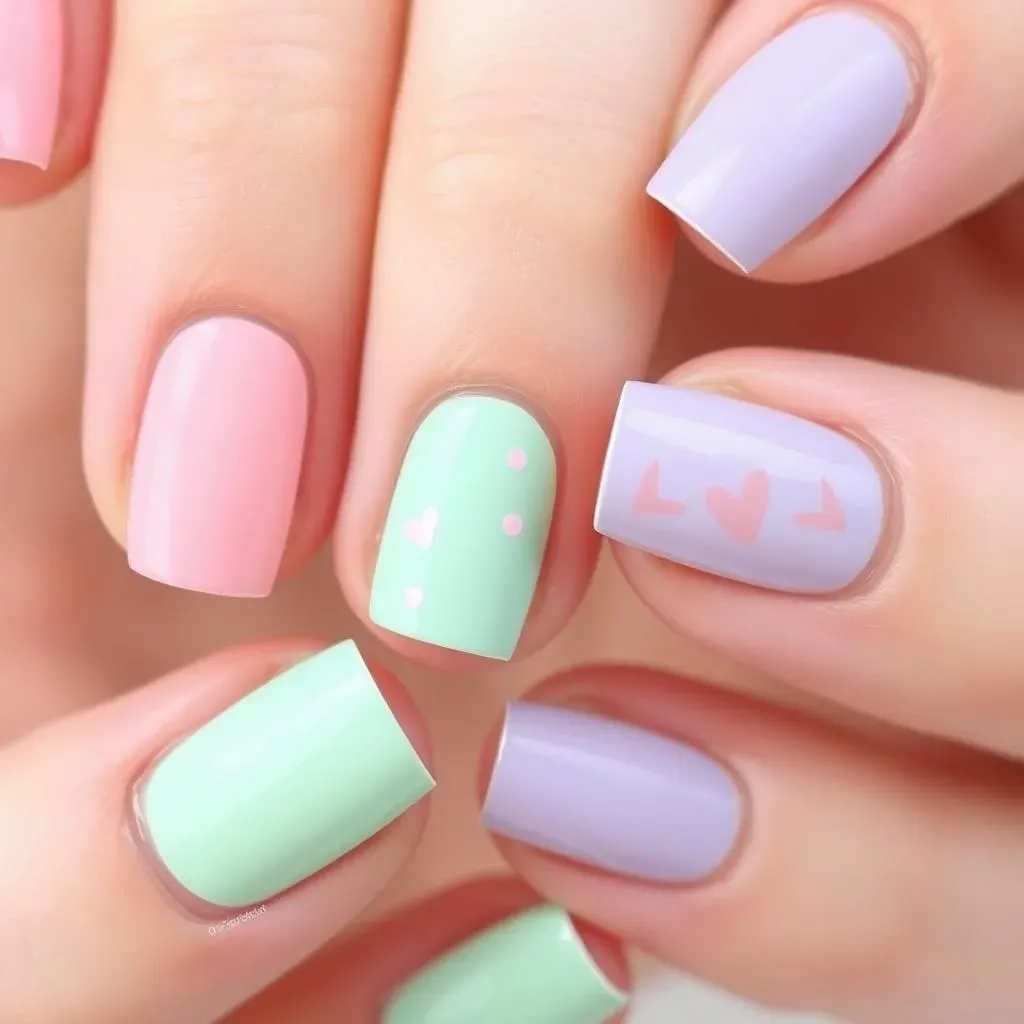
Adorable and Easy Nail Art Ideas for Short Nails
So, you've got short nails and you're looking for cute and easy nail art? Fantastic! Short nails are a total blank canvas for some seriously adorable designs. Forget the idea that you need long nails for fancy nail art – that's a myth! Think delicate details, subtle accents, and bold colors that really pop. A single accent nail with a cute design, like a tiny heart or a simple floral pattern, can elevate your whole look. Or, try a minimalist approach with a single color and a clean, geometric design. And don't forget the power of a great base coat! A gorgeous color can make even the simplest design look amazing. For example, a creamy pastel pink with a single silver glitter accent nail is both super chic and super easy. For more inspiration check out these cute and easy nail designs!
Design Idea | Difficulty | Supplies Needed |
|---|---|---|
Solid color with a single accent nail | Beginner | Base coat, top coat, two nail polish colors |
Simple geometric design | Beginner-Intermediate | Base coat, top coat, nail polish, striping tape |
Tiny dots or hearts | Beginner | Base coat, top coat, nail polish, dotting tool (or toothpick) |
Remember, the best nail art is the art you enjoy creating! Don't be afraid to experiment and have fun with it. You can easily find more simple nail art ideas for beginners on our site. For example, you can check out our easy at-home nail art designs for more detailed instructions. A little practice goes a long way, and soon you'll be creating adorable nail art masterpieces in no time.
- Keep your tools clean
- Start with a good base coat
- Don't be afraid to experiment
Simple Nail Designs Perfect for Short Nails: StepbyStep Tutorials
Simple Nail Designs Perfect for Short Nails: StepbyStep Tutorials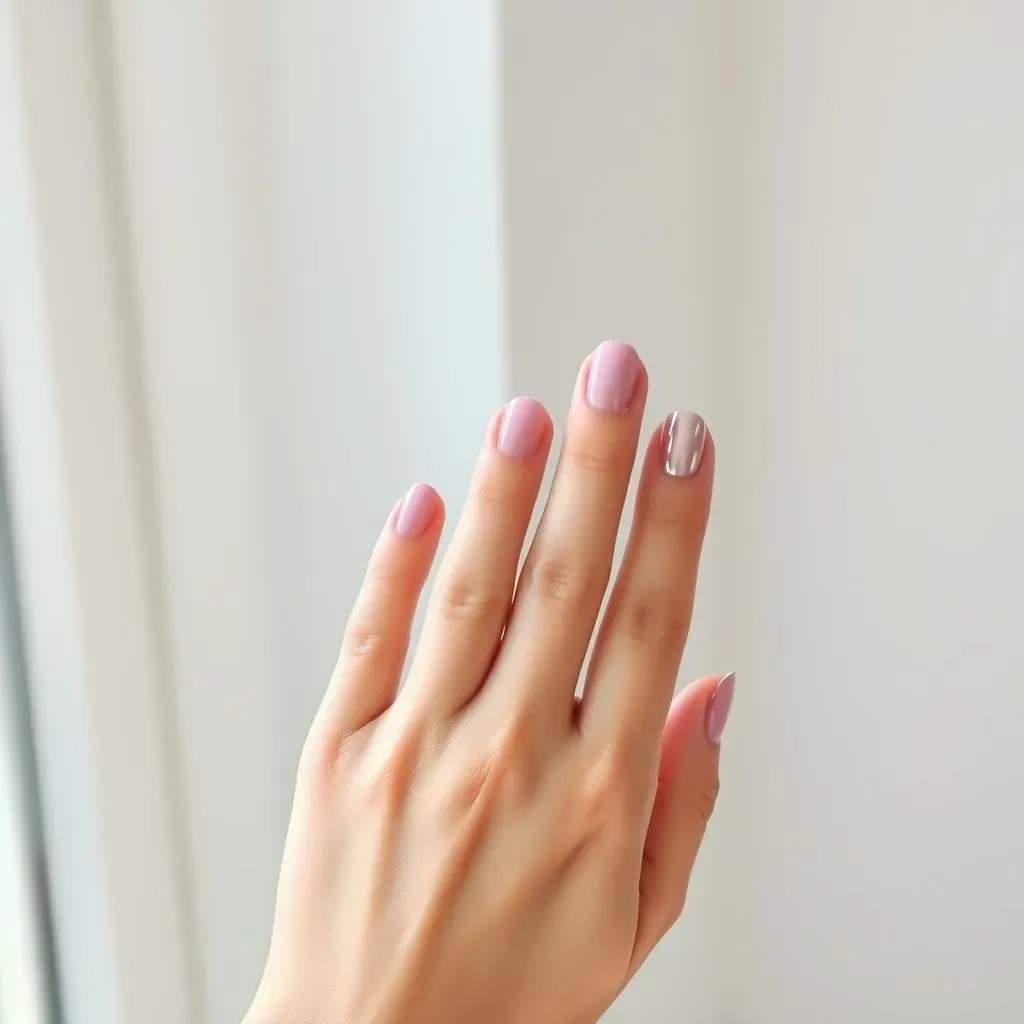
Easy Solid Colors with a Twist
Let's start with the simplest yet most impactful designs: solid colors! But we're not just talking about plain old manicures. Think of adding a subtle detail to elevate your look. For instance, try a classic French manicure, but instead of white, use a pastel shade like soft mint or delicate lavender. It's a fresh take on a timeless style, perfect for short nails. Or, go for a bold color like a vibrant coral or a deep jewel tone, and add a single metallic accent nail for a touch of glam. Check out our simple acrylic nail designs for more inspiration!
- Choose a base coat that complements your skin tone.
- Apply two thin coats of your chosen color for even coverage.
- For the accent nail, use striping tape or a thin brush for precision.
For even more detailed instructions, take a peek at our guide on easy everyday nail designs—it's packed with simple yet stunning ideas!
Step | Action | Tip |
|---|---|---|
1 | Apply base coat | Let it dry completely. |
2 | Apply two coats of color | Allow each coat to dry before applying the next. |
3 | Add accent (optional) | Use a fine brush or striping tape. |
4 | Apply top coat | For extra shine and longevity. |
Geometric Nail Art for Short Nails
Geometric designs are another fantastic option for short nails. Simple shapes like stripes, dots, or triangles can create a modern and chic look. Try using striping tape to create clean lines, or freehand simple shapes with a thin brush. You can keep it monochromatic, or experiment with different color combinations. A classic combination is a neutral base with black geometric shapes, but you can also try something more playful, such as pastel colors with gold accents. For more ideas, check out our easy line designs for nails!
Remember, practice makes perfect! Don't get discouraged if your first attempt isn't flawless. The key is to have fun and experiment with different techniques. And if you're feeling really adventurous, why not try using some nail art stickers or stencils to simplify the process? For tons of easy-to-do nail art, check out our easy DIY nail designs page!
- Use striping tape for straight lines.
- Practice on paper first if you're freehanding.
- Use a dotting tool for perfect dots.
Cute and Easy Nail Art for Short Nails: Inspiration and Tips
Cute and Easy Nail Art for Short Nails: Inspiration and Tips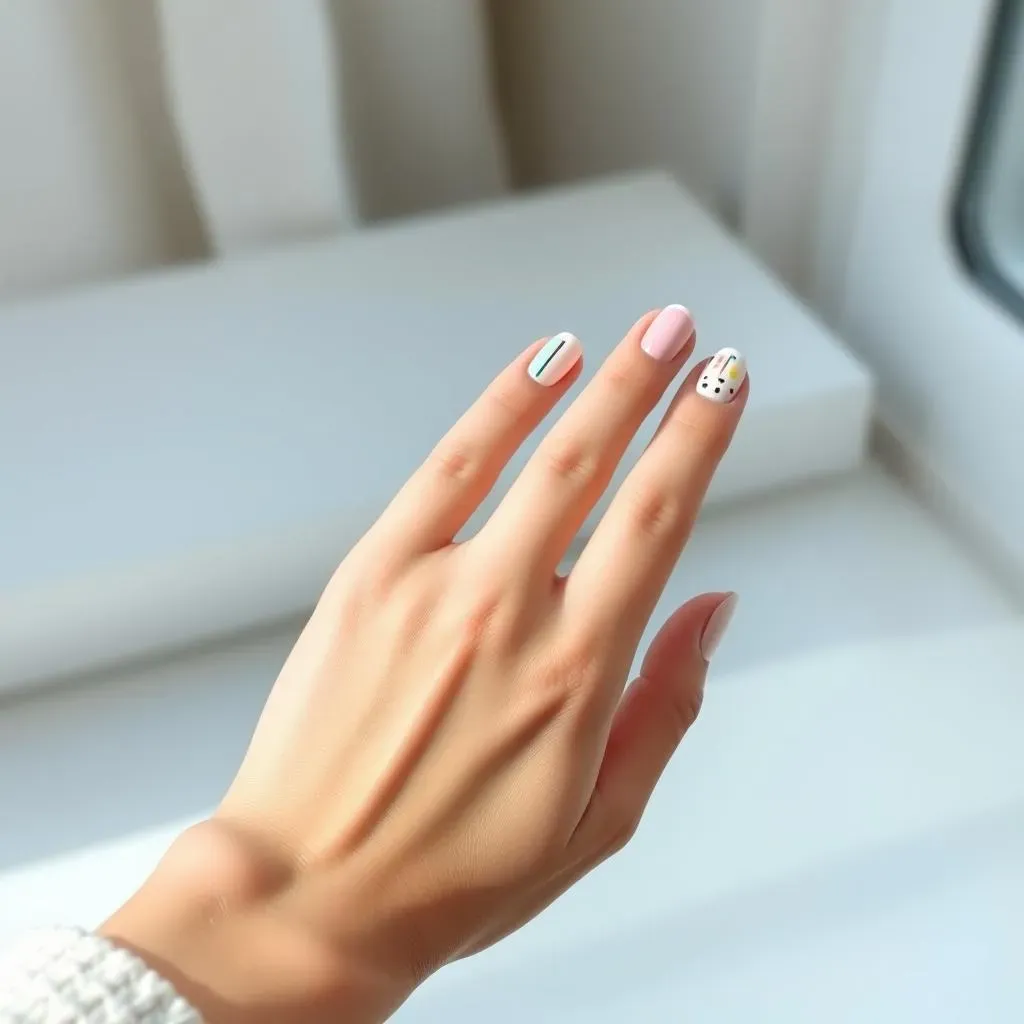
Let's get inspired! Pinterest and Instagram are overflowing with amazing nail art ideas. Searching for "short nail designs" or "easy nail art" will reveal a world of possibilities. Don't be afraid to mix and match elements you like from different designs. See a cute flower on one image and a cool geometric shape on another? Combine them! Your unique style will shine through. Remember, it's all about having fun and expressing your creativity. For more seasonal inspiration, check out our autumn nail designs!
- Use seasonal colors and themes.
- Look for designs that use simple shapes and lines.
- Don't be afraid to experiment with different color combinations.
Think about your personal style. Do you prefer bold and bright colors or something more subtle and sophisticated? Do you love florals, geometric patterns, or something completely unique? Once you have a general idea, start narrowing down your choices. For some extra sparkle, explore our rhinestone nail designs!
Style | Color Palette | Key Elements |
|---|---|---|
Minimalist | Neutral tones, pastels | Simple lines, dots, negative space |
Bohemian | Earthy tones, jewel tones | Floral patterns, abstract designs |
Modern | Bold colors, metallic accents | Geometric shapes, stripes |
Once you've found some designs you love, it's time to gather your supplies. You'll need base coat, top coat, your chosen nail polish colors, and any additional tools like striping tape, a dotting tool, or a fine-tipped brush. If you're feeling extra fancy, consider adding some small embellishments like rhinestones, glitter, or small charms. For more detailed instructions and supply lists, check out our at-home nail art designs page!
Don't forget the importance of proper nail care. Before you start painting, make sure your nails are clean and dry. Push back your cuticles gently and apply a base coat to protect your nails and help the polish adhere better. After your design is complete, finish with a top coat for added shine and durability. For a more detailed guide on nail care, check out our everyday nail designs guide which includes a dedicated section on nail care!
- Prep your nails: Clean, dry, and cuticles pushed back.
- Use thin coats of polish to avoid smudging.
- Allow each coat to dry completely before applying the next.
- Finish with a top coat for shine and longevity.