Table of Contents
Ready to unleash your inner nail artist? This article is your ultimate guide to cute easy nail designs for beginners! Forget expensive salon visits and complicated techniques; we'll show you how to create adorable, eye-catching manicures right at home. Whether you're a complete newbie or just looking for some fresh inspiration, we've got you covered. We'll walk you through simple designs using basic tools, perfect for those just starting out. Then, we'll explore cute designs specifically for short nails, proving that even limited canvas space can yield amazing results. Finally, we'll dive into seasonal and themed designs, giving you ideas for every occasion. Prepare to be amazed by how easy it is to transform your nails into miniature works of art. So grab your polish, and let's get started on your nail art journey!
Simple Nail Art Ideas for Beginners
Simple Nail Art Ideas for Beginners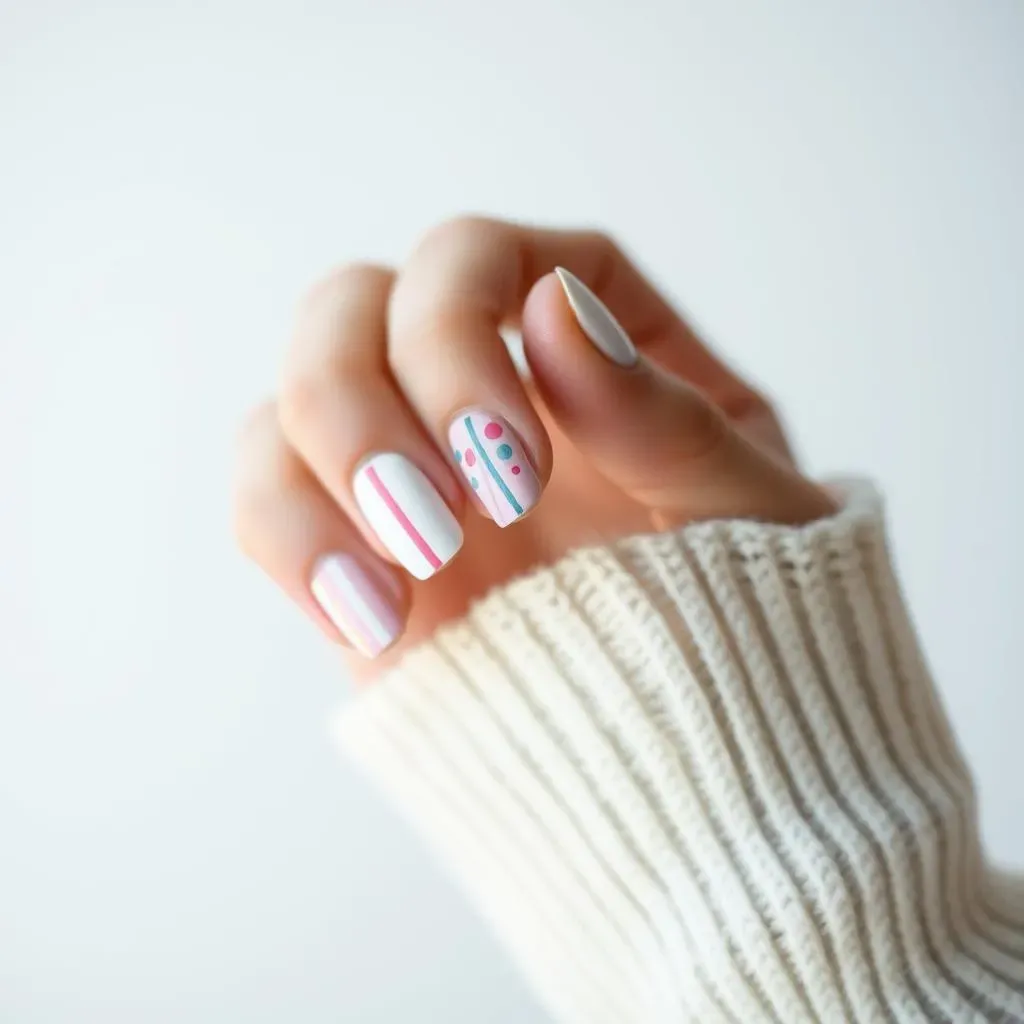
Stripes and Dots: The Easiest Nail Art
Let's start with the absolute basics! Stripes and dots are your gateway to the world of nail art. All you need is a few nail polishes in colors you love and a thin brush or a simple dotting tool. You can create endless variations – think bold stripes, tiny polka dots, or even a combination of both for a fun, playful look. For extra inspiration, check out our guide on easy black and white nail designs. It's surprisingly versatile and super easy!
Think of it like this: stripes are like drawing straight lines, and dots are like…well, making dots! It’s that simple. Start with a base coat, then add your stripes or dots. Finish with a top coat to seal the deal and protect your masterpiece. Don't be afraid to experiment with different color combinations!
- Choose 2-3 coordinating colors.
- Practice your lines and dots on paper first.
- Don't worry about perfection; embrace the imperfections!
Negative Space Magic: Less is More
Next up: negative space designs. This chic trend involves leaving parts of your nail bare, creating a stylish contrast with your chosen polish. This technique is incredibly forgiving, especially for beginners. You can create simple geometric shapes, like half-moons or triangles, by painting only a portion of your nail. Or, for something a little different, explore some easy designs for short nails – negative space works wonders on shorter nails!
Imagine a canvas, but instead of filling it entirely, you're strategically placing your colors. It's minimalist, modern, and incredibly easy to achieve. Start with a base coat, then use painter's tape (or your best freehand skills) to create your negative space shapes. Finish with a top coat, and you've got a stunning, effortlessly chic manicure. For extra flair, try incorporating a metallic accent color!
Design | Difficulty | Tools Needed |
|---|---|---|
Half-moon | Easy | Base coat, polish, top coat |
Triangle | Easy | Base coat, polish, top coat, tape (optional) |
Easy Designs Using Basic Tools
Easy Designs Using Basic Tools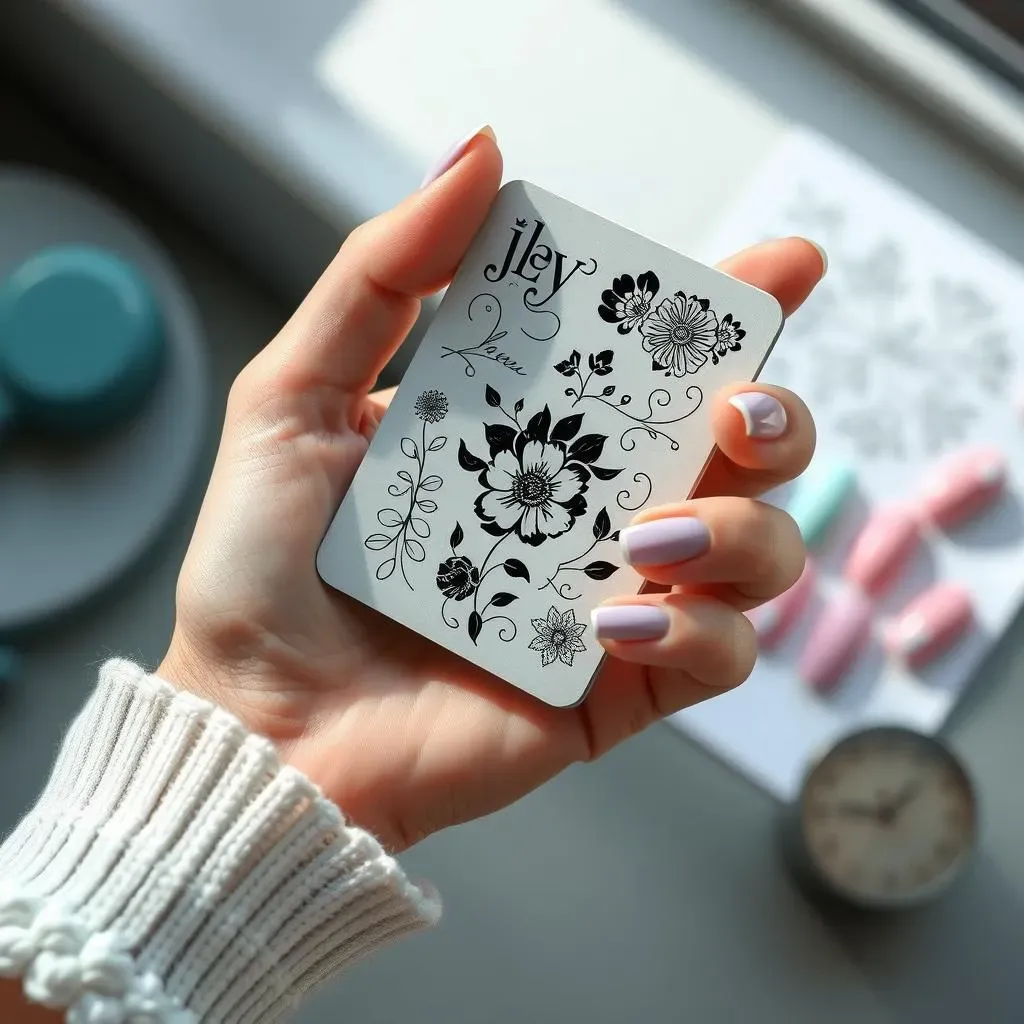
Stamping Fun: Easy Nail Art Designs
Let's talk nail stamping! This technique uses special plates with etched designs and a stamper to transfer the image onto your nails. It’s a game-changer for beginners because it lets you create intricate patterns without needing crazy artistic skills. You can find tons of stamping plates with cute designs, from florals to geometric shapes. For some extra inspiration, check out our collection of awesome easy floral nail designs – they’re perfect for stamping!
Think of it as a super cool rubber stamp for your nails. You simply apply polish to the plate, use the stamper to pick up the design, and then press it onto your nail. It's surprisingly simple and the results are stunning! A top coat will lock everything in place. Don't forget to clean your stamping plate after each use to keep it looking pristine.
- Choose a stamping plate with a design you love.
- Use a thin layer of polish on the plate.
- Firmly press the stamper onto the plate, then onto your nail.
Taping Techniques: Creating Clean Lines
Painter's tape is your new best friend. It's the secret weapon for creating crisp, clean lines and geometric patterns on your nails. You can use it to section off parts of your nail before applying different colors, creating stripes, or making unique shapes. For some extra ideas, you might want to look at our easy line designs for nails – they're all about using tape to perfection!
Think of it as a guide for your nail polish. You can create stripes, triangles, chevrons, or even more complex designs. Just place the tape where you want the lines to be, paint your nail, carefully peel off the tape, and finish with a top coat. It’s precise, it’s easy, and the results are seriously impressive. Experiment with different tape placements for endless possibilities!
Design | Tape Placement | Tip |
|---|---|---|
Stripes | Parallel lines | Use thin strips of tape |
Triangles | Diagonal lines | Cut tape into triangles |
Cute Nail Art for Short Nails
Cute Nail Art for Short Nails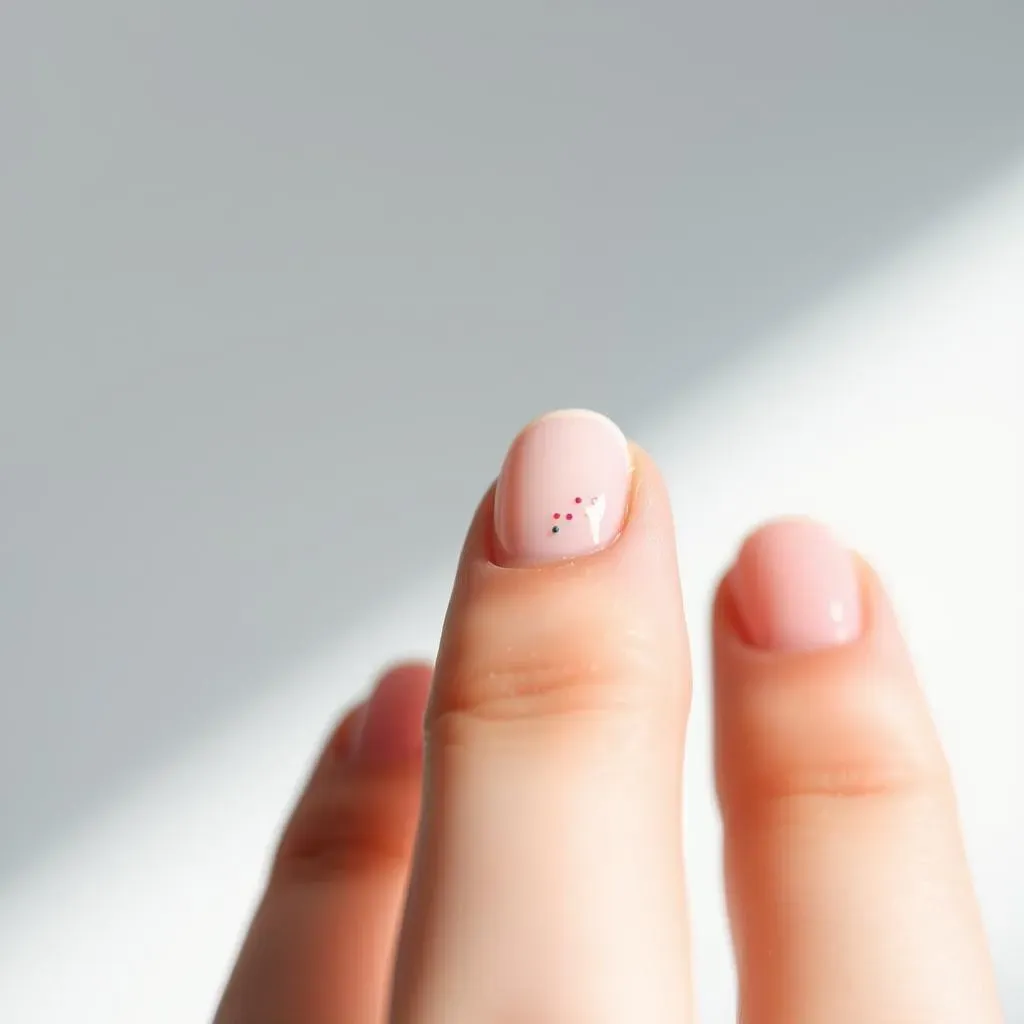
Short nails? No problem! Many believe short nails limit your nail art options, but that's just not true. With a little creativity, you can achieve adorable and stylish designs. Think delicate details, subtle accents, and strategically placed pops of color. For some extra inspiration, check out our collection of cute and easy designs for short nails – they're perfect for showcasing your creativity even on a smaller canvas!
One popular technique is to focus on a single accent nail. Decorate just one nail with a fun design, keeping the rest simple and elegant. This creates a balanced look that's both playful and sophisticated. Or, try using a single color with different textures, like matte and glossy polishes, to add depth and visual interest without cluttering the nail bed. For even more ideas, consider our easy pretty designs for short nails – they are simple yet effective.
- Use a single accent nail.
- Choose simple, small designs.
- Incorporate different nail textures.
Another great option is to use minimalist designs. Think simple stripes, tiny dots, or a single, strategically placed accent. These designs are easy to achieve and look incredibly chic on short nails. Remember, less is often more when it comes to short nails. A simple design with high-quality polish can be just as effective as a more complex design. For some ideas that are both simple and stylish, browse our selection of easy nail designs for short nails.
Don't be afraid to experiment with different colors and textures! You can even incorporate small embellishments like tiny rhinestones or glitter for a touch of sparkle. Just remember to keep it subtle and avoid anything too bulky, as this can overwhelm the small nail surface. For a bit of extra inspiration, take a peek at our easy cute designs for short nails – you'll find tons of ideas!
Design Idea | Description | Tip |
|---|---|---|
Solid Color with Glitter Accent | One color base, glitter on accent nail | Use fine glitter for a subtle look. |
Minimalist Stripes | Thin stripes in contrasting colors | Use painter's tape for clean lines. |
Seasonal and Themed Nail Designs
Seasonal and Themed Nail Designs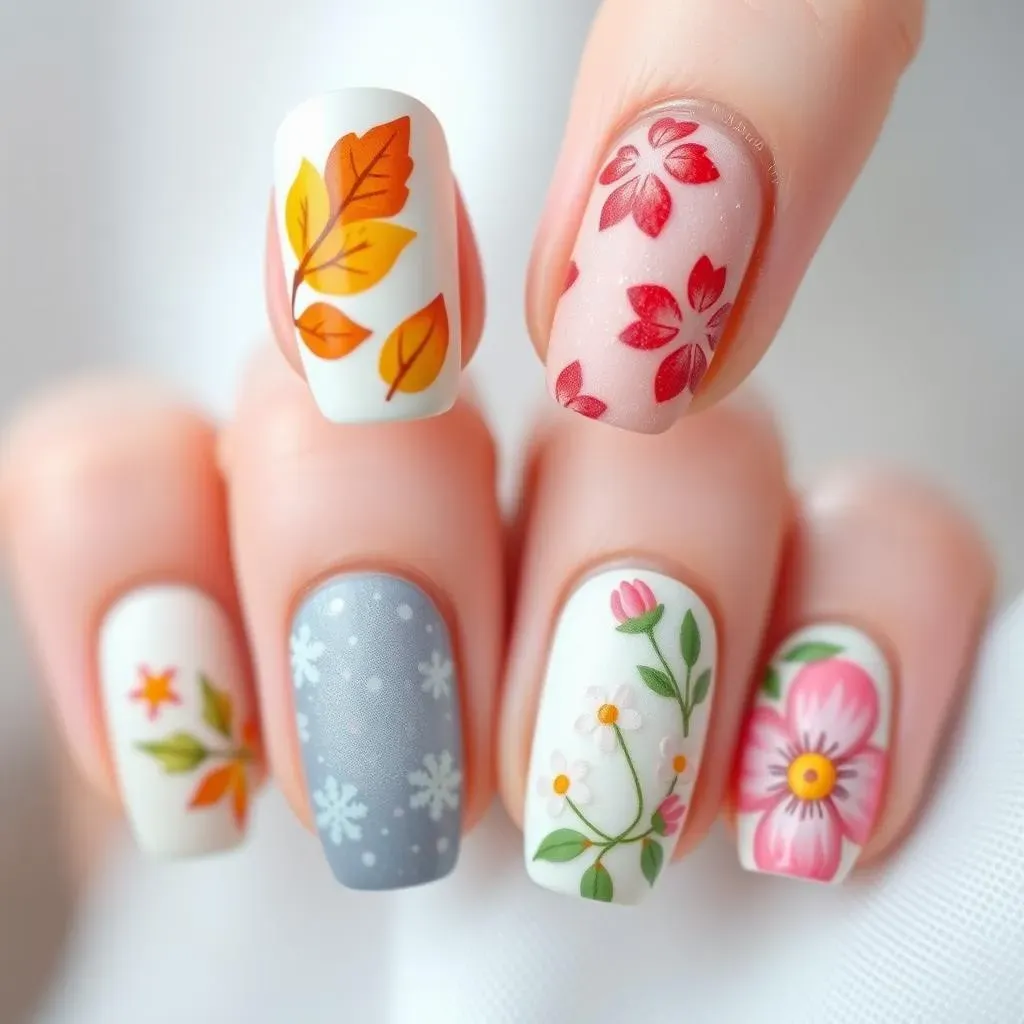
Autumnal Accents: Embrace the Fall
As the leaves change color, so should your nails! Fall offers a rich palette of warm hues, from burnt orange and deep reds to earthy browns and golden yellows. Think cozy sweaters and pumpkin spice lattes translated onto your fingertips. You can easily create a simple autumnal design using a gradient of fall colors or by adding some subtle leaf-shaped accents. For more intricate designs, check out our amazing easy fall nail art designs for inspiration!
Imagine creating a beautiful ombre effect with shades of burgundy, burnt orange, and golden yellow. Or, try incorporating small, hand-painted leaves or using nail stickers to add a touch of autumnal charm. A matte top coat can add a sophisticated touch to your fall manicure. Don't be afraid to experiment with different textures and finishes to create depth and visual interest.
- Use warm, earthy tones.
- Incorporate leaf shapes or patterns.
- Experiment with matte and glossy finishes.
Winter Wonderland: Festive Nail Art
Winter brings a chance to get creative with shimmery, sparkly, and snowy designs. Think frosty whites, icy blues, and shimmering silvers. You can create a simple winter wonderland scene using snowflake decals or by hand-painting delicate snowflakes. For more festive ideas, explore our cute and easy Christmas nail designs – they're perfect for the holiday season!
Picture this: a base coat of snowy white, accented with tiny silver glitter, and finished with a few carefully placed snowflake stickers. Or, try a gradient of icy blues and purples, creating a mesmerizing winter sky effect on your nails. For a truly festive look, consider adding some small, sparkly embellishments.
Design | Colors | Embellishments |
|---|---|---|
Snowflakes | White, silver, blue | Glitter, rhinestones |
Winter Gradient | Blue, purple, white | None or subtle glitter |
Spring Blossoms: Delicate Floral Designs
Spring is all about fresh starts and vibrant colors. Celebrate the season with delicate floral designs. You can create simple flower patterns using dotting tools or thin brushes, or use nail stickers for an easier approach. For some inspiration, check out our easy flower nail art designs – they're perfect for spring!
Imagine painting tiny daisies, delicate roses, or vibrant tulips on your nails. Use pastel shades for a soft, romantic look, or opt for bolder colors for a more vibrant feel. You can even add some small leaves or stems to complete the floral theme. A glossy top coat will add shine and protect your design.
- Use pastel or bright colors.
- Incorporate simple floral patterns.
- Add small leaves or stems for detail.