Table of Contents
Halloween's just around the corner, and what better way to celebrate than with some spooktacularly cute nails? This article is your guide to achieving the perfect Halloween manicure, even if you're a nail art newbie. Forget complicated designs and expensive salon visits; we're focusing on cute easy nail designs for Halloween that are simple enough for anyone to master. Whether you prefer adorable ghosts, playful pumpkins, or subtly spooky designs, we've got you covered. We'll walk you through step-by-step instructions for beginner-friendly techniques, showcasing creative ideas using readily available tools like nail stickers and decals. We'll also explore simple designs perfect for those with short nails, proving that even a small canvas can hold big Halloween vibes. Get ready to unleash your inner artist and create a manicure that's both stylish and seasonally appropriate. Let's get started on your frightfully fun Halloween nail art!
Cute Easy Halloween Nail Designs for Beginners
Cute Easy Halloween Nail Designs for Beginners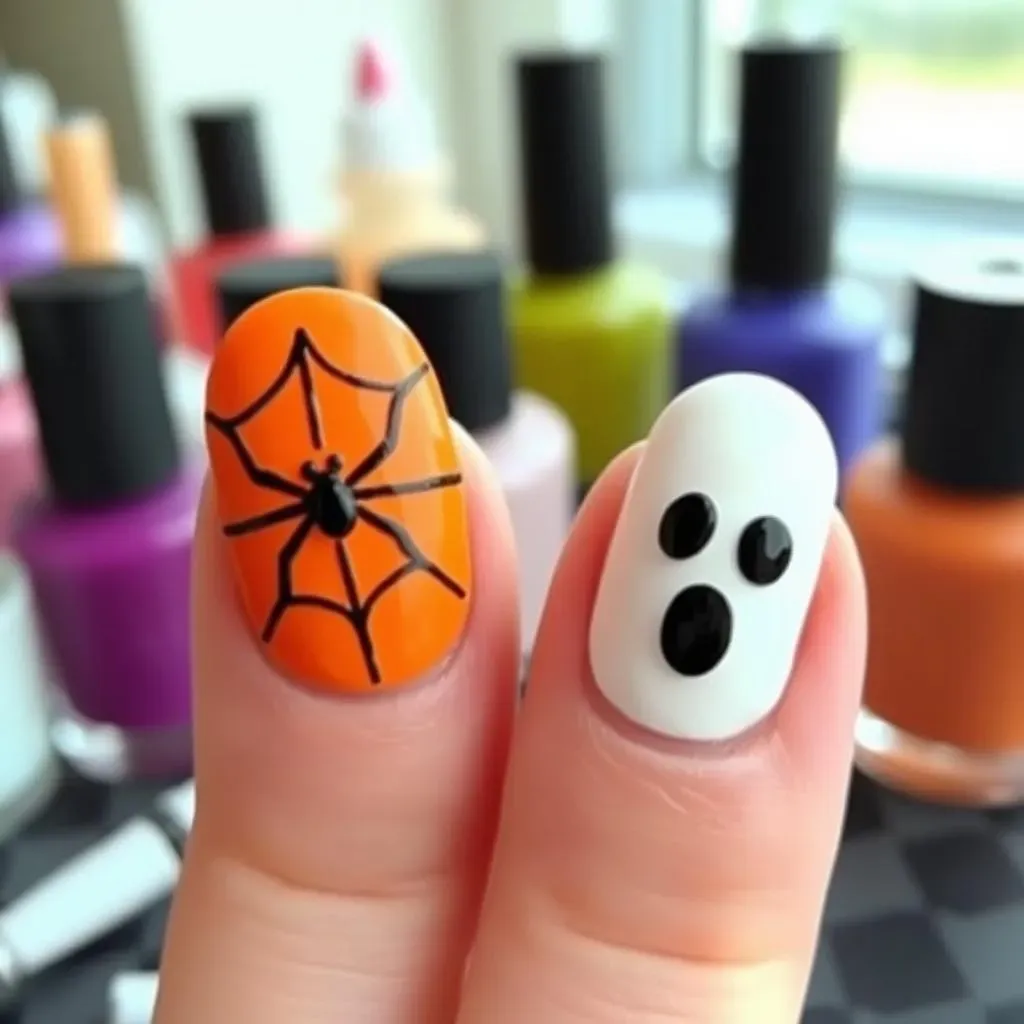
Simple Spiderweb Design
Let's start with a classic: the spiderweb! This is super easy, even if you've never painted your nails before. All you need is black nail polish and a toothpick or a very fine brush. Paint your nails your base color—a nice orange or purple works well for Halloween. Once that's dry, paint a small circle in the center of your nail with black polish. Then, using the toothpick, carefully draw lines outwards from the center, creating a web-like pattern. It doesn't have to be perfect; a slightly imperfect web adds to its charm! For extra spookiness, add a tiny black dot in the center to represent a spider. You can find more inspiration for easy Halloween nail art designs on our website.
Don't be afraid to experiment with different colors! A white spiderweb on a black background looks equally chic and spooky. And if you're feeling extra creative, try adding some glitter to the web for a touch of shimmer. Remember, the key is to have fun and not worry about making it perfect. It’s your Halloween mani, make it your own!
Step | Description |
|---|---|
1 | Paint base coat |
2 | Paint a central black circle |
3 | Create web lines with toothpick |
4 | Add a spider (optional) |
Ghostly Nails
Next up, let's create some adorable ghost nails! This design uses simple shapes and is incredibly forgiving. Start with a white base coat. Once that's completely dry, use a black nail polish pen or a fine brush to draw two small dots for eyes. Below the eyes, draw a small curved line for a mouth. That's it! You've created a friendly little ghost. You can add a few more details if you like, such as little arms on the side, but even without them, it's super cute and festive. If you're looking for more cute and easy nail designs, check out our other tutorials.
For a variation, use different colors for the ghosts. Pastel colors like light blue or pink can create a less spooky, more whimsical feel. You could even add a tiny bow on top of the ghost's head for an extra touch of cuteness. Remember to let each layer dry completely before adding the next to avoid smudging. And don’t forget a top coat to seal your design and make it last!
- White base coat
- Black dots for eyes
- Curved line for mouth
- Optional: Add arms or bow
Adorable Halloween Nail Art Ideas Using Stickers and Decals
Adorable Halloween Nail Art Ideas Using Stickers and Decals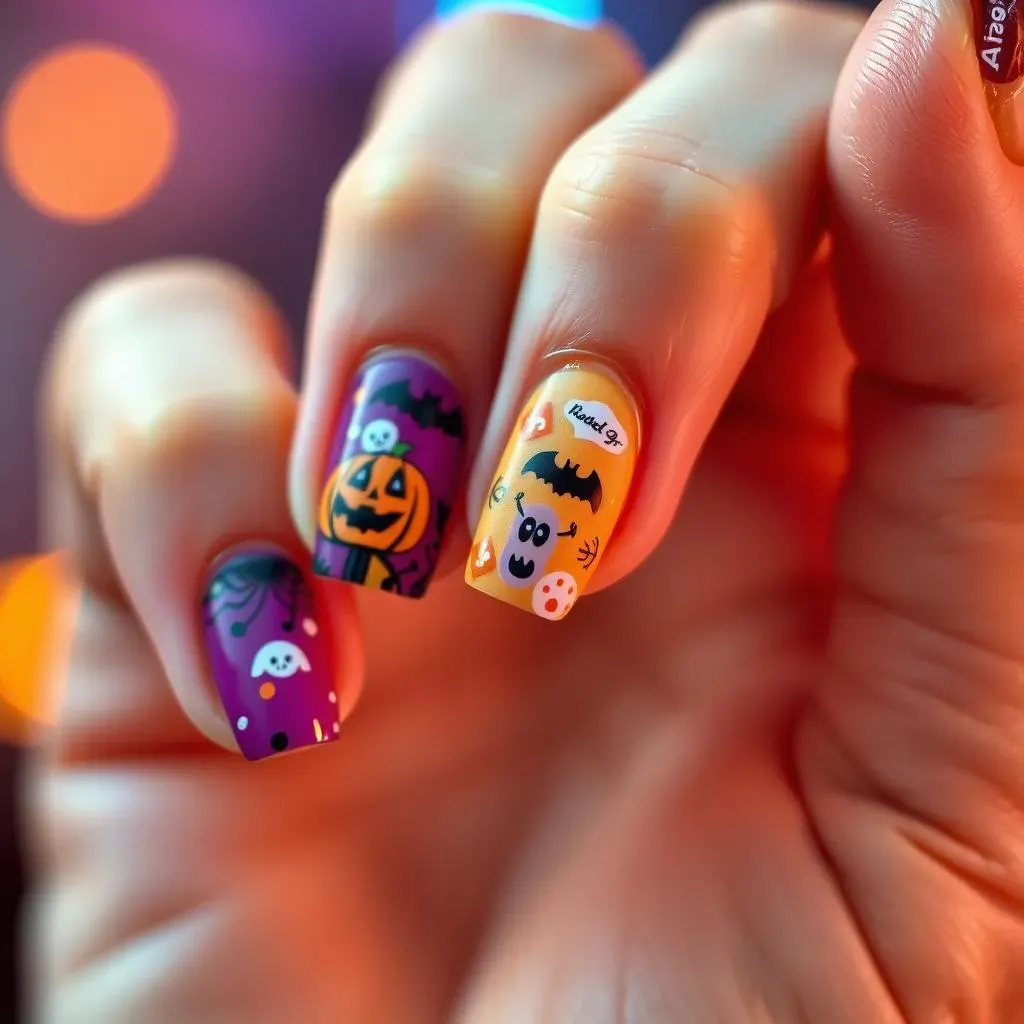
Pre-Made Halloween Nail Stickers
Let's be honest, sometimes you just want a quick and easy Halloween manicure. That's where nail stickers come in handy! You can find tons of adorable Halloween-themed stickers online or in craft stores. Think cute little pumpkins, friendly ghosts, or spooky bats. Simply apply a base coat to your nails, let it dry completely, then carefully peel and stick your chosen designs. Finish with a top coat to seal everything in place, and you're done! It's that simple. For even more inspiration, check out our amazing selection of awesome easy nail art designs—we’ve got something for everyone!
The best part about using stickers? No special skills are required! It's perfect for those of us who aren't exactly Picasso with a nail brush. You can easily create a perfectly polished look in minutes. And if you mess up? No worries! Just peel off the sticker and try again. It's low-pressure nail art at its finest. Plus, you can mix and match different stickers to create your own unique designs. Get creative and have some fun!
- Apply a base coat
- Apply Halloween stickers
- Seal with a top coat
Decal Designs for a Spooky Touch
Nail decals offer a slightly more advanced approach than stickers, but they're still incredibly easy to use. Decals often feature more intricate designs and are applied using water. Think detailed spiderwebs, tiny pumpkins, or even miniature Halloween scenes. You'll find a wide variety of decals online or in beauty supply stores. After applying a base coat, carefully cut out your chosen design, soak it in water, and gently slide it onto your nail. Smooth it out with a cotton swab, and then seal it with a top coat. For even more easy nail designs for parties, be sure to check our other blog posts.
Decals give you a chance to add a little extra detail to your Halloween manicure without the hassle of freehand painting. They're a fantastic option for achieving a professional-looking finish without the salon price tag. Experiment with different placement—some decals look great across the whole nail, while others look best as accents on just one or two nails. Remember to always use a top coat to protect your design from chipping and make it last longer!
Step | Description |
|---|---|
1 | Apply base coat |
2 | Prepare decal |
3 | Apply decal to nail |
4 | Seal with top coat |
Mixing Stickers and Decals for a Unique Look
Why choose between stickers and decals when you can use both? This is where you can really let your creativity shine! Start with a base coat, then add some simple stickers as a foundation for your design. Perhaps some cute little pumpkins or bats. Then, use decals to add intricate details. A delicate spiderweb decal over a pumpkin sticker adds an extra touch of Halloween magic. This combines the ease of stickers with the detailed designs of decals for a truly unique look. Looking for more ideas? Explore our collection of cute and easy nail designs for endless inspiration!
Don’t be afraid to experiment with different combinations and placements. You can create a cohesive theme or mix and match elements for a more eclectic style. The possibilities are endless! The key is to choose stickers and decals that complement each other and create a balanced look. Remember to take your time and enjoy the process. It's all about having fun and expressing your creativity. And always finish with a top coat for added protection and shine!
- Apply a base coat
- Add stickers
- Layer with decals
- Seal with a top coat
Simple Halloween Nail Designs with Stripes and Dots
Orange and Black Stripes
Let's start with a super simple design: orange and black stripes! This is perfect for beginners because it requires minimal skill and looks surprisingly chic. Begin with a base coat of your favorite nail polish color. Once dry, use striping tape or a thin brush to create alternating orange and black stripes across your nails. You can go for thick stripes, thin stripes, or even diagonal stripes—whatever floats your boat! For extra flair, try adding a few tiny black dots between the stripes to create a subtle spooky vibe. If you're looking for more ideas, check out our post on easy nail designs for parties—it's full of inspiration!
This design is super versatile. You can adjust the width and spacing of the stripes to create different looks. Thin stripes create a more delicate feel, while thicker stripes make a bolder statement. And don't be afraid to experiment with other Halloween colors! Purple and black, green and orange—the options are endless. Remember to seal your masterpiece with a top coat to protect your stripes and keep your mani looking fresh. You can also find some other easy and simple nail art designs on our site.
- Apply base coat
- Create stripes with tape or brush
- Add dots (optional)
- Apply top coat
Spooky Dotted Nails
Next up, let's create some fun dotted nails! This is another super easy design that's perfect for Halloween. Start with a base coat of black or dark purple. Once dry, use a small dotting tool or a toothpick to create a pattern of orange and white dots across your nails. You can create a random pattern, or try arranging the dots in lines or shapes. For a more spooky look, cluster the dots together in certain areas. To discover more amazing designs, explore our gallery of awesome easy nail art designs!
This design is incredibly forgiving—there’s no need for precision! The beauty of this look lies in its imperfection. Experiment with different sizes and colors of dots to create your own unique style. You can even try using glitter polish for some of the dots to add a touch of shimmer. And, as always, remember to finish with a top coat to protect your design and give it a glossy finish. This design is perfect for those who want something simple yet festive for the Halloween season. For more simple ideas, check out our easy nail designs for short nails guide.
Color | Placement | Size |
|---|---|---|
Orange | Random | Small |
White | Clustered | Medium |
Combining Stripes and Dots for a Festive Look
Now let's combine the best of both worlds: stripes and dots! This design involves creating a base of stripes, then adding dots in the spaces between them. You can use any color combination you like; orange and black stripes with white dots, purple and green stripes with orange dots—the possibilities are endless! This design gives you the chance to play around with different patterns and combinations to create your own unique Halloween manicure. Need more inspiration? Check out our range of cute easy nail designs.
This design allows you to blend simple techniques for a more complex-looking result. It's a fantastic way to show off your creativity without spending hours perfecting intricate details. Remember to let each coat dry completely before applying the next to prevent smudging. And don't forget the top coat! It will protect your design and give your nails a beautiful, glossy finish. For those looking for more Halloween inspiration, take a look at our easy Halloween nail art designs page.
- Apply base coat
- Paint stripes
- Add dots between stripes
- Apply top coat
Cute Easy Halloween Nail Designs for Short Nails
Miniature Pumpkins and Ghosts
Short nails don't mean sacrificing Halloween spirit! Embrace the cuteness with miniature designs. Think tiny pumpkins, little ghosts, or even just simple black and orange polka dots. These small-scale designs are perfect for shorter nails and prevent any feeling of overcrowding. Keep the color palette simple; one or two colors work best to avoid making the nails look busy. For more inspiration on cute nail designs, check out our other article on easy cute nail designs.
A great tip is to use a fine-tipped nail art brush or even a toothpick to create those teeny tiny details. Remember, less is more! A few carefully placed details will make a bigger impact than a crowded design. Don't forget a top coat to seal everything in and give your nails a gorgeous shine. Looking for more seasonally appropriate ideas? Our collection of easy fall nail art designs is full of inspiration!
- Use a fine-tipped brush or toothpick
- Keep designs small and simple
- Use a limited color palette
- Finish with a top coat
Subtle Halloween Accents
Sometimes, subtlety is key. Instead of going all-out with spooky designs, try adding subtle Halloween accents to your manicure. A single black spiderweb on your ring finger, a few tiny orange and black stripes, or even just a Halloween-colored accent nail can be just enough to show your festive spirit. This approach works beautifully with short nails, as it avoids overwhelming the nail bed with too much detail. For more ideas on simple nail art, check out our guide on easy and simple nail art designs.
Consider using negative space to your advantage. Let parts of your nails remain unpainted, letting the accent color pop. This creates a modern and stylish look, perfect for those who prefer a more understated approach to Halloween nail art. Remember to use a high-quality top coat to protect your design and make it last. If you're looking for more ideas on how to decorate your nails for parties, check out our post on easy nail designs for parties.
Accent Nail Color | Design Idea |
|---|---|
Black | Spiderweb |
Orange | Pumpkin silhouette |
Purple | Simple stripes |