Table of Contents
Ready to unleash your inner artist and transform your nails into adorable canvases? This article is your passport to the fun and surprisingly simple world of easy cartoon nail designs. Forget complicated salon appointments and expensive manicures; we're diving into techniques and designs that are perfect for beginners, busy schedules, and anyone who wants to add a playful pop to their look. Whether you're a seasoned nail art enthusiast or just starting out, we've got you covered. We'll walk you through simple character designs, show you how to create trendy cartoon nail art, and provide essential tips and tricks. You'll discover that mastering easy cartoon nail designs is easier than you think, requiring only a few basic tools and a dash of creativity. From mastering the fundamental techniques to adding those unique personal touches, we'll equip you with everything you need to create stunning, cartoon-inspired manicures. So, grab your favorite polishes, and let's get started on this fun and creative journey into the delightful world of easy cartoon nail designs! Prepare to be amazed at how quickly you can achieve professional-looking results. Get ready to express yourself, one adorable cartoon nail at a time!
Adorable Cartoon Character Nails: Simple Steps for Beginners
Adorable Cartoon Character Nails: Simple Steps for Beginners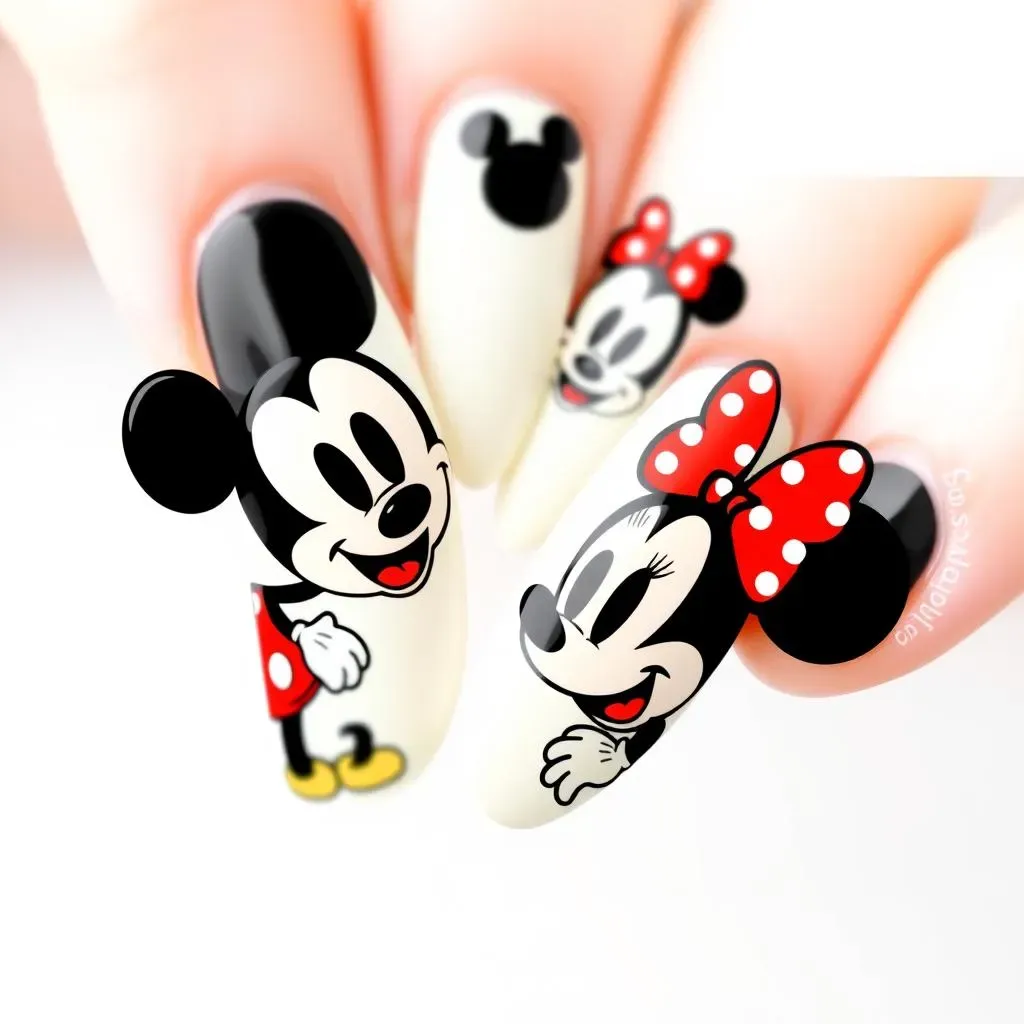
Mickey Mouse Magic
Let's start with a classic! Mickey Mouse nails are super cute and surprisingly easy. You'll only need black and red nail polish, a thin brush (or even a toothpick!), and a steady hand. Start with a base coat of your favorite color. Once that's dry, paint two black circles on each nail for Mickey's head. Add two smaller black circles for his eyes and a smaller red circle for his nose. Finally, add some small black lines for his mouth and you're done! It's that simple. For extra inspiration, check out our post on cute and easy nail designs for more ideas!
Remember, practice makes perfect. Don't worry if your first attempt isn't flawless. The beauty of this design is that it's forgiving. Even slightly imperfect circles add to the charm! A little wobbly line? Embrace the imperfection; it's part of the fun. Plus, you can always add a top coat to smooth everything out.
Step | Action |
|---|---|
1 | Base coat |
2 | Black circles (head) |
3 | Black circles (eyes) |
4 | Red circle (nose) |
5 | Black lines (mouth) |
6 | Top coat |
Minnie Mouse Makeover
Minnie Mouse is just as easy as Mickey! This time, you'll need red and white polish, plus a thin brush or toothpick. Follow the same base coat steps as before. For Minnie's head, paint a large red circle on each nail. Then, add white circles for her eyes and a small red bow on top. You can even add tiny black dots for eyelashes! See? Super simple, and so adorable. If you are looking for more inspiration for your party, check out these easy nail designs for parties.
Don’t be afraid to experiment with different colors! Instead of classic red and white, try pink and yellow, or blue and green. Get creative and let your personality shine through. You can even use different types of polish, like glitter or matte, to add some extra sparkle or texture. Remember, these are *your* nails, so have fun with it!
- Base coat
- Red circles (head)
- White circles (eyes)
- Red bow
- Optional: Black dots (eyelashes)
- Top coat
Beyond the Basics: Simple Character Silhouettes
Once you've mastered Mickey and Minnie, it's time to branch out! Try simple silhouettes of other cartoon characters. Think simple shapes: a heart for Hello Kitty, a lightning bolt for Pikachu, or a star for a super-hero. You can use stencils for clean lines, or freehand it for a more playful look. A single color can make a big impact! These simple designs are perfect for beginners because they don't require intricate details. They're quick, easy, and look great.
For more inspiration on simple designs, explore our collection of easy nail art designs for beginners. Remember, the key is to keep it simple and fun. Don't overthink it! The most important thing is to have fun and express your creativity. These easy-to-follow designs are a great way to build confidence and explore your artistic side. Let your nails reflect your personality and have fun with it!
Trendy Cartoon Nail Art: From Classic to Cute
Trendy Cartoon Nail Art: From Classic to Cute
Pop Art Perfection
Let's talk bold colors and graphic lines! Pop art nails are super trendy right now. Think bright, contrasting colors, simple shapes, and iconic imagery. You can easily recreate famous pop art pieces, like Andy Warhol's soup cans or Roy Lichtenstein's comic strips, on your nails. Use strong color blocks and clean lines to create a striking look. A simple dotting tool or even a toothpick can help achieve that perfect pop art effect. For extra inspiration on simple yet effective designs, check out our blog on simple nail designs for 2024.
Don't be afraid to experiment with different color combinations! The beauty of pop art is its vibrancy. Try bright pinks and yellows, bold blues and oranges, or even neon shades for a truly eye-catching manicure. Remember, the goal is to make a statement, so go big and bold!
- Choose bold, contrasting colors
- Use simple shapes and lines
- Consider iconic pop art imagery
- Use a dotting tool or toothpick for precision
- Add a top coat for shine and longevity
Anime-Inspired Accents
Anime and manga are hugely popular, and their influence extends to nail art! Think big eyes, cute characters, and vibrant colors. You can create simple anime-inspired designs using a fine-tipped brush or nail art pen. Start with a base coat and then add simple details like large eyes, rosy cheeks, and maybe a cute hat or bow. For more inspiration, check out these easy nail art pen design ideas.
Consider adding small details like sparkles or glitter to bring your anime-inspired designs to life. Experiment with different color palettes to match your favorite anime characters or create something completely unique. Don't be afraid to experiment with different techniques and styles to find what works best for you.
Step | Action |
|---|---|
1 | Base coat |
2 | Draw large eyes |
3 | Add rosy cheeks |
4 | Optional: Add a hat or bow |
5 | Top coat |
Kawaii Cute Overload
Kawaii, meaning "cute" in Japanese, is all about adorable characters and pastel colors. Think soft pinks, light blues, and yellows. You can use simple shapes and designs to create a sweet and charming look. Consider adding tiny hearts, stars, or bows to your nails. You can also use stickers or decals for an even easier approach. For more kawaii inspiration, browse our selection of easy cute nail designs.
Remember, kawaii is all about sweetness and playfulness. Don't be afraid to get creative and experiment with different combinations of colors and designs. The goal is to create a manicure that is both adorable and unique to you. A little bit of sparkle or glitter can also add to the overall kawaii effect. Have fun with it and let your creativity shine through!
Mastering the Basics: Essential Tools and Techniques for Easy Cartoon Nail Designs
Mastering the Basics: Essential Tools and Techniques for Easy Cartoon Nail Designs
Gather Your Supplies: The Essential Toolkit
Before you dive into creating your masterpiece, let's talk tools. You don't need a fancy salon setup; a few key items will get you started. First up: nail polish! Grab a selection of your favorite colors, including black and white for outlines and details. Think about bright, bold shades for pop art designs, or pastel hues for a kawaii look. Next, you'll need a thin brush. A detail brush from an art supply store works great, but even a toothpick can do the trick in a pinch! These are perfect for creating fine lines and detailed features on your cartoon characters. Finally, don't forget a top coat to protect your artwork and give it a beautiful shine. And of course, you'll need a base coat to protect your natural nails. For more inspiration on at-home nail art, check out our amazing collection of easy at-home nail art designs.
Optional but highly recommended: A dotting tool is incredibly useful for creating small circles and dots, perfect for eyes, noses, and other details. You can easily find affordable dotting tools online or at beauty supply stores. If you’re feeling really fancy, consider investing in some nail art pens; these can make drawing fine lines and details much easier, especially for intricate characters. These are great for adding fine details, like eyelashes and whiskers. And if you're feeling extra creative, why not try some nail art stickers or decals? They're a super easy way to add ready-made elements to your designs. For beginners, this is a fantastic option to add some fun elements to your designs.
- Nail polish (various colors)
- Thin brush or toothpick
- Top coat
- Base coat
- (Optional) Dotting tool
- (Optional) Nail art pens
- (Optional) Nail art stickers/decals
Prep Your Nails: The Foundation for Success
Before you start painting, make sure your nails are clean and prepped. Start by gently pushing back your cuticles. Then, give your nails a quick file to shape them neatly. This will give your nail art a much cleaner and more professional look. Apply your base coat evenly to protect your nails from staining and to provide a smooth surface for your nail art. This is a crucial step for creating long-lasting, beautiful cartoon nails. Let the base coat dry completely before moving on to the next step. For more ideas on prepping your nails, check out our guide to easy nail art designs for beginners.
Once your base coat is dry, it's time to get creative! Remember, practice makes perfect. Don't be afraid to experiment and try different techniques. If you make a mistake, don't worry; nail polish remover is your best friend! Just gently wipe away any mistakes and start again. The most important thing is to have fun and enjoy the process. And if you're feeling overwhelmed, remember that even the simplest designs can look amazing. For example, a single color with a simple heart can be incredibly cute and stylish. Consider checking out some easy cute designs for short nails for inspiration!
Step | Action |
|---|---|
1 | Push back cuticles |
2 | File nails |
3 | Apply base coat |
4 | Let base coat dry |
Beyond the Basics: Adding Flair and Personal Touches to Your Cartoon Manicures
Beyond the Basics: Adding Flair and Personal Touches to Your Cartoon Manicures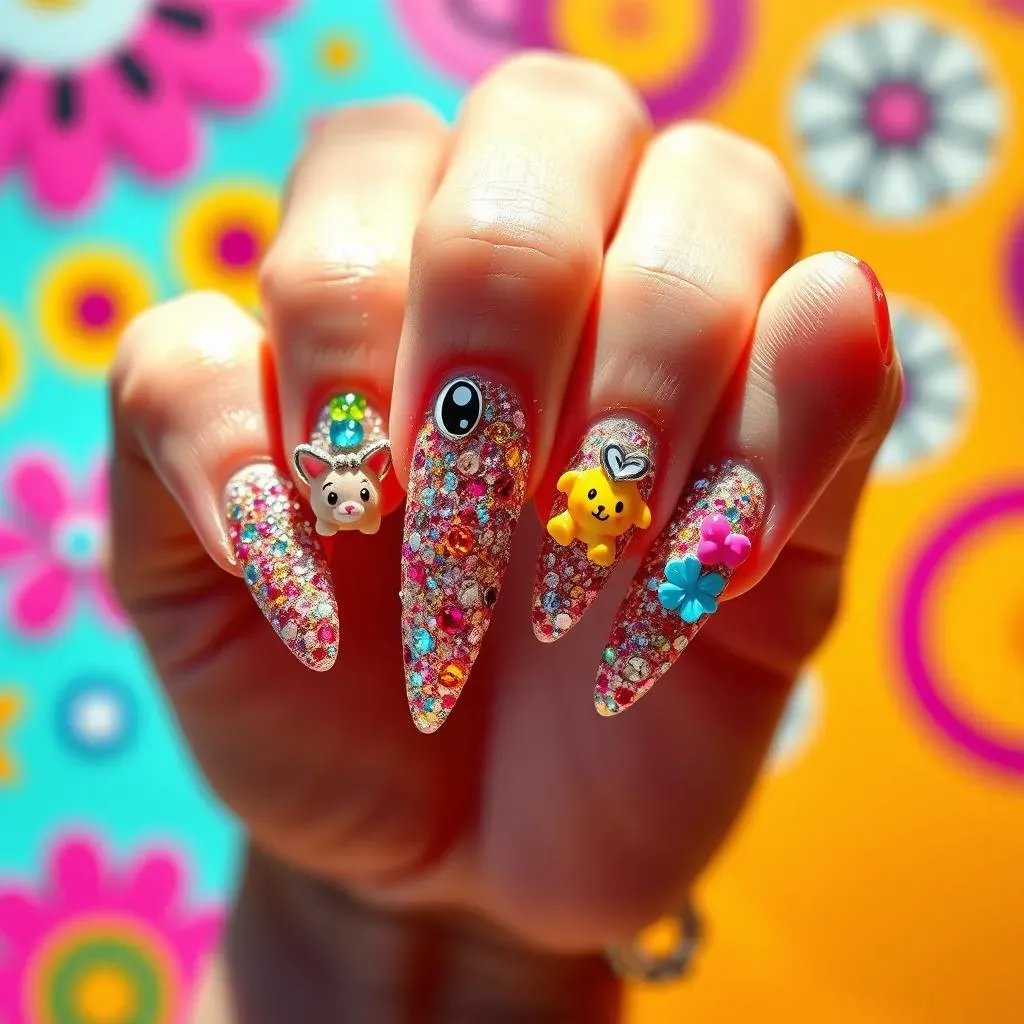
Adding Sparkle and Shine: Glitter, Gems, and More
Okay, so you've mastered the basics. Now let's amp up the fun! Adding glitter is a super easy way to give your cartoon nails some extra sparkle. Simply apply a coat of glitter polish over your finished design, or use a glitter glue to add some extra shimmer to specific areas. For more ideas on adding some extra glam, check out our guide on amazingly simple manicures.
Tiny gems or rhinestones can add a touch of elegance and sophistication to your cartoon designs. Use a toothpick or tweezers to carefully place them on your nails, creating subtle accents or more elaborate patterns. Experiment with different sizes and colors to create a unique look. You can even use these to add extra details to your designs, such as eyes or buttons. For a more whimsical touch, consider adding small 3D charms or embellishments. These can be purchased online or at craft stores. They add a playful and unique touch to your designs.
- Glitter polish
- Glitter glue
- Rhinestones
- 3D charms
Negative Space Magic: The Art of Leaving Things Out
Negative space nail art is all about letting the natural nail show through. This creates a modern, minimalist look. You can use this technique to create a frame around your cartoon character or to incorporate simple geometric shapes. This is a great way to add a touch of sophistication to your designs. For more inspiration on negative space designs, check out our selection of easy nail designs for long nails.
Negative space designs can be surprisingly effective, especially when paired with bold colors or simple shapes. It's a great way to add visual interest without overwhelming the nail. Remember, less can be more! Think about the overall balance of your design and how negative space can create a feeling of openness and airiness. This technique works well with almost any cartoon character or style. Experiment with different shapes and sizes of negative space to see what works best for you. It's a great way to create unique and stylish designs.
Technique | Description |
|---|---|
Framing | Create a border around your design |
Geometric Shapes | Incorporate simple shapes like triangles or squares |
Partial Design | Only paint part of the nail, leaving the rest bare |