Table of Contents
Ready to upgrade your manicure game without spending hours in a salon? Then you've come to the right place! This article is your ultimate guide to mastering simple almond nail designs. Whether you're a nail art newbie or just looking for some fresh inspiration, we've got you covered. We'll explore a range of easy-to-follow designs, perfect for beginners, and showcase some of the hottest trends in simple almond nail art. We'll walk you through simple DIY techniques you can do at home, saving you time and money. Plus, we’ll help you choose the perfect colors and shapes to flatter your hands and complement your style. So, ditch the complicated designs and embrace the elegance of simple almond nail designs. Let's get started on creating stunning, effortless manicures that will turn heads!
Simple Almond Nail Designs for Beginners
Simple Almond Nail Designs for Beginners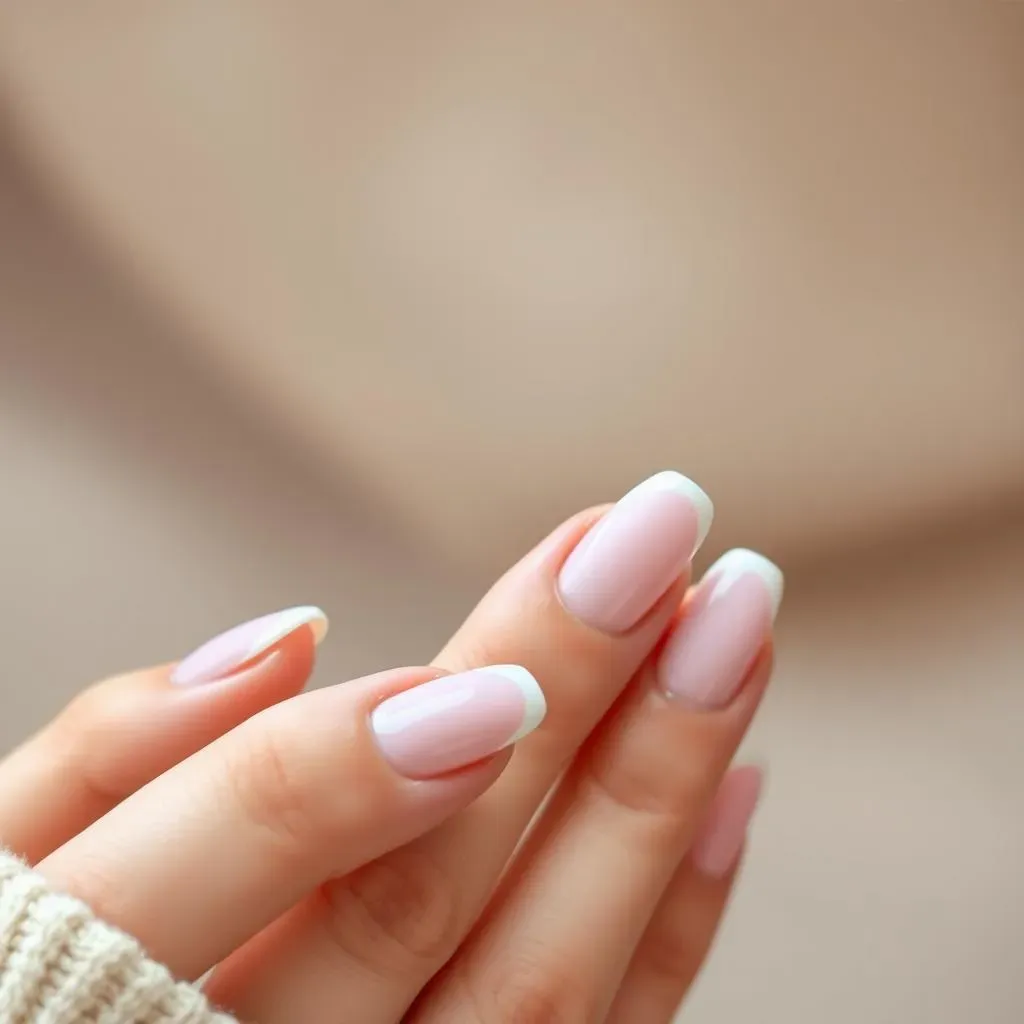
Mastering the Almond Shape
Let's be honest, achieving that perfect almond shape can feel a little daunting at first. It's all about finding the right balance between round and pointed. Think of it like sculpting a tiny, elegant egg on your nail! Start by filing your nails into a slightly oval shape, gently tapering the edges towards a subtle point. Don't rush; take your time and use a fine-grit file for a smooth finish. Too much pressure can lead to breakage, so be gentle! Once you’ve got the basic shape, you can move onto the fun part – adding color and design.
For extra help, check out our guide on easy nail art designs for beginners – it’s packed with tips and tricks for achieving professional-looking results, even if you’re a total nail art newbie. Remember, practice makes perfect! The more you try, the more confident you'll become.
Step | Action |
|---|---|
1 | File into an oval shape |
2 | Taper edges to a point |
3 | Use a fine-grit file |
Simple Solid Colors and French Manicures
Once you've mastered the almond shape, the possibilities are endless! But let's start with the basics. A simple, solid color is always a classic and incredibly chic choice. Choose a shade that complements your skin tone and outfit. A nude pink or a sophisticated beige can look incredibly elegant, while a bright red or a deep blue can add a bold touch. Application is key here; use thin coats to prevent chipping and ensure even coverage. Let each coat dry completely before applying the next.
Another super easy but stylish option is the classic French manicure. This timeless design involves painting the tips of your nails white or a pastel shade, leaving the rest of the nail in a natural or nude color. This look is perfect for any occasion, from a casual day out to a formal event. For shorter nails, try our guide on easy pretty nail designs for short nails for more ideas! It’s all about finding what works best for you.
- Solid color
- French manicure
- Nude shades
- Bright colors
Trending Simple Almond Nail Art Ideas
Trending Simple Almond Nail Art Ideas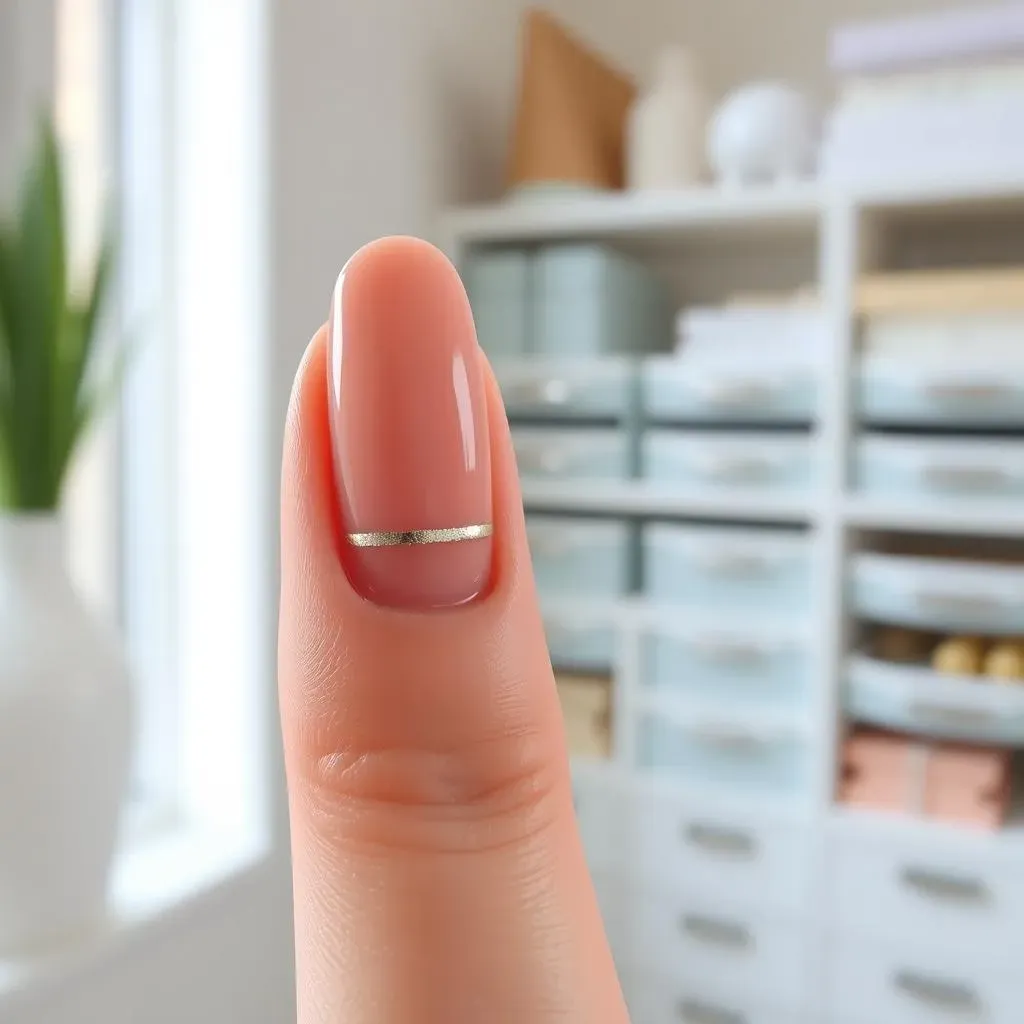
Minimalist Chic
Minimalism is having a major moment in the nail art world, and simple almond nails are the perfect canvas. Think clean lines, subtle accents, and a focus on high-quality polish. A single, carefully placed accent nail with a tiny metallic stripe or a delicate dot can elevate a solid color manicure to the next level. Or, try a barely-there glitter effect, adding a touch of sparkle without being overly flashy. Keep it simple, keep it stylish.
For even more minimalist inspiration, check out our post on simple nail designs easy to do. You'll find tons of ideas for creating understated yet sophisticated looks. Remember, sometimes less is truly more!
- Single accent nail
- Metallic stripes
- Delicate dots
- Subtle glitter
Geometric Shapes and Negative Space
Geometric shapes are another huge trend, offering a modern and graphic touch to simple almond nail designs. Think clean lines, sharp angles, and contrasting colors. A simple half-moon design, a bold stripe, or even a tiny triangle can add visual interest without being overwhelming. Negative space—leaving parts of the nail bare—is another popular technique, creating a clean and sophisticated look. This is especially flattering on almond nails, allowing the nail shape itself to be a design element.
If you're feeling adventurous, try incorporating some negative space. Our guide on easy at-home nail art designs has some fantastic examples of how to use negative space creatively. It’s surprisingly easy to achieve a professional-looking result!
Design Element | Description |
|---|---|
Half-moon | Classic and elegant |
Stripes | Bold and modern |
Triangles | Geometric and chic |
Negative space | Clean and sophisticated |
Easy DIY Simple Almond Nail Designs at Home
Easy DIY Almond Nail Art at Home
Let's face it: salon manicures can be pricey! But achieving gorgeous simple almond nail designs at home is totally doable. You don't need fancy tools or years of experience. Start with the basics: a good quality nail polish, a fine-grit file, and some cuticle oil. Prep your nails by gently pushing back your cuticles and shaping them into your desired almond shape. Then, apply a base coat, two coats of your chosen polish, and a top coat for extra shine and longevity. Remember, thin coats are key to prevent smudging and ensure even coverage. For extra help with nail prep, check out our guide on easy at-home nail art designs - it’s a lifesaver!
- Nail polish
- Fine-grit file
- Cuticle oil
- Base coat
- Top coat
Once you've mastered a solid color, you can experiment with simple nail art techniques. Use striping tape to create clean lines and geometric designs. A dotting tool or even a toothpick can help you add tiny dots, flowers, or other simple motifs. Don't be afraid to get creative and have fun with it! And if you're looking for more inspiration for easy at-home manicures, check out our collection of cute easy nail art designs – there are tons of great ideas!
Tool | Use |
|---|---|
Striping tape | Create lines and shapes |
Dotting tool | Add dots and small details |
Toothpick | Create simple designs |
Simple Almond Nail Designs: Choosing the Right Colors and Shapes
Choosing the Right Colors
Picking the perfect nail polish color is half the battle! Think about your skin tone – warmer tones often look great with peachy nudes, corals, or warm reds, while cooler tones might prefer dusty roses, lavenders, or deep blues. Consider your outfit too – a bold color can be a fun statement, while a neutral shade offers versatility. Don’t be afraid to experiment! Try a few different shades on one nail before committing to a whole manicure.
For more color inspiration, check out our guide on easy nail designs for date night – it's full of gorgeous color combinations that are perfect for any occasion. Remember, choosing a color is all about expressing your personal style!
- Warm skin tones: Peachy nudes, corals, warm reds
- Cool skin tones: Dusty roses, lavenders, deep blues
- Consider your outfit
- Experiment with different shades
Finding the Perfect Almond Shape
The almond shape is all about that beautiful balance between round and pointed. The length of your nail will influence how pointed you can go. Shorter nails often look best with a more rounded almond shape, while longer nails can handle a more dramatic point. Pay attention to your nail bed – a longer nail bed will allow for a more elongated almond shape. Remember, your nail shape should complement your overall hand shape, so take a look at your hands and see what looks most flattering!
Need more ideas for shorter nails? Our post on simple nail designs for short nails is packed with inspiration. Remember, the perfect almond shape is the one that makes *you* feel confident and stylish!
Nail Length | Almond Shape |
|---|---|
Short | More rounded |
Long | More pointed |
Consider your nail bed length | Elongated shape |