Table of Contents
Ready to ditch the boring winter blues and embrace some seriously cute nail art? This winter, let's ditch the complicated designs and dive into the world of "winter easy nail designs"! Forget spending hours at the salon – we're all about simple, stylish manicures you can totally DIY. Whether you're a nail art newbie or a seasoned pro, this article is your ultimate guide to festive fingertips. We’ll cover adorable snowflake designs that are easier than you think, explore quick and easy techniques that’ll have you looking glam in minutes, and even show you how to rock those winter vibes even if you have short nails. Get ready to be inspired by a collection of charming and achievable winter nail art ideas. Let's get those nails winter-ready!
Simple Snowflake and Holiday Designs
Simple Snowflake and Holiday Designs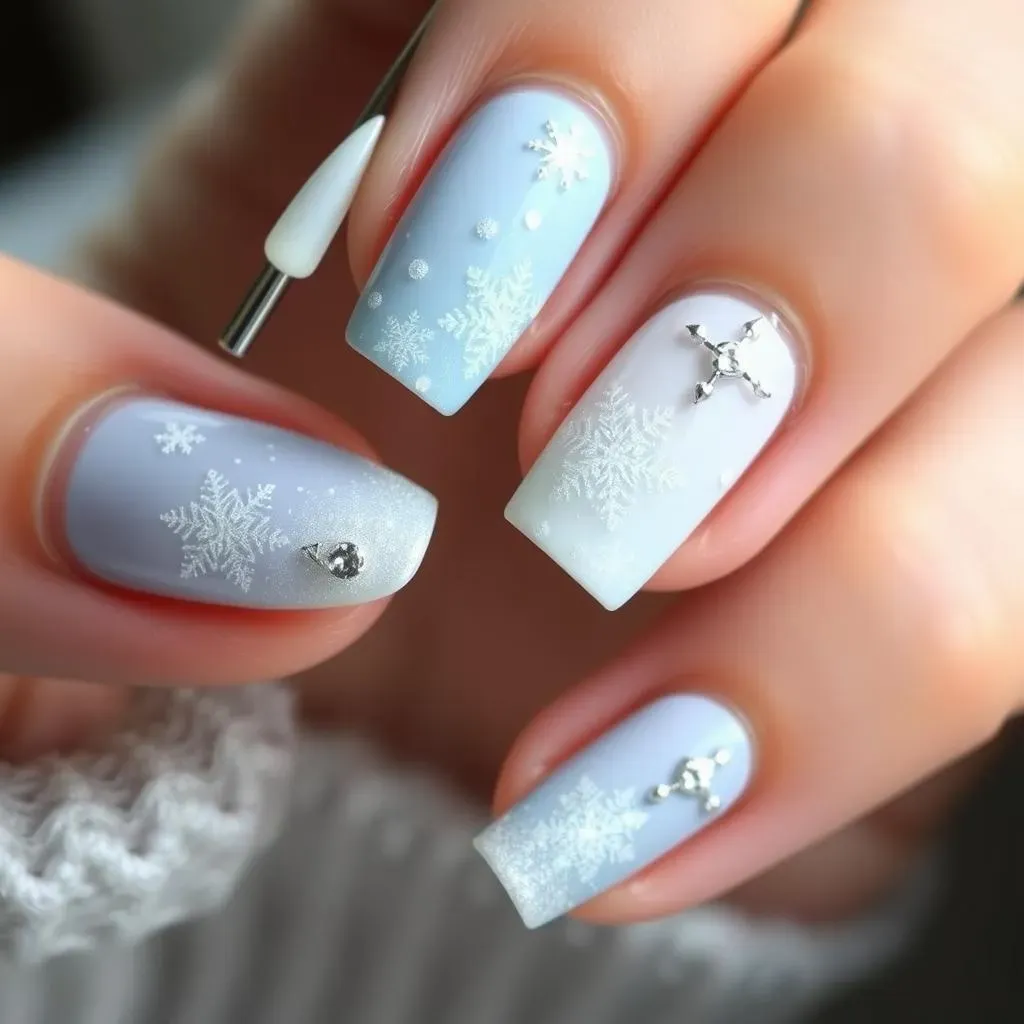
Classic Snowflake Nails
Let's start with the quintessential winter nail design: snowflakes! You don't need fancy tools; a simple dotting tool or even a toothpick can create surprisingly intricate snowflakes. Start with a base coat of your favorite wintery color – think icy blues, crisp whites, or even a sparkly silver. Then, use a contrasting color to add tiny dots, forming the snowflake's six arms. For extra flair, add a tiny glitter accent to the center. It's simple, festive, and perfect for beginners! Check out our guide on easy nail art step-by-step designs for more detailed instructions.
Remember, practice makes perfect! Don't worry if your first few attempts aren't flawless. The beauty of these designs lies in their simplicity. Even slightly imperfect snowflakes add to their charm. Plus, you can always use a top coat to even out any minor imperfections. For even more inspiration, explore our collection of awesome easy nail art designs.
Color | Tools | Skill Level |
|---|---|---|
Icy Blue, White, Silver | Dotting tool, toothpick | Beginner |
Festive Holiday Accents
Beyond snowflakes, there's a whole world of holiday-themed nail art you can easily create. Think tiny Christmas trees, adorable candy canes, or even miniature presents. These can be painted freehand or you can use nail art stickers for a super speedy manicure. A base coat of red, green, or a festive metallic will set the stage. Then, use fine-tipped brushes to paint your chosen designs. Don't forget to add a touch of glitter or shimmer for extra sparkle! If you're feeling adventurous, try adding some tiny rhinestones for extra pizzazz. For more ideas, check out our easy nail designs with rhinestones post.
Remember to keep it simple! You don't need to recreate a miniature winter wonderland on each nail. A single, carefully executed design on one or two nails is often more effective than trying to cram too much detail onto every nail. For those with short nails, consider focusing on one accent nail, leaving the others with a solid base color. Looking for other easy options? Our cute nail designs for short nails page has some great ideas!
- Christmas Trees
- Candy Canes
- Gift Boxes
Winter Wonderland Gradient
Gradients are a fantastic way to create a soft, dreamy winter look without a lot of fuss. Start by applying a light, pastel color to your nails (like a pale blue or lavender). Then, use a slightly darker shade of the same color to create a subtle gradient effect. You can blend the colors using a sponge or a small brush. Finally, add a top coat to seal the design and add shine. A simple gradient can be surprisingly effective, especially if you choose colors that evoke a sense of wintery serenity.
To make your gradient even more festive, add some subtle glitter or shimmer towards the tips of your nails. This creates a beautiful, icy look. And remember, you can customize this design to match your personal style. Try experimenting with different color combinations to find your perfect winter gradient. For additional inspiration, check out our post on easy painted nails designs for more gradient ideas.
Quick and Easy Winter Nail Art Techniques
Quick and Easy Winter Nail Art Techniques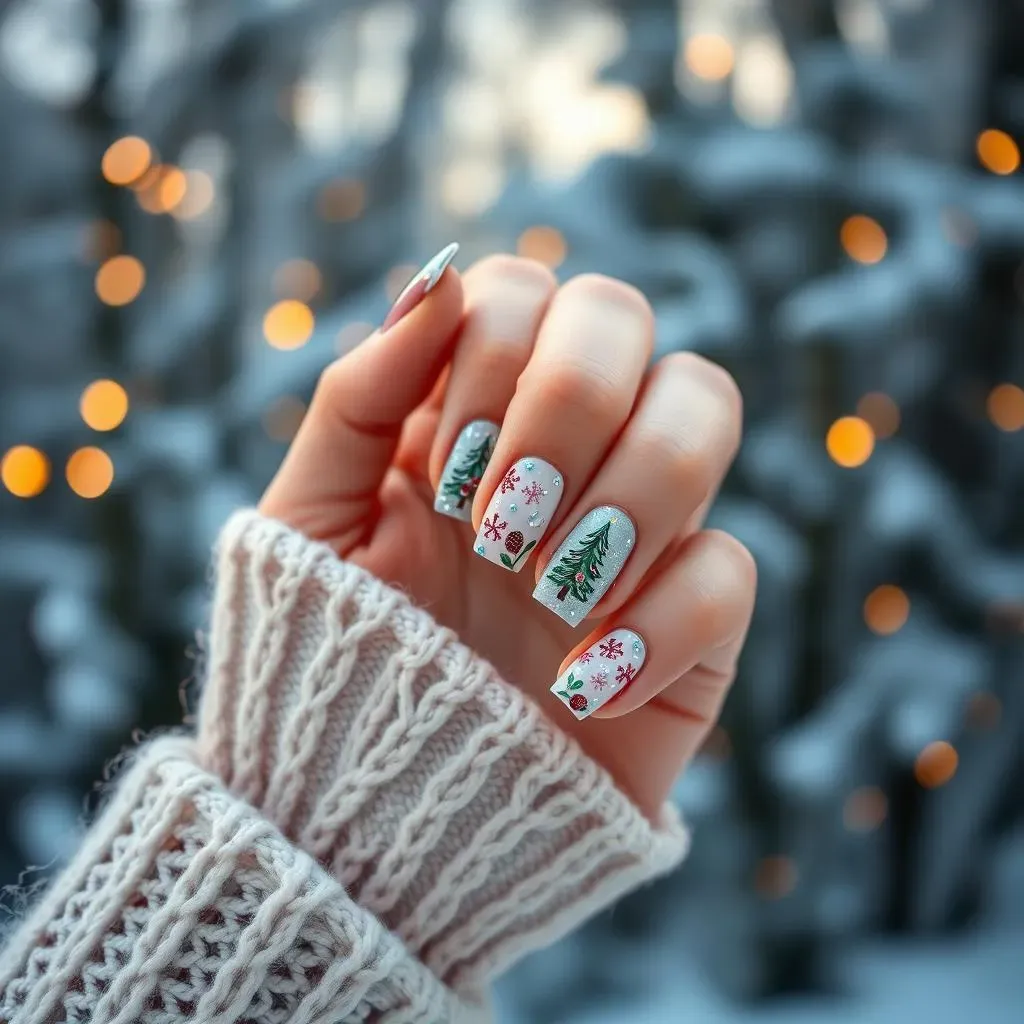
Nail Art Stickers: Your Secret Weapon
Let's be honest, sometimes you just don't have the time (or the patience!) for intricate nail art. That's where nail art stickers come in! These little beauties are a lifesaver for creating professional-looking designs in a flash. Simply apply your base coat, stick on your chosen wintery designs – snowflakes, tiny trees, or festive patterns – and seal it all with a top coat. It’s that easy! For even more inspiration, check out our fast and easy nail designs for more ideas.
Nail stickers come in a huge variety of styles and designs, so you're sure to find something that matches your winter aesthetic. They're also great for adding small details to a simple manicure. For example, you could paint your nails a solid color and then add a few snowflake stickers for a touch of winter magic. Need more ideas for quick and easy designs? Our page on at-home easy nail designs has tons of inspiration.
- Snowflakes
- Winter Animals
- Festive Patterns
Sponge Techniques for a Wintery Gradient
Sponge techniques are another fantastic way to achieve a beautiful winter manicure without a lot of fuss. All you need is a makeup sponge, several shades of polish, and a bit of patience. Start by applying base coats of your chosen colors. Then, dab the sponge into each color and gently press it onto your nails to create a blended effect. Experiment with different color combinations to achieve the perfect wintery look. Try icy blues and whites, or perhaps some deep purples and silvers for a more dramatic effect. For even more inspiration, take a look at our easy nail art designs for beginners.
Remember, the key to a successful sponge gradient is to use light, dabbing motions. Don't press too hard, or you'll end up with a muddy look. And don't be afraid to experiment! Try different sponge shapes and sizes to create unique effects. Once you've mastered the basic technique, you can try adding glitter or other embellishments to create even more interesting designs. For more tips and tricks, check out our easy nail art step by step guide.
Step | Description |
|---|---|
1 | Apply base coat |
2 | Dab sponge in polish |
3 | Gently press onto nails |
4 | Apply top coat |
Simple Dotting and Line Designs
Sometimes, the simplest designs are the most effective. Using a dotting tool or a toothpick, you can create charming winter designs with just dots and lines. Experiment with different sizes and spacings to create snowflakes, trees, or other winter-inspired motifs. A base coat of white or a pale blue provides a perfect canvas for these minimalist designs.
This technique is incredibly versatile. You can create intricate designs or keep it super simple, depending on your mood and skill level. Don't be afraid to experiment with different colors and patterns! For more ideas on simple line designs, check out our article on easy line nail designs.
Adorable Winter Nail Ideas for Short Nails
Adorable Winter Nail Ideas for Short Nails
Subtle Sparkle, Maximum Impact
Short nails? No problem! Subtle sparkle is your best friend for a winter manicure. Instead of large, bold designs, opt for a base coat of a deep, rich color like burgundy or emerald green. Then, add a thin layer of fine glitter over the top for a touch of understated shimmer. This creates a sophisticated, wintery look without overwhelming your nail bed. It's easy to apply and looks incredibly chic. For more inspiration on short nail designs, check out our cute short nail designs page.
To make it even more wintery, try adding a few tiny, carefully placed snowflakes using a fine-tipped brush and a contrasting color. Or, consider adding a single, small rhinestone to the base of each nail for a touch of extra sparkle. Remember, less is more when it comes to short nails. A few well-placed accents can make a huge difference. For more ideas on using rhinestones, see our easy rhinestone designs.
Base Color | Accent | Effect |
|---|---|---|
Burgundy, Emerald Green | Fine Glitter, Tiny Snowflakes | Subtle Sparkle |
Monochromatic Magic
Monochromatic nail art is another fantastic option for short nails. Choose a single color family – like various shades of blue, for example – and create a gradient effect using different tones. This creates depth and visual interest without being overly fussy. You can use a sponge or a fine brush to blend the colors. A soft, icy blue gradient is particularly lovely for a winter manicure.
To add a touch of extra flair, consider using a matte top coat on some nails and a glossy top coat on others for a textured, modern look. This creates a playful contrast without being too overwhelming. The key is to keep the overall look cohesive and elegant. For more inspiration on simple monochromatic designs, browse our collection of simple pink nail designs (adapt the color scheme!).
- Icy Blue Gradient
- Shades of Purple
- Various Greens
Winter-Inspired Accent Nails
If you're feeling less ambitious, try an accent nail approach. Paint all your nails a neutral base color (like a creamy beige or a soft pink). Then, on just one or two nails, create a small winter-themed design. This could be a single snowflake, a tiny pine tree, or even just a few strategically placed dots. This is a great way to add a touch of winter cheer without overwhelming your short nails.
Choose a design that complements your base color and overall style. For instance, a simple snowflake in silver or white would look beautiful against a nude base. Or, a tiny Christmas tree in green and red would add a festive touch. Remember, the accent nail should be a small but impactful detail that enhances the overall look. For more ideas on accent nails, check out our post on easy toenail designs (the principles are the same!).