Table of Contents
Ready to dive into the world of effortlessly chic nail art? This guide is your passport to mastering "easy blue nail designs," perfect for beginners and busy individuals alike. We'll explore a spectrum of blue hues, from calming baby blues to vibrant electric shades, showcasing simple yet stunning manicure ideas. Forget complicated techniques and expensive salon visits – we're all about achievable beauty. First, we'll cover the basics: creating flawless solid blue nails in various shades. Then, get ready to unleash your creativity with easy-to-follow techniques for adding dots, stripes, and other fun patterns. Next, we'll elevate your designs with the addition of glitter and rhinestones, transforming your manicure from simple to spectacular. Finally, we'll explore the mesmerizing world of ombre and gradient blue nail art, proving that even advanced-looking designs can be surprisingly easy to achieve at home. So grab your favorite blue polishes and let's get started on creating your dream manicure!
Simple Solid Blue Shades
Simple Solid Blue Shades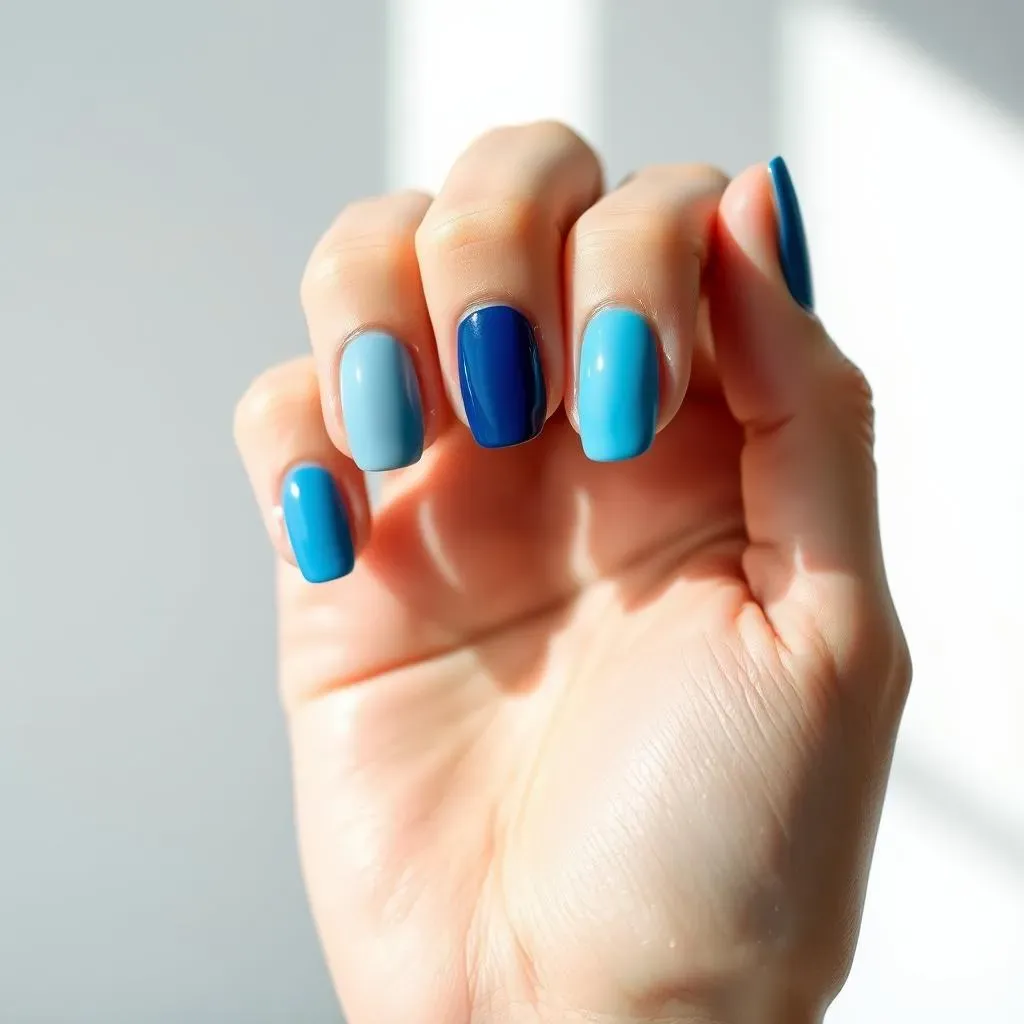
Choosing Your Perfect Blue
The beauty of a solid blue manicure lies in its simplicity. It's a canvas for your personal style, and the shade you choose says a lot. Think about what feeling you want to evoke – a calming, serene atmosphere? Or a bold, confident statement? A light, pastel blue like a robin's egg offers a delicate, spring-like feel. For something more sophisticated, a deep navy or sapphire blue creates a rich, elegant look. And for a playful touch, consider a vibrant turquoise or sky blue. No matter your choice, the key is to pick a shade that complements your skin tone and personal style.
Don't forget to prep your nails before applying your chosen blue polish. Start by gently pushing back your cuticles and shaping your nails. This will create a smooth surface for your polish and will make your manicure look more professional. For a longer-lasting manicure, consider using a base coat before your color and a top coat after. This extra step will help protect your nails and prevent chipping. Check out our guide on simple gel nail designs for more tips on nail preparation and application.
Blue Shade | Personality | Occasion |
|---|---|---|
Pastel Blue | Sweet, Delicate | Casual, Brunch |
Navy Blue | Sophisticated, Elegant | Formal Event, Date Night |
Turquoise | Playful, Energetic | Summer, Vacation |
Application Techniques for a Flawless Finish
Applying polish evenly can sometimes feel tricky, but with a little practice, you'll be a pro in no time. Start by applying thin coats. Thick coats are more likely to smudge and take longer to dry. Let each coat dry completely before adding the next. And don't forget the importance of clean-up! A small brush dipped in nail polish remover can work wonders for those little mistakes around your cuticles. Take your time and focus on precise application. A little patience goes a long way in achieving a professional-looking finish.
For a truly flawless look, consider using a base coat and top coat. The base coat will protect your nails from staining and help the color adhere better. The top coat will add shine and help your manicure last longer. This simple routine can dramatically improve the longevity of your manicure. For more step-by-step guidance, explore our post on easy nail art step-by-step.
- Apply thin coats
- Let each coat dry completely
- Use a base coat and top coat
- Clean up any smudges
Beyond the Basics: Adding Personality
While a simple solid blue is stunning on its own, you can easily add a personal touch to elevate your manicure. Consider adding a subtle accent nail. Perhaps one nail in a slightly different shade of blue, or even a metallic accent. This small detail adds visual interest without being overwhelming. Another idea is to incorporate a simple design onto one or two nails, like a small heart or a delicate flower. This can be easily done using a toothpick or a nail art pen. Remember, even the simplest additions can make a big difference in the overall look.
Don't be afraid to experiment with different finishes. A matte top coat can create a sophisticated, modern look, while a glossy top coat adds shine and glamour. You can even mix and match finishes on different nails for a unique effect. If you’re feeling adventurous, check out our collection of easy nail art designs for even more inspiration!
Easy Blue Nail Art with Dots and Stripes
Easy Blue Nail Art with Dots and Stripes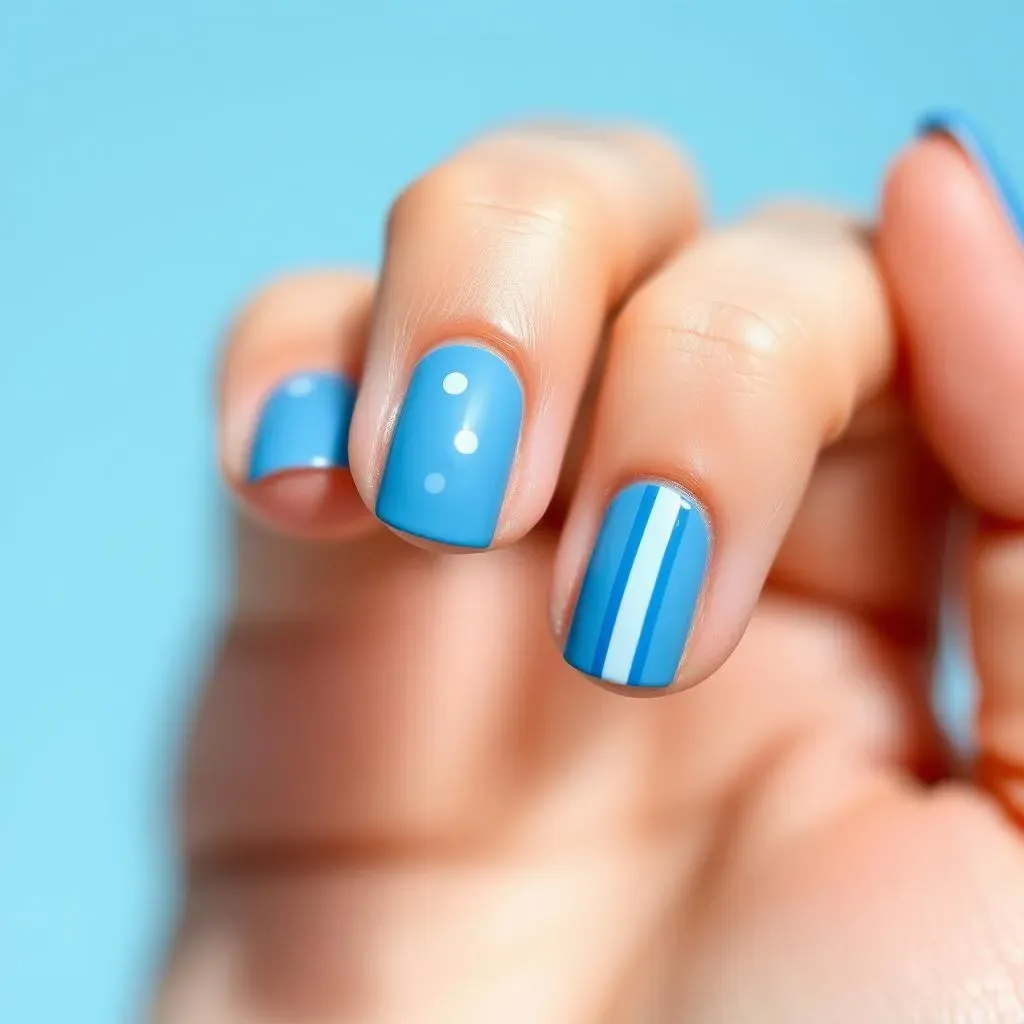
Easy Dotted Designs
Let's start with dots! They're super simple but can create surprisingly intricate designs. All you need is a toothpick or a dotting tool (you can even use the end of a bobby pin in a pinch!). Dip your tool into your blue polish and gently dab it onto your nails to create a pattern. You can make tiny dots for a delicate look, or larger dots for a bolder statement. Experiment with different arrangements – try a row of dots, a cluster of dots, or even a gradient of dots, going from small to large. The possibilities are endless!
For extra flair, try using different shades of blue for your dots. A lighter blue on a darker base or vice versa can add depth and interest. Or, you could incorporate a contrasting color, like white or silver, for a pop of brightness. Remember to let each dot dry before adding more to prevent smudging. For more detailed instructions and design ideas, check out our guide on easy nail art pen designs—lots of inspiration there!
Dot Size | Effect | Tip |
|---|---|---|
Small | Delicate, refined | Use less polish on your tool |
Medium | Playful, versatile | Practice on paper first |
Large | Bold, statement-making | Use more polish |
Stripes: Simple Yet Chic
Stripes are another fantastically easy way to add some personality to your blue manicure. You can create vertical stripes, horizontal stripes, or even diagonal stripes – the choice is yours! Use thin strips of painter's tape to create perfectly straight lines, or for a more free-flowing look, use a thin nail art brush or even the tip of a toothpick. Again, thin coats are key to prevent smudging and ensure even coverage.
Don't be afraid to experiment with different stripe widths and spacing. Thin stripes create a more delicate look, while thicker stripes make a bolder statement. You can even combine stripes with dots for a more complex design. For even more ideas and tutorials on creating clean lines and stripes, see our helpful guide on simple nail designs with lines.
- Use painter's tape for straight lines
- Experiment with different stripe widths
- Combine stripes with dots or other designs
- Use a thin brush for freehand stripes
Combining Dots and Stripes
Once you've mastered dots and stripes separately, you can combine them for even more creative nail art. Imagine alternating rows of dots and stripes, creating a rhythmic pattern. Or, place dots at the intersection of stripes, adding a playful touch. The possibilities are truly endless. Remember, practice makes perfect, so don't be discouraged if your first attempts aren't flawless. Have fun experimenting and finding what works best for you.
To add a touch of elegance, consider using a metallic accent color along with your blue. A thin gold or silver stripe can add a touch of luxury to your design. Or, you could use metallic dots to add sparkle and shine. For more inspiration on combining different techniques and colors, take a look at our collection of easy at-home nail art designs.
Adding Sparkle: Blue Nails with Glitter and Rhinestones
Adding Sparkle: Blue Nails with Glitter and Rhinestones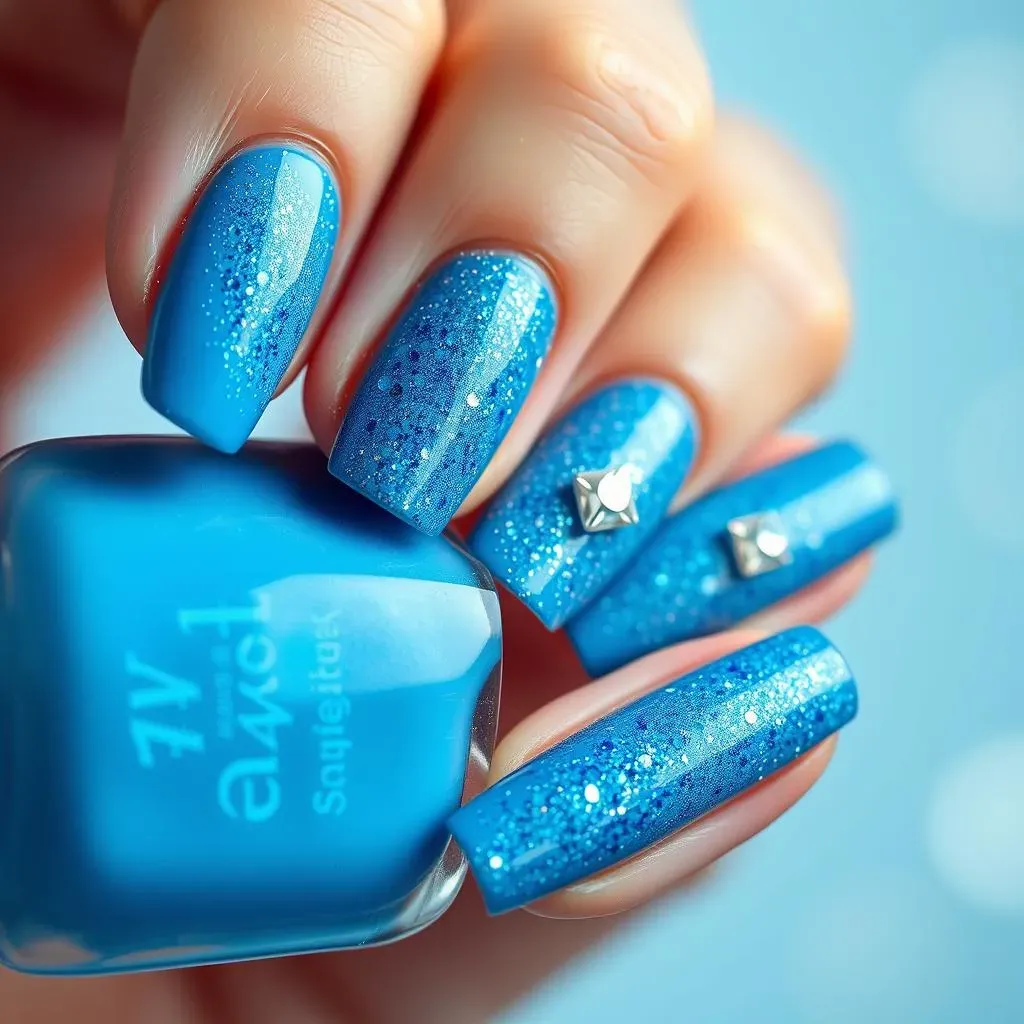
Adding Glitter: Easy Sparkle
Let's talk glitter! It's the easiest way to add instant glamour to your blue manicure. You can either use a glitter polish or apply loose glitter over a base coat of blue. For a glitter polish, simply apply it like regular nail polish – one or two thin coats should do the trick. For loose glitter, apply a layer of clear top coat, then sprinkle the glitter onto your nails while the top coat is still wet. Seal it with another layer of top coat to lock the glitter in place and give it some extra shine. Easy peasy!
Experiment with different glitter colors and sizes! Fine glitter creates a subtle shimmer, while chunky glitter makes a bold statement. You can even mix different glitter sizes for a unique textured look. For even more glitter inspiration, check out our post on easy rhinestone nail designs—they often include glitter too!
Glitter Type | Effect | Tip |
|---|---|---|
Fine Glitter | Subtle shimmer | Use multiple thin coats |
Chunky Glitter | Bold sparkle | Apply sparsely for even coverage |
Rhinestones: Adding a Touch of Glamour
Rhinestones add a touch of high-end glamour to any manicure. They're surprisingly easy to apply and come in a huge variety of shapes, sizes, and colors. Start by applying a base coat of blue polish, and once it's dry, add a small dab of clear top coat where you want to place your rhinestone. Quickly press the rhinestone onto the wet top coat and gently hold it for a few seconds to ensure it adheres properly. Finish with another layer of top coat to secure everything in place.
Get creative with your rhinestone placement! You can create a simple accent on one nail, or create a more elaborate design across multiple nails. Try arranging them in a pattern, like a line, a cluster, or even a design. For more inspiration and step-by-step tutorials, visit our page on easy nail designs with rhinestones.
- Use a toothpick or tweezers for precise placement
- Start with a small design and gradually add more
- Use different sizes and shapes of rhinestones
- Seal with a top coat for longevity
Combining Glitter and Rhinestones
For maximum sparkle, combine glitter and rhinestones! Imagine a base of glitter polish, accented with strategically placed rhinestones. Or, you could create a design using glitter and then add rhinestones to highlight certain areas. The combination of the two creates a dazzling effect, perfect for a special occasion or just to add some extra fun to your everyday look. Remember to let each layer dry completely before adding the next to avoid smudging.
Don't be afraid to experiment and play around with different combinations. Try using different colors of glitter and rhinestones to complement your blue base. Or, try using different shapes and sizes of rhinestones to add visual interest. If you're looking for more ideas and inspiration, check out our page on easy at-home nail art designs for even more inspiration!
Blue Ombre and Gradient Nail Designs
Blue Ombre and Gradient Nail Designs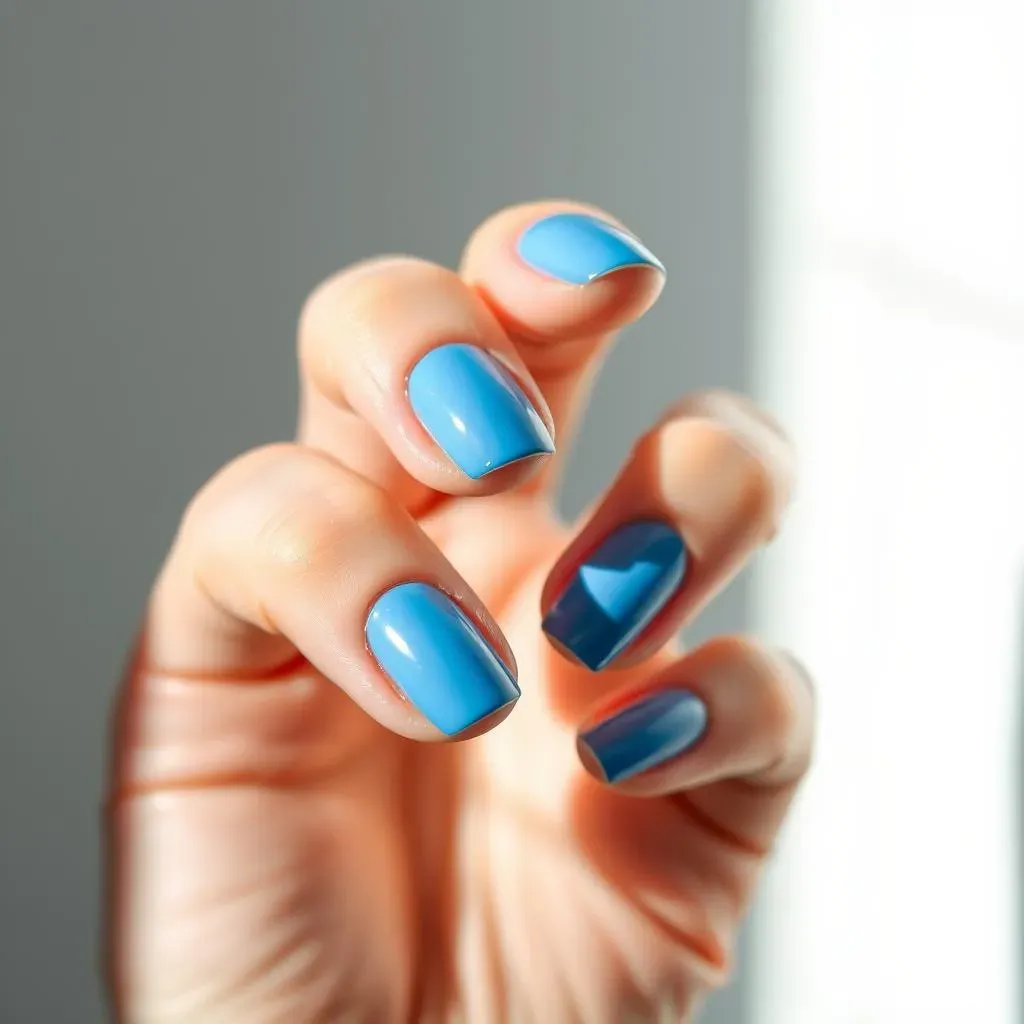
Creating a Smooth Ombre Effect
Ombre nails, with their seamless color transitions, are a total head-turner. But don't let the professional look intimidate you! Achieving a beautiful blue ombre is easier than you think. You'll need two or three shades of blue—a light, a medium, and a dark shade work best. Start by painting your nails with your lightest shade. Then, using a sponge, dab on your medium shade, blending it slightly into the lighter shade. Finally, dab on your darkest shade, again blending it into the medium shade. The key is to blend the colors gently to create a smooth, gradual transition. Keep blending until you're happy with the effect!
For even smoother transitions, use a makeup sponge. It's softer and more porous than a regular sponge, creating a more subtle gradient. You can also use a small brush for more control, although it will require a bit more patience. And don't forget the importance of thin coats to avoid a clumpy look. For more detailed instructions on sponge techniques, check out our guide on step-by-step easy nail designs—they cover a lot of helpful techniques.
Shade | Application | Tip |
|---|---|---|
Lightest | Base coat | Apply evenly to all nails |
Medium | Sponge application | Blend gently with lighter shade |
Darkest | Sponge application | Blend into medium shade |
Gradient Nails: A Twist on Ombre
Gradient nails offer a slightly different take on the ombre effect. Instead of a smooth transition, gradient nails create a more defined separation between colors. You can achieve this by painting each nail with a different shade of blue, creating a spectrum across your fingers. Or, you can paint sections of each nail with different shades, creating a unique design on each nail. The possibilities are really endless!
To create a sharp line between colors, use painter's tape to section off your nails. This will give you clean, precise lines. You can also use a small brush to create a more freehand gradient effect. Remember to let each coat dry completely before adding the next one. For more inspiration and creative ideas, check out our post on awesome easy nail art designs—tons of great ideas there!
- Use painter's tape for clean lines
- Experiment with different color combinations
- Try different application methods (sponge, brush)
- Let each coat dry completely