Table of Contents
Ready to give your toes some Valentine's Day love? Forget complicated salon appointments and pricey pedicures! This article is your guide to creating adorable and easy Valentine's Day toe nail designs, perfect for celebrating the season of love without breaking the bank or your nail polish skills. We'll start with super simple designs ideal for beginners, using techniques you can master in minutes. Then, we'll add a touch of sparkle with easy glitter and rhinestone ideas – because who doesn't love a little extra shine? Finally, we'll explore some slightly more advanced designs that are still totally achievable, even if you're not a nail art pro. Whether you're a complete newbie or just looking for some fresh inspiration, these easy valentine toe nail designs will have your feet looking fabulous for your romantic celebrations. So grab your favorite nail polish colors, and let's get started on creating the perfect Valentine's Day pedicure! Get ready to discover the joy of easy valentine toe nail designs.
Simple Valentine's Day Toe Nail Designs for Beginners
Simple Valentine's Day Toe Nail Designs for Beginners
Classic Red and Pink Hearts
Let's start with the simplest of simple designs: classic red and pink hearts! This is perfect for anyone who wants a cute, festive look without too much fuss. All you need is a base coat, your chosen red and pink nail polishes, and a tiny detail brush or even a toothpick if you're feeling really adventurous. Paint your toes a base color (a nude shade looks great, but any color works!). Once that's dry, use the brush to paint small hearts on each nail. It doesn't have to be perfect; a slightly imperfect heart adds charm! For an extra touch, add some tiny white dots to make the hearts look like they're popping. You can even find simple heart nail art stickers online to make this even easier! Check out our post on easy nail art ideas for more inspiration.
This design is so easy, you can do it while watching your favorite show! It's also great for practicing your nail art skills. Even if your hearts aren't perfectly symmetrical, it still looks adorable. Remember, practice makes perfect (or at least, pretty darn good!). And don't be afraid to experiment with different shades of red and pink to find your perfect Valentine's Day palette. Consider a fun ombre effect for a bit more flair!
Step | Action |
|---|---|
1 | Apply base coat |
2 | Paint red and pink hearts |
3 | Add white dots (optional) |
4 | Seal with top coat |
Subtle Valentine's Day Hues
If hearts aren't your thing, or if you prefer a more subtle Valentine's Day look, try using soft pink, rose gold, or even a delicate blush tone as your base color. This is a fantastic option if you want something pretty but understated. You can enhance this minimalist look with a shimmery top coat for an extra touch of glamour or a matte top coat for a modern feel. Need some more inspiration for simple nail designs? Check out our page on basic easy nail designs for more ideas!
This approach is all about letting the color speak for itself. The beauty lies in its simplicity. A single coat of a lovely pastel pink can be incredibly chic and romantic. If you want to add a touch of something extra, consider adding some tiny metallic accents. It's all about subtlety and elegance here. And don't forget a good top coat to protect your masterpiece!
- Choose a soft pink, rose gold, or blush shade.
- Apply two coats for even coverage.
- Add a shimmery or matte top coat.
- Optional: Add tiny metallic accents.
Adding Some Sparkle: Easy Glitter and Rhinestone Toe Nail Art
Adding Some Sparkle: Easy Glitter and Rhinestone Toe Nail Art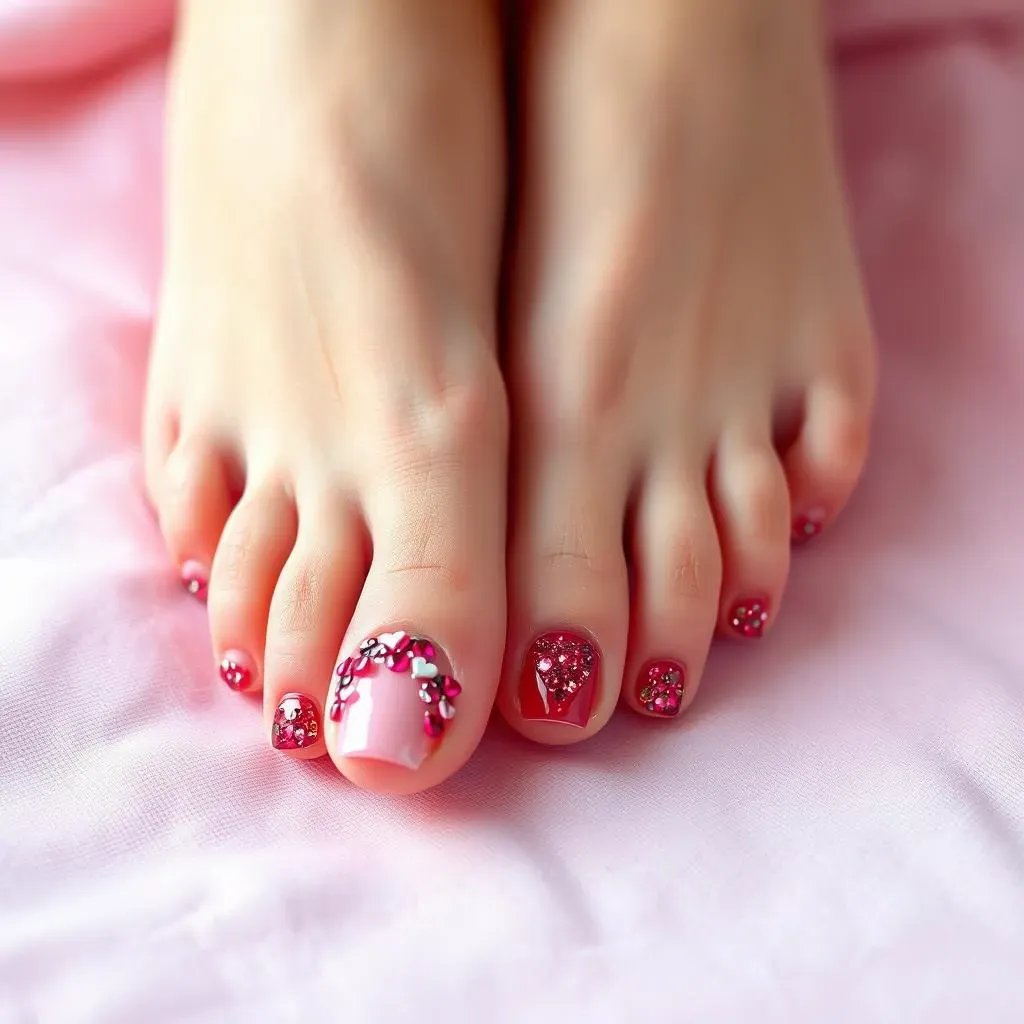
All That Glitters
Let's add some serious sparkle to your Valentine's Day toes! Glitter is your best friend here. Start with a base coat of your favorite color – a deep red or a pretty pink works perfectly. Once dry, apply a generous layer of your chosen glitter polish. For extra oomph, try a chunky glitter for maximum shine. If you're feeling extra fancy, you can even mix different glitters for a more unique look. For even more nail art ideas, check out our guide to easy nail art designs.
Don't forget a good top coat to seal in all that glitter and prevent it from shedding everywhere. You can also add some small heart-shaped glitter pieces for an extra touch of Valentine's Day flair. The key is to have fun and experiment! Don't worry about getting it perfectly even – a little bit of messiness adds to the charm.
- Apply a base coat.
- Add glitter polish.
- Use a top coat to seal.
- Optional: Add heart glitter.
Rhinestone Romance
Ready to take your Valentine's Day pedicure to the next level? Rhinestones add instant glamour! Choose small, heart-shaped rhinestones for a romantic touch, or go for a mix of sizes and shapes for a more eclectic look. You can create simple patterns, like a line of rhinestones down the center of each nail, or go all out and cover your entire nail in sparkling gems. For more ideas on using rhinestones, see our article on easy nail designs with rhinestones.
If you are a beginner, start with a simple design. Use a toothpick or a dotting tool to apply a small amount of nail glue to the nail and then carefully place the rhinestone on top. Press gently to ensure it adheres properly. Once you're happy with your design, apply a top coat to secure the rhinestones. Remember, less is often more when it comes to rhinestones – a few strategically placed gems can have a much bigger impact than a chaotic mess. Don't be afraid to experiment!
Step | Action |
|---|---|
1 | Apply base coat |
2 | Apply nail glue |
3 | Place rhinestones |
4 | Apply top coat |
More Advanced (But Still Easy!) Valentine's Day Toe Nail Designs
More Advanced (But Still Easy!) Valentine's Day Toe Nail Designs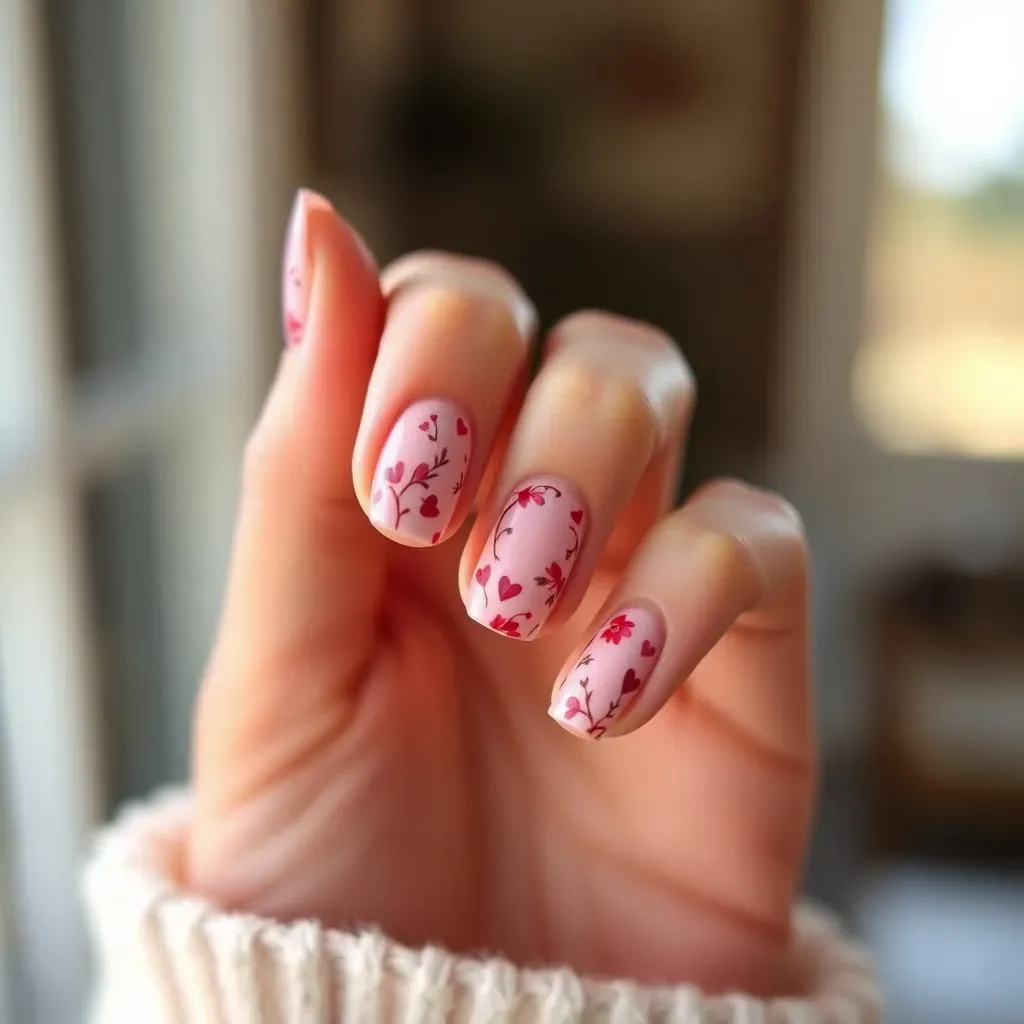
Subtle Valentine's Day Designs
Let's step up the game with some slightly more intricate designs, but still super manageable for beginners! Think delicate floral patterns, or maybe a simple ombre effect using Valentine's Day colors. You can achieve a lovely floral look using striping tape and different shades of pinks and reds. Just apply your base coat, then stick down the tape to create the shapes of your flowers. Paint over the tape with your chosen colors, and remove the tape once it's dry to reveal a neat and pretty design. For more inspiration on easy floral designs, check out our post on easy painted nail designs.
An ombre effect is another great option. Start with a light pink at the base of your nail, and gradually blend it into a deeper red or rose gold towards the tip. You can use a sponge to achieve a soft, blended look. Remember, it's about the overall effect, not perfection! A slightly uneven ombre adds a touch of charm. For more simple nail ideas, see our collection of simple almond nail designs.
- Use striping tape for floral designs.
- Create an ombre effect with a sponge.
- Experiment with different color combinations.
- Don't worry about perfection – embrace the imperfections!
Geometric Valentine's Day Nail Art
Geometric designs are surprisingly easy to create and look super chic. Use striping tape to create clean lines and shapes, such as hearts, stripes, or even simple polka dots. You can use a combination of colors to create a visually interesting pattern. For example, try alternating stripes of red and white, or create a grid of small hearts in different colors. Need more ideas? Explore our selection of easy nail art pen designs for more inspiration!
Remember to apply a base coat before starting your design, and always seal it with a top coat to protect your artwork and give it a glossy finish. If you're not confident in your freehand skills, use nail art stickers or stencils to help you create perfect shapes. You can find tons of Valentine's Day-themed nail art stickers online. Don't forget to check out our page dedicated to quick and easy nail designs for more simple yet stylish ideas.
Design Element | Description |
|---|---|
Stripes | Use striping tape for clean lines |
Hearts | Create small hearts with a dotting tool |
Polka Dots | Use a toothpick or dotting tool |