Table of Contents
Ready to transform your nails into adorable masterpieces? This article is your ultimate guide to easy cute nail art designs! Whether you're a complete beginner or just looking for some fresh inspiration, we've got you covered. We'll start with super simple designs perfect for those just starting their nail art journey. Think easy-peasy polka dots, charming stripes, or delicate flowers – all achievable with minimal effort and maximum cuteness. Next, we'll tackle cute nail art specifically designed for shorter nails, proving that even short nails can rock amazing designs. Then, get ready for a seasonal adventure! We'll explore a range of easy cute nail art designs perfect for every season – from springtime pastels to festive winter wonderlands. Finally, we'll level up your skills with some slightly more advanced techniques, but don't worry, they're still surprisingly easy to master. By the end, you'll be confident enough to create your own unique and stylish easy cute nail art designs, expressing your personality with every manicure. Let's dive in and unleash your inner nail artist!
Simple Nail Art Designs for Beginners
Simple Nail Art Designs for Beginners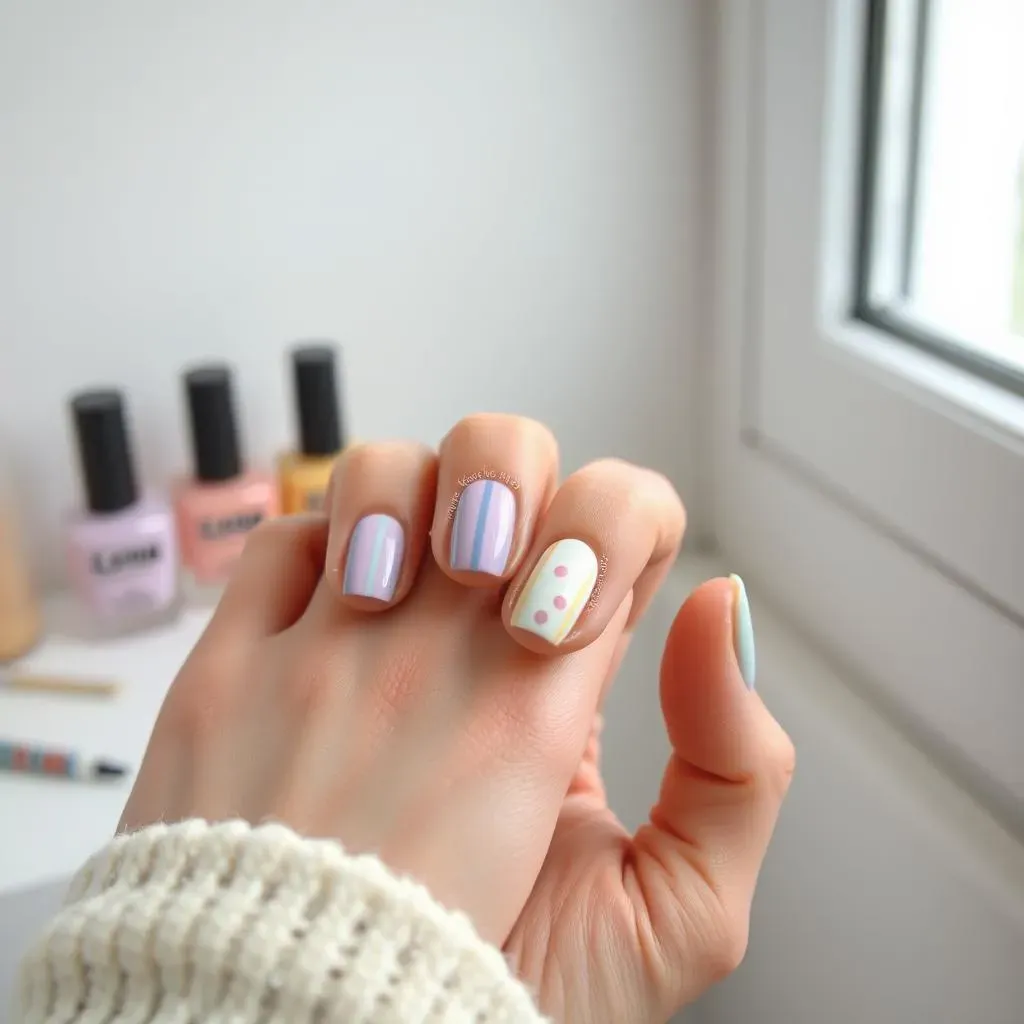
Mastering the Basics: Simple Stripes & Dots
Let's start with the absolute easiest nail art: stripes and dots! Grab your favorite nail polishes – two contrasting colors work great. For stripes, use painter's tape to create clean lines, or freehand it if you're feeling brave (a steady hand helps!). For dots, use a toothpick or a dotting tool; if you don't have a dotting tool, don't worry, a bobby pin works just as well! Practice on a piece of paper first to get the hang of it. Start with simple patterns, like alternating stripes or evenly spaced dots. Remember, it's all about having fun and experimenting. Don't be afraid to get a little messy – it's part of the learning process! Check out our guide on easy black and white nail designs for more inspiration.
Once you've mastered stripes and dots, try combining them! Imagine alternating stripes with rows of dots, or creating a dotted border around a stripe. The possibilities are endless. You can also try using different sizes of dots to add interest. For example, you could use large dots for the base and smaller dots to create a pattern on top. The key here is to keep it simple and fun. Don't worry about perfection; embrace the imperfections. After all, that's what makes your nail art unique! And if you're looking for something a little more festive, why not check out our easy Halloween nail art designs?
Design | Tools Needed | Difficulty |
|---|---|---|
Stripes | Nail polish, painter's tape (optional) | Easy |
Dots | Nail polish, toothpick or dotting tool | Easy |
Adding a Touch of Elegance: Negative Space Designs
Negative space nail art is all the rage, and it's surprisingly easy to achieve! This technique involves leaving some of your nail bare, creating a beautiful contrast with your chosen color. You can create simple negative space designs using painter's tape, just like with stripes. For instance, you could paint half your nail one color, leaving the other half bare, or create a geometric pattern by taping off sections of your nail. Another fun idea is to create a half-moon design at the base of your nail. This looks super chic and modern, and it's surprisingly easy to do. For more complex negative space designs, you might want to invest in some nail stencils. These come in a variety of shapes and sizes, allowing you to create intricate patterns with ease. Check out our simple nail art designs for more ideas.
Remember, negative space nail art is all about showcasing the natural beauty of your nails. It's a minimalist approach that's both stylish and sophisticated. You can elevate a simple negative space manicure by adding a single accent nail with a more intricate design. For example, you could paint one nail with a cute flower design, or add some glitter to one nail for a touch of sparkle. The possibilities are endless! If you're feeling adventurous, why not try a seasonal twist? Our blog post on easy summer nail art designs offers some great inspiration for incorporating negative space into your summer manicure.
- Use painter's tape for clean lines.
- Experiment with different shapes and patterns.
- Add an accent nail for extra flair.
Cute Nail Art Ideas for Short Nails
Cute Nail Art Ideas for Short Nails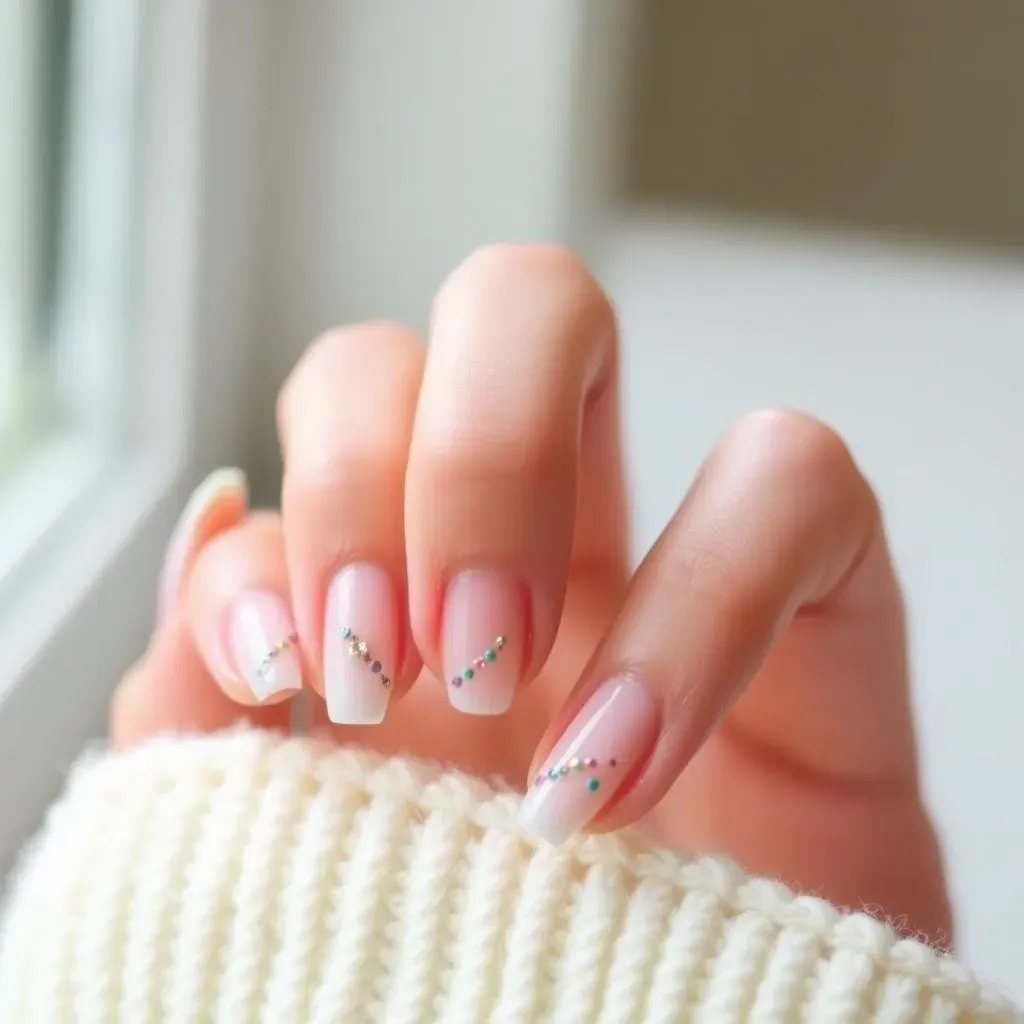
Short nails don't mean sacrificing style! In fact, they're a perfect canvas for cute and chic nail art. Think delicate designs that maximize impact without overwhelming your nail bed. Simple solid colors with a subtle accent nail are always a winner. A single sparkly stone on one nail can add a touch of glamour, while a tiny heart or flower on another creates a playful touch. For more inspiration, check out our ideas for easy pretty nail designs for short nails.
Another great option is to focus on a single, impactful design. A single, well-executed design can look just as stunning as a more complex, multi-nail design, especially on shorter nails. A geometric pattern, a minimalist stripe, or a cute animal face can all make a statement without being too busy. Remember, less can be more, particularly when it comes to short nails. Try a simple French manicure with a twist – instead of a white tip, use a pastel color or add a tiny design to the tip. For more ideas for short nails, consider our easy toenail designs for short nails – many of these translate beautifully to fingernails!
- Solid colors with accent nails
- Single, impactful designs
- French manicure with a twist
Don't be afraid to experiment with different textures and finishes. A matte top coat can give your design a sophisticated look, while a glossy top coat adds shine and vibrancy. Adding small embellishments, like tiny studs or glitter, can also elevate your design without making it too busy. Just remember to keep the embellishments small and strategically placed to avoid cluttering your short nails. For more advanced techniques, check out our amazing easy gel nail designs – many of these can be adapted for short nails too!
Ultimately, the best nail art for short nails is the art that makes *you* feel confident and happy. So experiment, have fun, and don't be afraid to try new things. The beauty of nail art lies in its endless possibilities, and short nails are no exception. If you're looking for something a bit more festive, take a peek at our collection of cute easy Christmas nail designs – many of these would work beautifully on short nails too!
Design Idea | Description | Difficulty |
|---|---|---|
Solid Color with Accent Nail | One color base, one nail with a small design or embellishment | Easy |
Single Design | One design repeated on all nails | Easy-Medium |
French Manicure with a Twist | Classic French manicure with a colored tip or small design | Medium |
Seasonal Nail Art Designs: Spring, Summer, Fall, Winter
Seasonal Nail Art Designs: Spring, Summer, Fall, Winter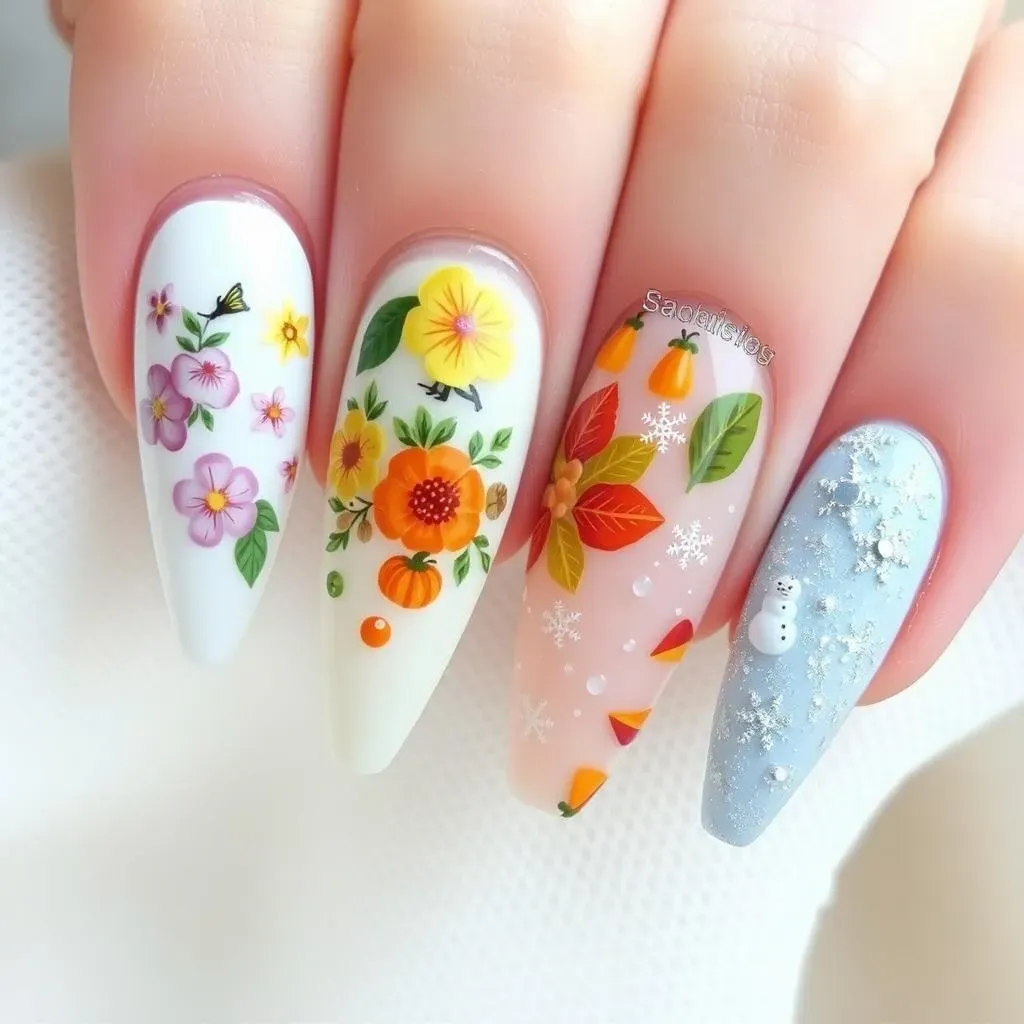
Spring into Color: Pastel Perfection
Spring is all about fresh starts and vibrant colors! Think pastel hues like soft pinks, baby blues, and sunny yellows. These colors are perfect for creating a cheerful and uplifting manicure. You can create a simple gradient effect by blending two or three pastel shades together, or try a more intricate design using floral accents. Dainty flowers are a classic spring choice. You can either freehand paint them, or use nail stencils for a cleaner look. For extra inspiration, check out our easy spring nail art designs.
Another fun idea is to incorporate spring-themed embellishments, such as tiny butterflies or flowers. These can be added to a solid pastel base, or used to accentuate a more complex design. Remember, spring is all about lightness and airiness, so keep your designs delicate and playful. If you're feeling adventurous, try adding some glitter to your design for a touch of sparkle. A subtle glitter overlay can add a touch of magic to your spring manicure. For more ideas on adding a touch of sparkle, check out our amazing easy gel nail designs – many of these techniques can be adapted for spring!
- Pastel colors
- Floral accents
- Spring-themed embellishments
Summer Fun: Bright and Bold
Summer is the perfect time to experiment with bright and bold colors! Think vibrant oranges, sunny yellows, and deep blues. These colors are perfect for creating a fun and playful manicure that reflects the energy of the season. You can create a simple design by using two contrasting colors, or try a more intricate design using geometric patterns or tropical themes. Tropical fruits like pineapples and mangoes add a summery vibe. You can paint them freehand or use nail stickers for an easier approach.
Another fun idea is to incorporate summer-themed embellishments, such as tiny seashells or starfish. These can be added to a solid base color, or used to accentuate a more complex design. If you're feeling adventurous, try creating a beach-inspired design using shades of sand, ocean blue, and white. For more summer inspiration, check out our easy summer nail art designs. Don't forget to add a top coat to protect your design and keep your nails looking fabulous all summer long!
Color Palette | Design Idea | Difficulty |
|---|---|---|
Bright oranges, yellows, blues | Tropical fruits, geometric patterns | Medium |
Sand, ocean blue, white | Beach-inspired design | Medium-Hard |
Autumn Hues: Warm and Cozy
Autumn is all about warm and cozy colors! Think rich browns, deep oranges, and burnt reds. These colors are perfect for creating a sophisticated and elegant manicure that reflects the beauty of the season. You can create a simple design by using two or three autumnal shades, or try a more intricate design using leaf patterns or plaid accents. Fall leaves are a classic autumn choice. You can either paint them freehand or use nail stencils.
Another fun idea is to incorporate autumn-themed embellishments, such as tiny pumpkins or acorns. These can be added to a solid base color, or used to accentuate a more complex design. If you're feeling adventurous, try creating a design inspired by the changing leaves, using a gradient of warm autumnal shades. For more autumnal inspiration, check out our easy fall nail art designs. Remember, autumn is all about depth and richness, so don't be afraid to experiment with different textures and finishes.
- Rich browns, deep oranges, burnt reds
- Leaf patterns
- Autumn-themed embellishments
Advanced (But Still Easy!) Cute Nail Art Techniques
Advanced (But Still Easy!) Cute Nail Art Techniques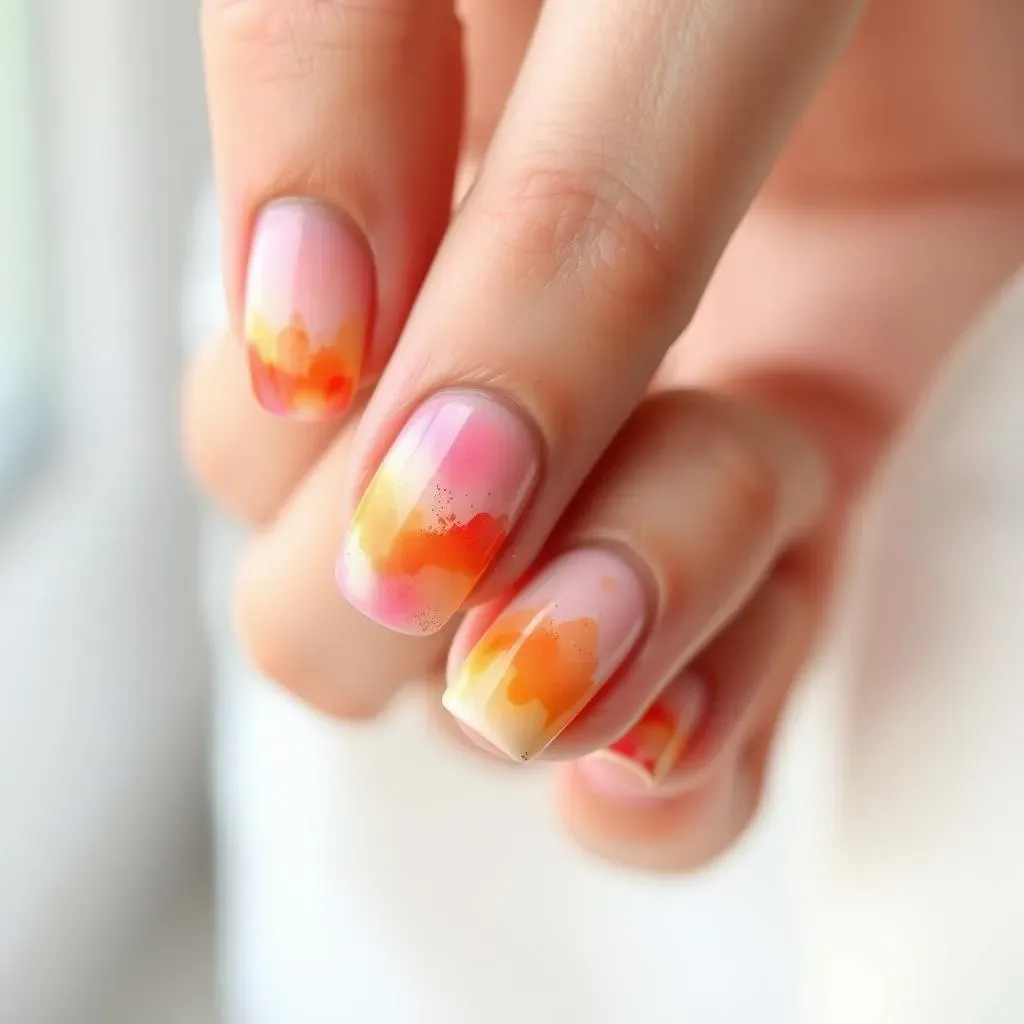
Watercolor Nail Art: A Wash of Color
Ready to add some artistic flair? Watercolor nail art might sound intimidating, but it's surprisingly achievable! The key is to use sheer, translucent polishes and blend them gently for a soft, dreamy effect. Start with a light base coat. Then, using a small brush or even a toothpick, apply small dabs of different colors. Before the polish dries, use a clean, damp brush to gently blend the colors together, creating a beautiful watercolor effect. Experiment with different color combinations to achieve unique looks. For a more defined look, you can use painter's tape to create sections for your watercolor effect. Remember, the beauty of watercolor nail art lies in its imperfection. Embrace the slightly messy, artistic feel.
To add depth and dimension, try layering different shades. For instance, you could start with a pale yellow, then add layers of orange and pink to create a sunset effect. Or, try layering blues and greens to create an ocean scene. Don't be afraid to experiment! Adding tiny embellishments, like glitter or small rhinestones, can also elevate your watercolor design. Just remember to keep it subtle to avoid overwhelming the delicate watercolor effect. For even more inspiration, check out our guide to easy painted nail designs – many of these techniques can be adapted for a watercolor style.
- Use sheer polishes
- Blend colors gently
- Experiment with layering
Ombre Nails: A Gradient of Gorgeousness
Ombre nails are another fantastic way to elevate your nail art game without too much fuss. This technique involves creating a gradual blend of colors, creating a seamless transition from one shade to another. The easiest way to achieve this is using a sponge. Apply your chosen colors to the sponge in stripes, then gently dab the sponge onto your nails, blending the colors as you go. Experiment with different color combinations to create unique ombre effects. A classic combination is a soft pink transitioning to a deeper rose, or a bright yellow fading into a sunny orange.
For a more sophisticated look, you can try using a gradient of similar shades, creating a subtle ombre effect. For instance, you could use three shades of pink, gradually transitioning from light to dark. You can also add some glitter to your ombre design to create a touch of sparkle. Remember, the key to a successful ombre manicure is to blend the colors smoothly, creating a seamless transition. If you want to try something different, check out our easy French tip nail designs, as the gradient technique is similar and can be adapted.
Step | Instructions |
|---|---|
1 | Apply base coat |
2 | Apply colors to sponge |
3 | Dab sponge onto nails |
4 | Apply top coat |