Table of Contents
Ready to ditch expensive salon visits and create stunning nails from the comfort of your own home? This guide is your passport to the world of "easy gel nail designs for beginners." We'll take you from newbie to nail-art ninja, step-by-step. First, we'll cover the essential tools and supplies you'll need – think of it as gathering your superhero gear before embarking on your nail art adventure. Then, get ready to dive into a treasure trove of simple gel nail designs, complete with easy-to-follow tutorials and inspiration for your next manicure. We'll start with basic techniques and gradually introduce more advanced methods, all while keeping it beginner-friendly. By the end, you'll not only have mastered several gorgeous looks but also gained the confidence to experiment and create your own unique designs. So grab your polish, and let's get started on your journey to beautifully manicured nails!
Essential Tools and Supplies for Gel Nail Art
Essential Tools and Supplies for Gel Nail Art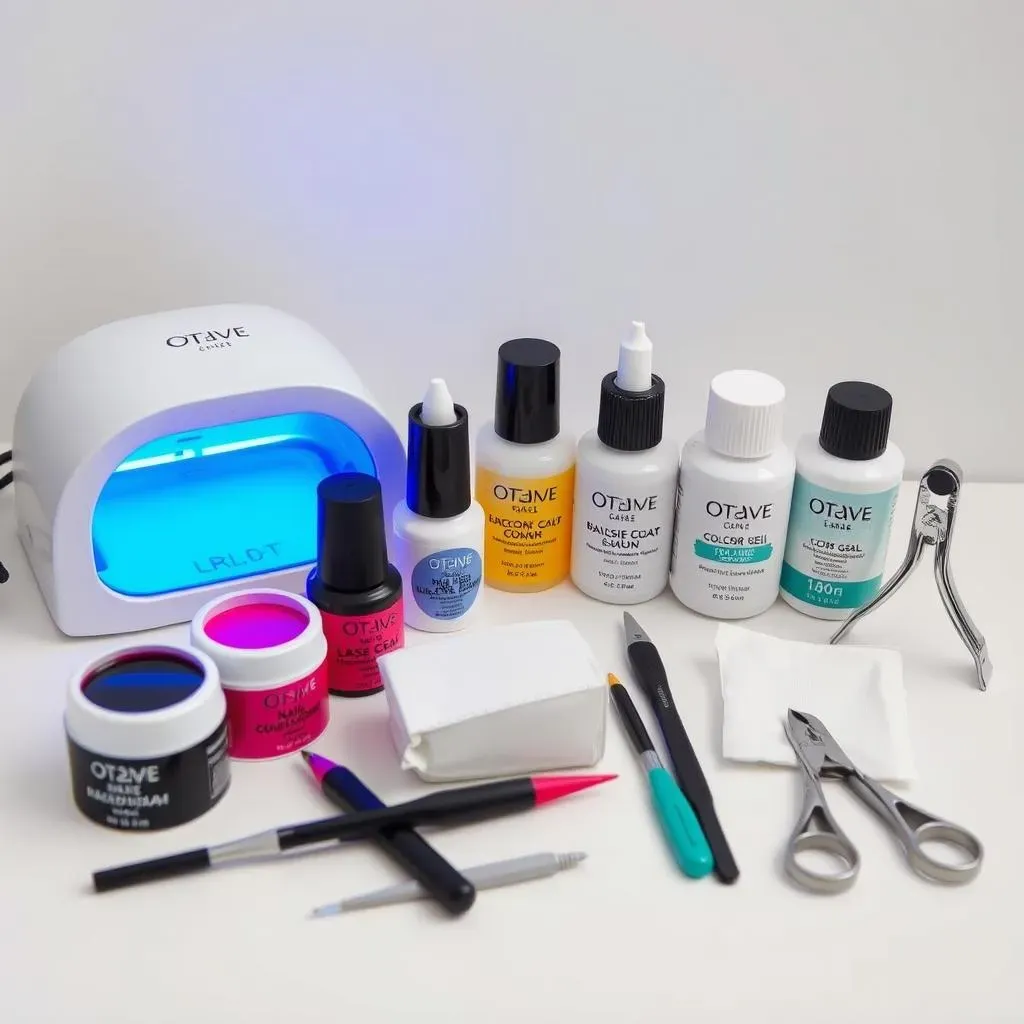
The Base Camp: Gathering Your Supplies
Before you unleash your inner nail artist, you'll need the right tools. Think of it like prepping for a fantastic adventure – you wouldn't climb a mountain in flip-flops, would you? First up: a good quality UV or LED lamp. This is your magic potion maker, curing your gel polish and making your masterpiece last. Next, you'll need a base coat, color gels (choose your favorites!), and a top coat for that glossy, long-lasting shine. Don't forget cuticle pusher, nail file, and some nail clippers to prep those nails for perfection. Oh, and some lint-free wipes are your best friend for cleaning up any spills. For extra flair, consider nail art brushes and some cute embellishments like rhinestones or glitter! Check out our guide on easy nail designs with rhinestones for inspiration.
Having the right tools is half the battle! A good quality nail file will make shaping your nails a breeze (and prevent breakage). Choose a fine-grit file to avoid damaging your nails. And don't underestimate the power of a good base and top coat – they're the unsung heroes of a long-lasting manicure. A base coat protects your nails, while a top coat seals the deal, preventing chips and adding that extra shine. For some extra fun nail art ideas, check out our selection of cute and easy nail art designs.
Item | Importance |
|---|---|
UV/LED Lamp | Cures gel polish |
Base Coat | Protects nails |
Color Gels | Your creative palette |
Top Coat | Adds shine and durability |
Prep Work: Getting Your Nails Ready
Before you even think about painting, you've got to prep those nails! It's like getting ready for a big race – you wouldn't start without stretching, would you? First, give your nails a good clean, then gently push back your cuticles. Don't cut them – just push them back for a neat look. Then, file your nails to your desired shape. Be gentle! Once they're perfectly shaped, use a buffer to smooth out the surface. This ensures your gel polish will stick perfectly and last longer. A little prep work goes a long way! Check out our easy designs for nails at home for more inspiration.
Remember, clean nails are happy nails! Remove any old polish and gently push back your cuticles with a cuticle pusher. Filing your nails to the correct shape is crucial for a professional finish. Take your time and be precise! Finally, buffing the surface creates a smooth base for your gel polish, ensuring it adheres properly and lasts longer. If you need a little extra guidance, check out our post on easy nail art designs at home. It's packed with useful tips and tricks!
- Clean your nails thoroughly.
- Gently push back your cuticles.
- File your nails to your desired shape.
- Buff your nails for a smooth surface.
Simple Gel Nail Designs: Easy Tutorials and Ideas
Simple Gel Nail Designs: Easy Tutorials and Ideas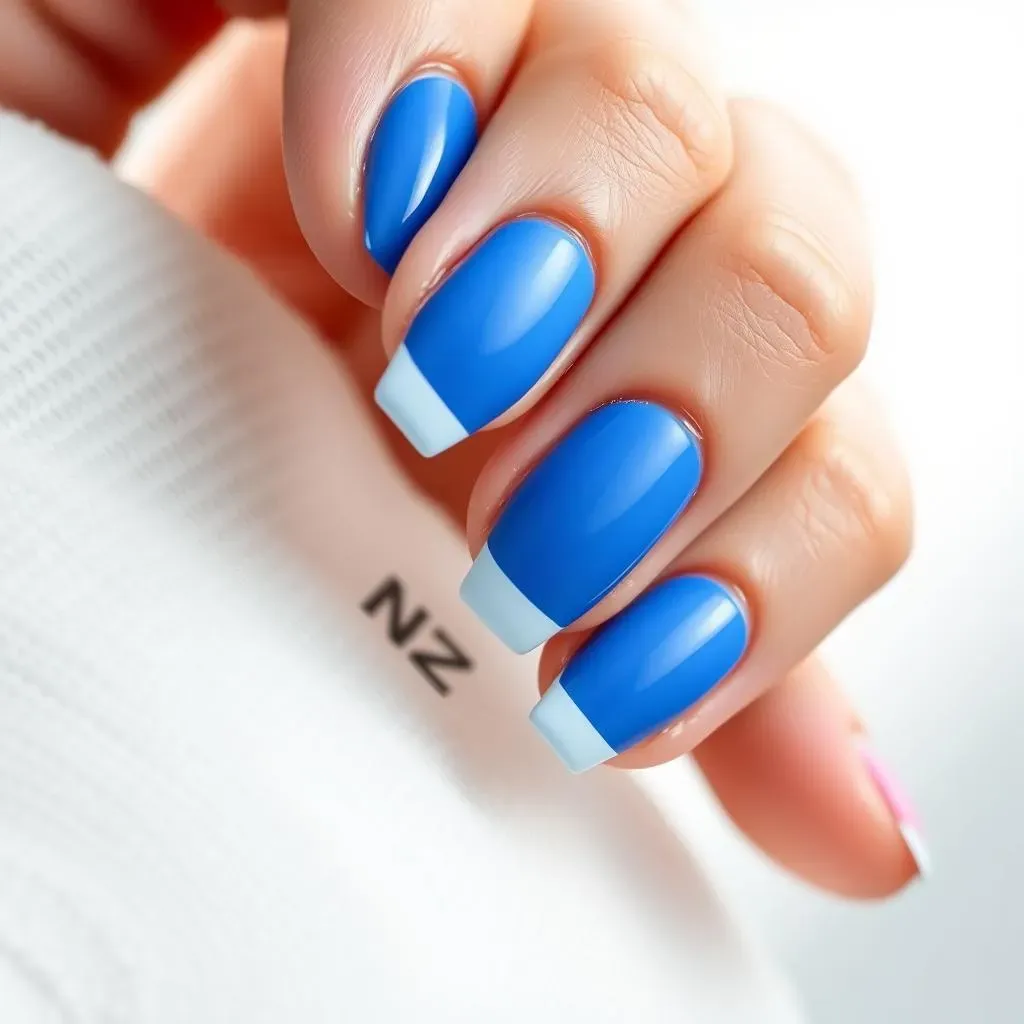
Monochromatic Magic: One-Color Wonders
Let's start with the easiest designs – using just one color! It's like painting a masterpiece with a single, bold stroke. Choose a shade you love, whether it's a classic red, a vibrant blue, or a sophisticated nude. Apply two coats of your chosen color gel, ensuring each coat is thin and even. Cure each coat under your lamp according to the manufacturer’s instructions. Finish with a top coat for extra shine and protection. It's that simple! For more inspiration, check out our easy blue nail art designs – they're incredibly easy to recreate.
Think of this as your nail art warm-up. It’s a great way to practice your application technique and get comfortable with the process before moving on to more complex designs. A simple, solid color manicure is incredibly chic and surprisingly versatile. It works for any occasion, from a casual day out to a formal event. Want to add a little extra something? Try a matte top coat for a completely different vibe! For more simple ideas, see our page on simple nail designs.
- Choose your favorite gel color.
- Apply two thin coats, curing each one.
- Finish with a top coat for shine.
French Manicure: A Classic with a Twist
The French manicure is a timeless classic, and it's surprisingly easy to do with gel polish! Start with a base coat, then apply two coats of a nude or pale pink gel. Once cured, use a thin nail art brush to paint a white smile line at the tip of each nail. Cure again, and finish with a top coat. For a modern twist, try a different color for the tips, like a pastel shade or a metallic hue. For even more ideas, check out our post on easy nail art designs for beginners – it’s full of inspiration!
Don't be intimidated by the precision of the French manicure. With a little practice, you'll be able to achieve a salon-quality finish at home. Use painter's tape to create a clean, straight line if you're struggling with freehand painting. And remember, practice makes perfect! If you're looking for more simple and elegant ideas, browse our gallery of easy and pretty nail designs.
Step | Description |
|---|---|
1 | Apply base coat and nude/pink gel |
2 | Paint white (or colored) tips |
3 | Cure and apply top coat |
Advanced Techniques and Creative Designs for Beginners
Advanced Techniques and Creative Designs for Beginners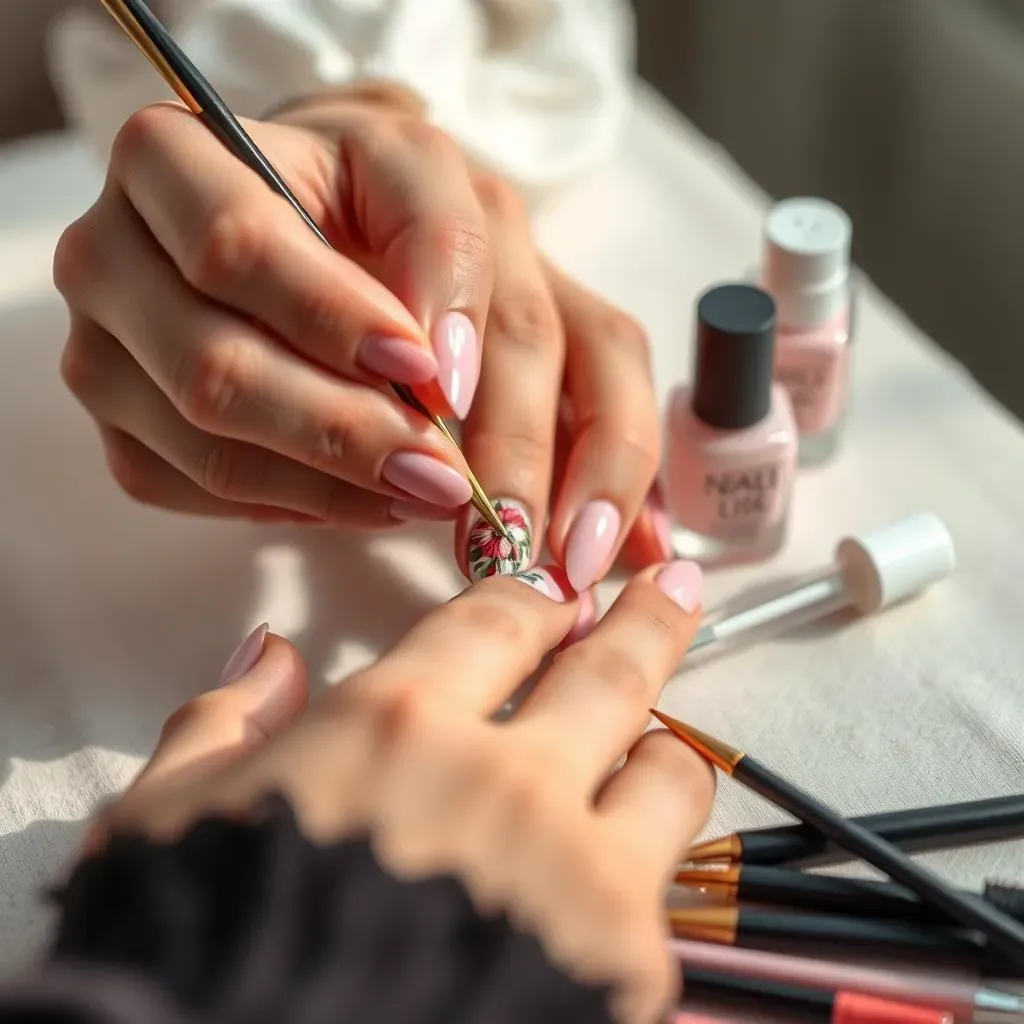
Nail Art Brushes: Unleashing Your Creativity
Now it's time to level up your nail game! Nail art brushes are your secret weapon for creating intricate designs. Start with a few basic brushes – a detail brush for fine lines, and a liner brush for sharp edges. Practice your strokes on a piece of paper before tackling your nails. Don't worry about making mistakes – it's all part of the learning process. Try simple designs like dots, stripes, or flowers. For more intricate designs, check out our easy flower nail designs – they’re surprisingly easy to master!
Think of nail art brushes as your paintbrushes. Different brush shapes and sizes create different effects. A fine detail brush is perfect for delicate lines and intricate details, while a flat brush can be used for broader strokes and filling in larger areas. Experiment with different techniques to find what works best for you – there’s no right or wrong way to express your creativity! For more fun ideas, check out our collection of easy and cute nail designs.
- Start with basic brushes (detail, liner).
- Practice on paper before applying to nails.
- Experiment with dots, stripes, or flowers.
Adding Embellishments: Sparkle and Shine
Want to add some extra pizzazz to your designs? Embellishments are your new best friends! Rhinestones, glitter, and even small charms can transform a simple manicure into a dazzling masterpiece. Start with small accents, placing them strategically on your nails. Use a dotting tool or a toothpick to apply small embellishments. For larger embellishments, use a small amount of gel polish to adhere them to your nails. Don't overdo it – a little sparkle goes a long way! For more ideas on using embellishments, check out our article on easy nail designs with rhinestones.
Remember, less is often more when it comes to embellishments. Start with a few carefully placed stones or a touch of glitter to add subtle sparkle. You can always add more if you feel like it, but it's harder to take them away! Experiment with different colors and shapes to create unique looks. For more inspiration on using glitter and other embellishments, check out our guide on easy nail art designs (no tools needed) – it's full of clever ideas!
Embellishment | Application Method |
|---|---|
Rhinestones | Dotting tool or toothpick |
Glitter | Brush or sponge |
Charms | Small amount of gel polish |